
OSX 1036U D CX, OSX 1036N D CX specifications
The Hotpoint OSX 1036N D CX and OSX 1036U D CX are innovative built-in multifunctional microwave ovens designed to enhance cooking convenience and efficiency in modern kitchens. Both models are emblematic of Hotpoint's commitment to providing high-quality appliances that combine style, functionality, and advanced technology.One of the standout features of the Hotpoint OSX 1036N and OSX 1036U is their multifunctionality. These ovens not only serve as microwaves but also feature grill and convection cooking options, allowing for a wide range of cooking techniques. This versatility enables users to prepare anything from simple reheated meals to complex gourmet dishes, all in one appliance.
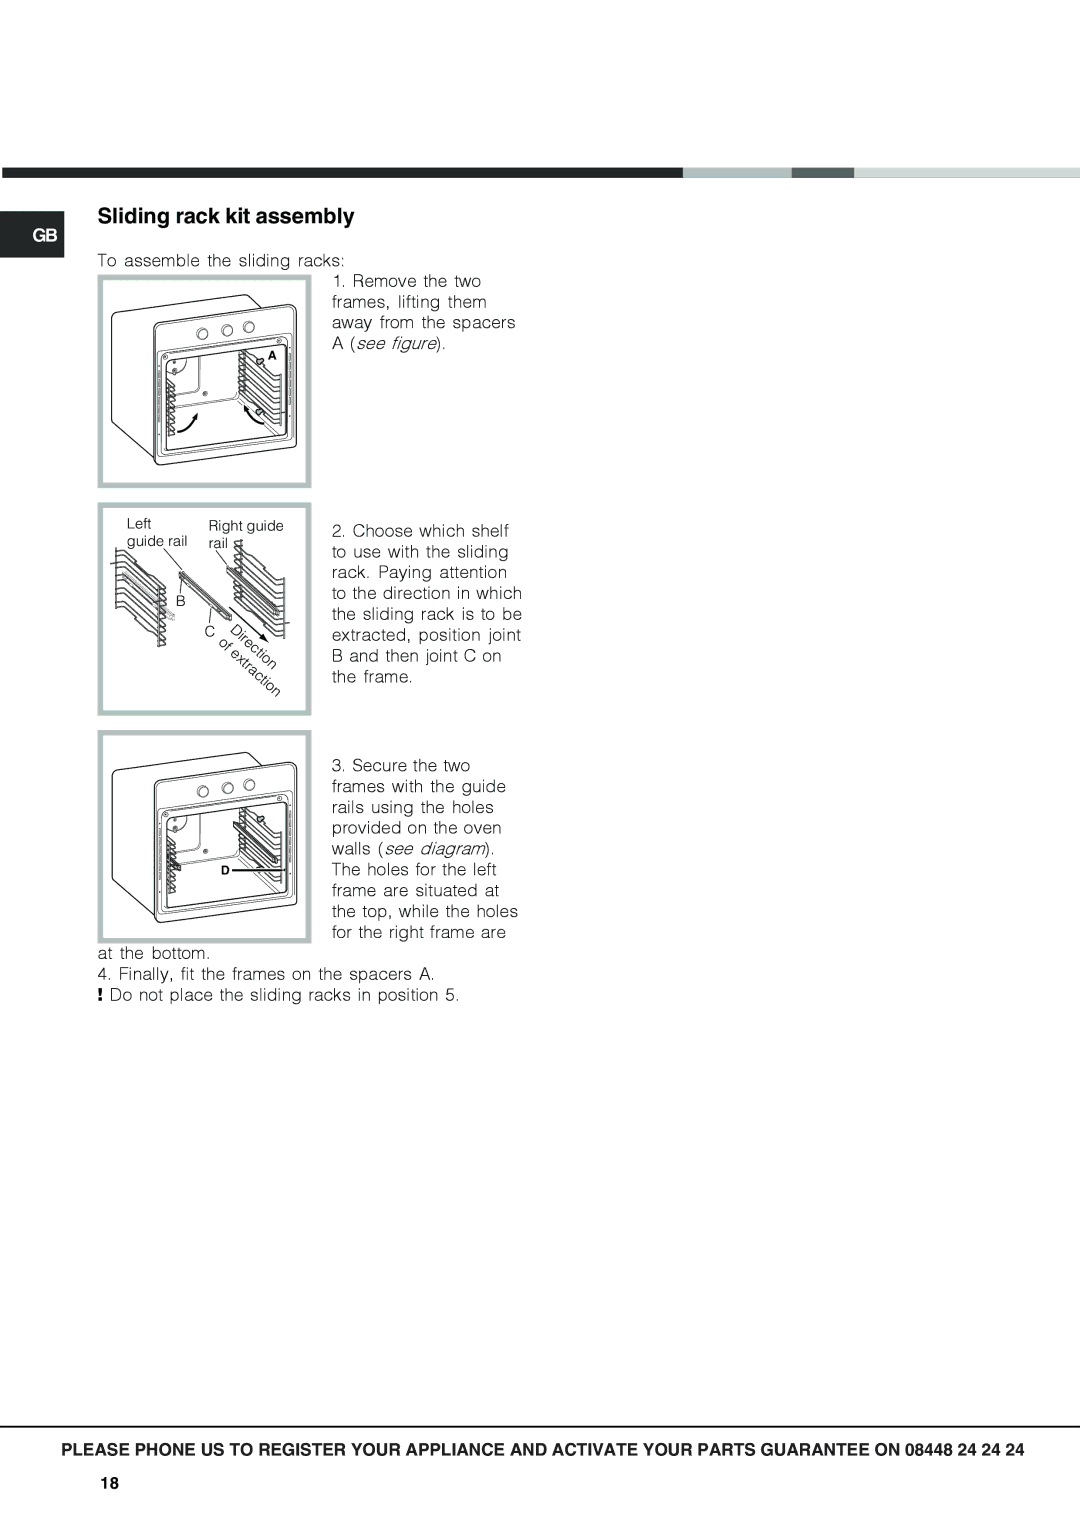
The intelligent design of these models includes a spacious cavity that can accommodate larger dishes, making them ideal for family meals or entertaining guests. The microwave offers a generous capacity of 36 liters, ensuring that there is ample space for varied cookware. Furthermore, the models come with a turntable and an adjustable shelf, optimizing the use of space and ensuring even cooking results.
Hotpoint has incorporated several advanced technologies into the OSX 1036N D CX and OSX 1036U D CX. One crucial highlight is the efficient inverter technology, which provides a consistent and even heat distribution. This feature ensures that food is cooked thoroughly, eliminating cold spots and ensuring optimal results, even for defrosting tasks. The smart sensor cooking technology automatically adjusts the cooking time and power levels based on the type of food being prepared, further adding to the ease of use.
The design of both models is sleek and modern, featuring a stylish stainless-steel finish and a user-friendly LED display. This intuitive control panel allows for easy navigation through the different functions and settings, making the cooking process smooth and hassle-free.
In terms of energy efficiency, the Hotpoint OSX 1036N D CX and OSX 1036U D CX are designed to consume less power while maintaining high performance. This aspect not only contributes to a lower energy bill but also reflects Hotpoint’s dedication to sustainability.
In summary, the Hotpoint OSX 1036N D CX and OSX 1036U D CX are exceptional microwave ovens that embody advanced technology and thoughtful design. With multifunctional capabilities, spacious interiors, and energy-efficient operations, these models represent a valuable addition to any contemporary kitchen, meeting the demands of today’s cooking enthusiasts.