MAINTENANCE FUNDAMENTALS
Shelf Assembly Removal
•Raise the front curved glass.
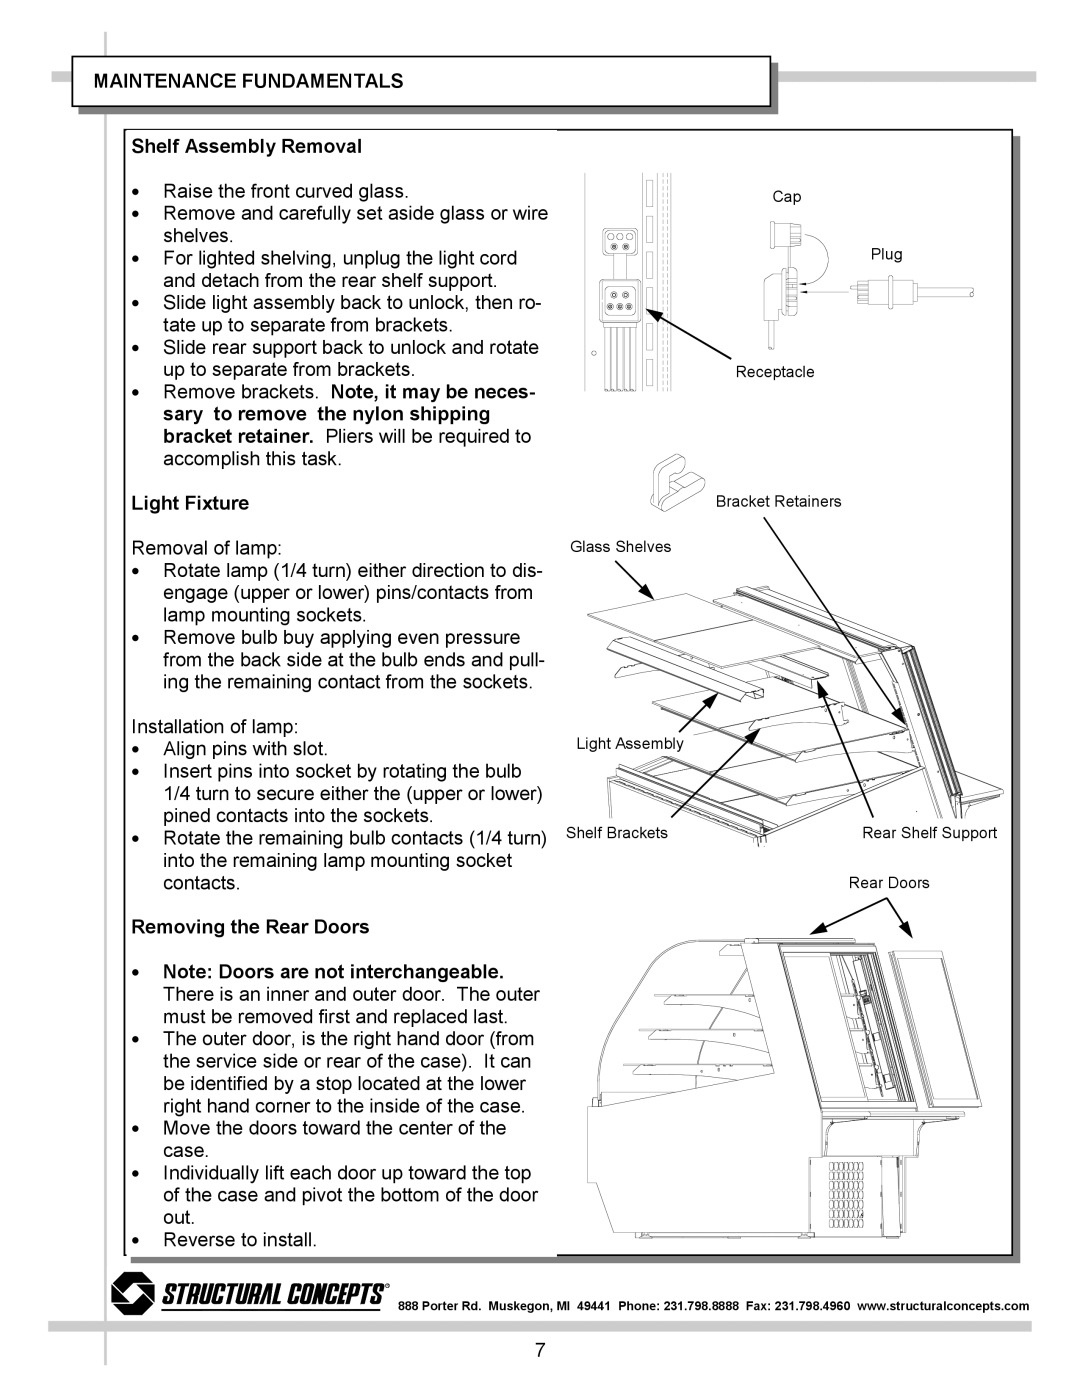
•Remove and carefully set aside glass or wire shelves.
•For lighted shelving, unplug the light cord and detach from the rear shelf support.
•Slide light assembly back to unlock, then ro- tate up to separate from brackets.
•Slide rear support back to unlock and rotate up to separate from brackets.
•Remove brackets. Note, it may be neces- sary to remove the nylon shipping bracket retainer. Pliers will be required to accomplish this task.
Cap
Plug
Receptacle
Light Fixture | Bracket Retainers |
Removal of lamp: | Glass Shelves |
•Rotate lamp (1/4 turn) either direction to dis-
engage (upper or lower) pins/contacts from lamp mounting sockets.
• Remove bulb buy applying even pressure from the back side at the bulb ends and pull- ing the remaining contact from the sockets.
Installation of lamp:
•Align pins with slot.
•Insert pins into socket by rotating the bulb 1/4 turn to secure either the (upper or lower) pined contacts into the sockets.
•Rotate the remaining bulb contacts (1/4 turn) into the remaining lamp mounting socket contacts.
Removing the Rear Doors
•Note: Doors are not interchangeable. There is an inner and outer door. The outer must be removed first and replaced last.
•The outer door, is the right hand door (from the service side or rear of the case). It can be identified by a stop located at the lower right hand corner to the inside of the case.
•Move the doors toward the center of the case.
•Individually lift each door up toward the top of the case and pivot the bottom of the door out.
•Reverse to install.
Light Assembly
Shelf Brackets | Rear Shelf Support |
Rear Doors
R
888 Porter Rd. Muskegon, MI 49441 Phone: 231.798.8888 Fax: 231.798.4960 www.structuralconcepts.com
7
