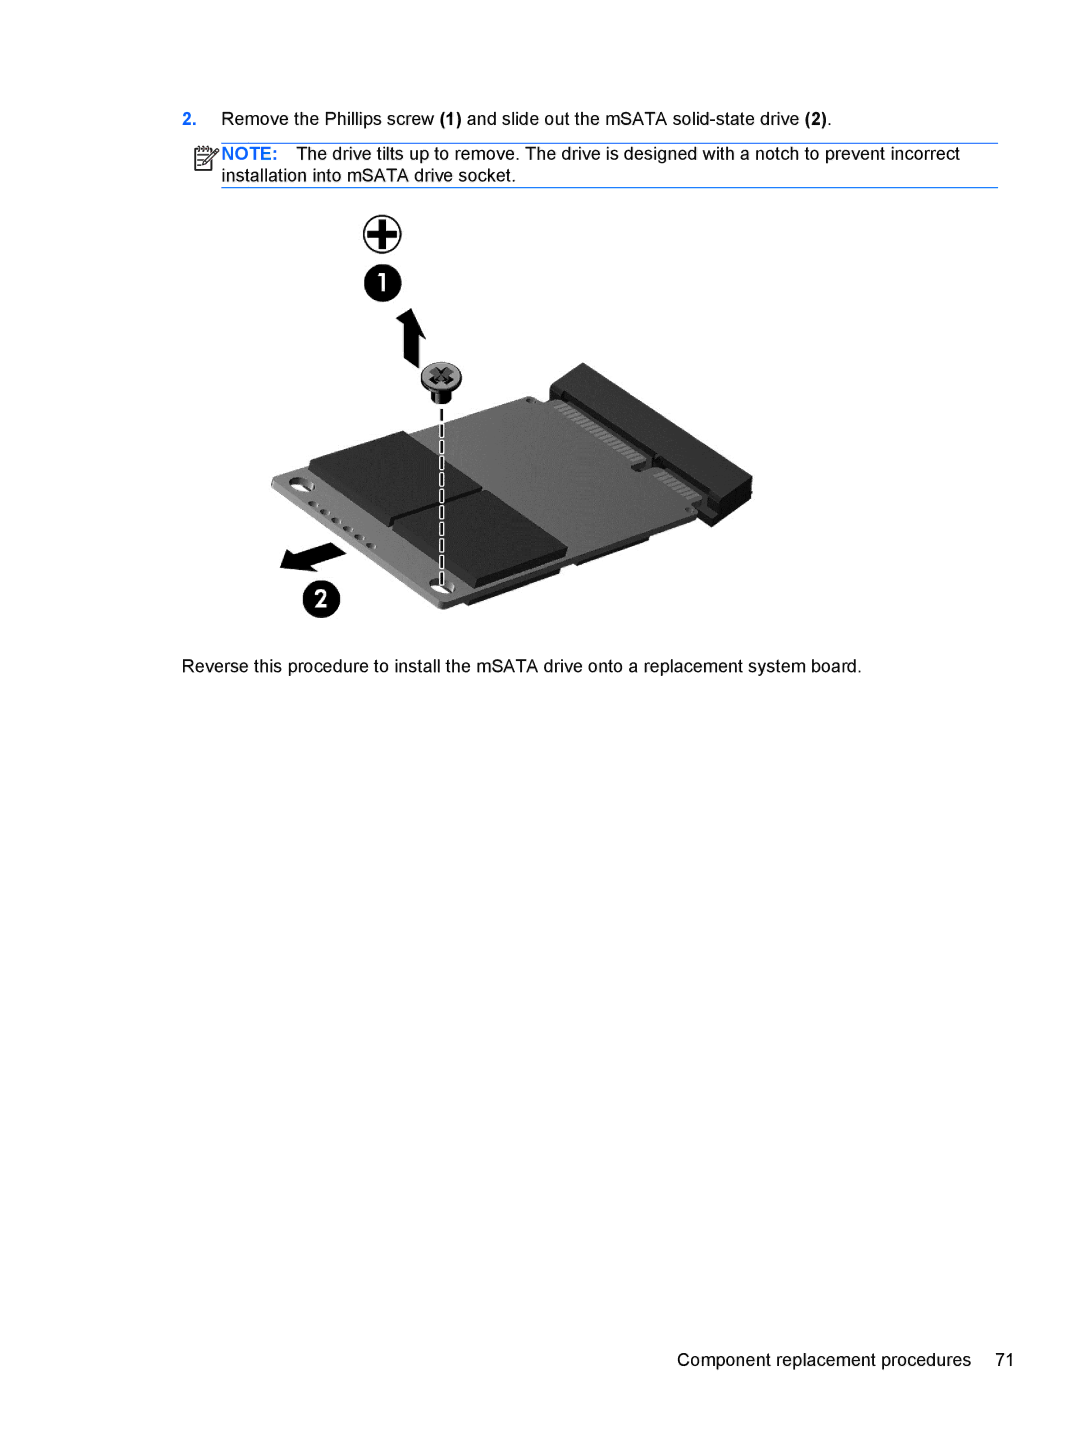
2.Remove the Phillips screw (1) and slide out the mSATA
![]()
![]()
![]()
![]() NOTE: The drive tilts up to remove. The drive is designed with a notch to prevent incorrect installation into mSATA drive socket.
NOTE: The drive tilts up to remove. The drive is designed with a notch to prevent incorrect installation into mSATA drive socket.
Reverse this procedure to install the mSATA drive onto a replacement system board.
Component replacement procedures 71