Operation
Pressure Relief Procedure
1.Shut off the power to the pump.
2.Turn off the air and fluid supply to the gun.
3.Close the
4.Trigger the gun into a grounded metal waste con- tainer to relieve the fluid pressure.
Operation
Apply the Fluid
Adjust the system control device, if it is automatic, so the gun starts spraying just before meeting the workpiece and stops as soon as the workpiece has passed. Keep the gun a consistent distance, 8 to 10 in. (200 to 250 mm), from the surface of the object being sprayed.
To achieve best results when applying fluid:
•Keep gun perpendicular and 8 to 10 inches (200 to 250 mm) from object being sprayed.
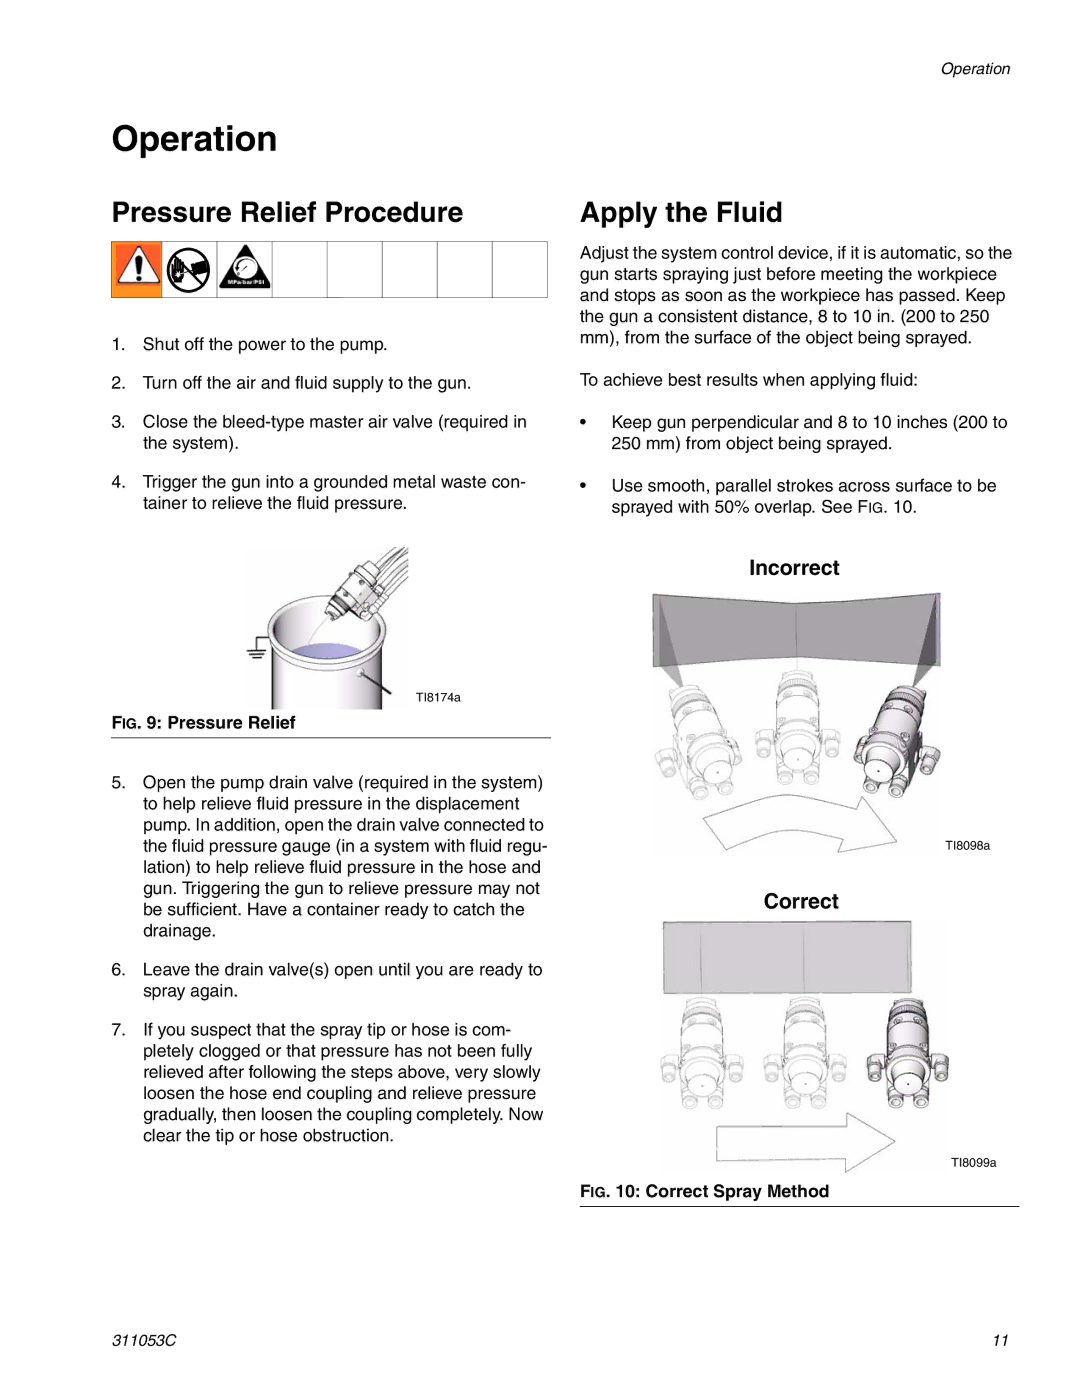
•Use smooth, parallel strokes across surface to be sprayed with 50% overlap. See FIG. 10.
TI8174a
FIG. 9: Pressure Relief
5.Open the pump drain valve (required in the system) to help relieve fluid pressure in the displacement pump. In addition, open the drain valve connected to the fluid pressure gauge (in a system with fluid regu- lation) to help relieve fluid pressure in the hose and gun. Triggering the gun to relieve pressure may not be sufficient. Have a container ready to catch the drainage.
6.Leave the drain valve(s) open until you are ready to spray again.
7.If you suspect that the spray tip or hose is com- pletely clogged or that pressure has not been fully relieved after following the steps above, very slowly loosen the hose end coupling and relieve pressure gradually, then loosen the coupling completely. Now clear the tip or hose obstruction.
Incorrect
TI8098a
Correct
TI8099a
FIG. 10: Correct Spray Method
311053C | 11 |