Replacing an Optical Disc Drive
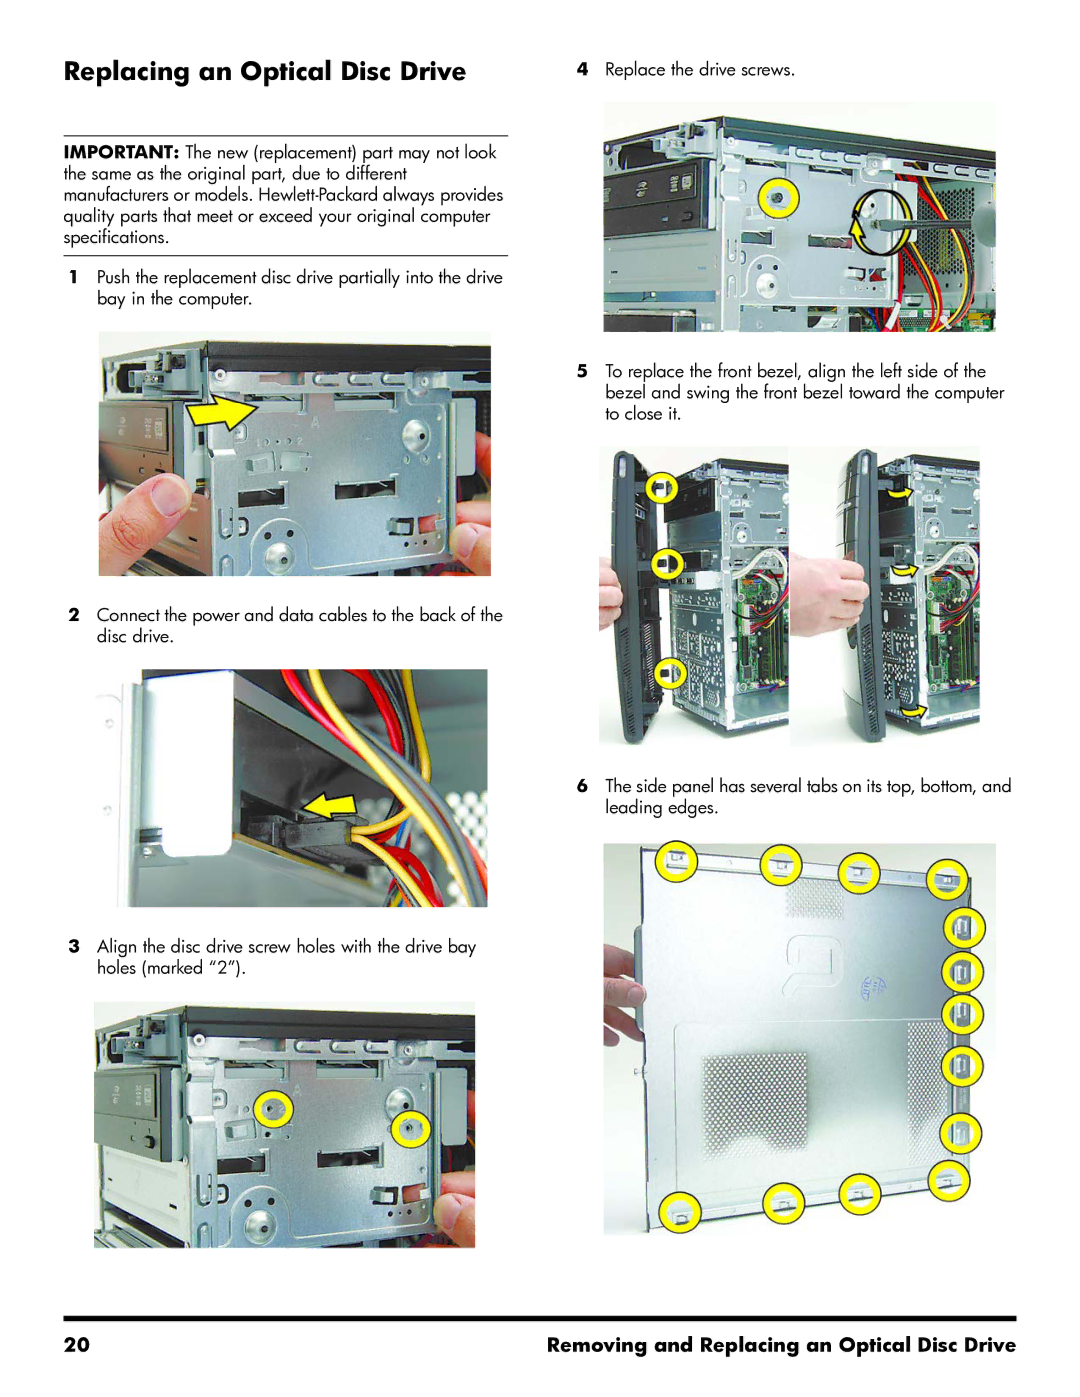
4Replace the drive screws.
IMPORTANT: The new (replacement) part may not look the same as the original part, due to different manufacturers or models.
1Push the replacement disc drive partially into the drive bay in the computer.
2Connect the power and data cables to the back of the disc drive.
3Align the disc drive screw holes with the drive bay holes (marked “2”).
5To replace the front bezel, align the left side of the bezel and swing the front bezel toward the computer to close it.
6The side panel has several tabs on its top, bottom, and leading edges.
20 | Removing and Replacing an Optical Disc Drive |
