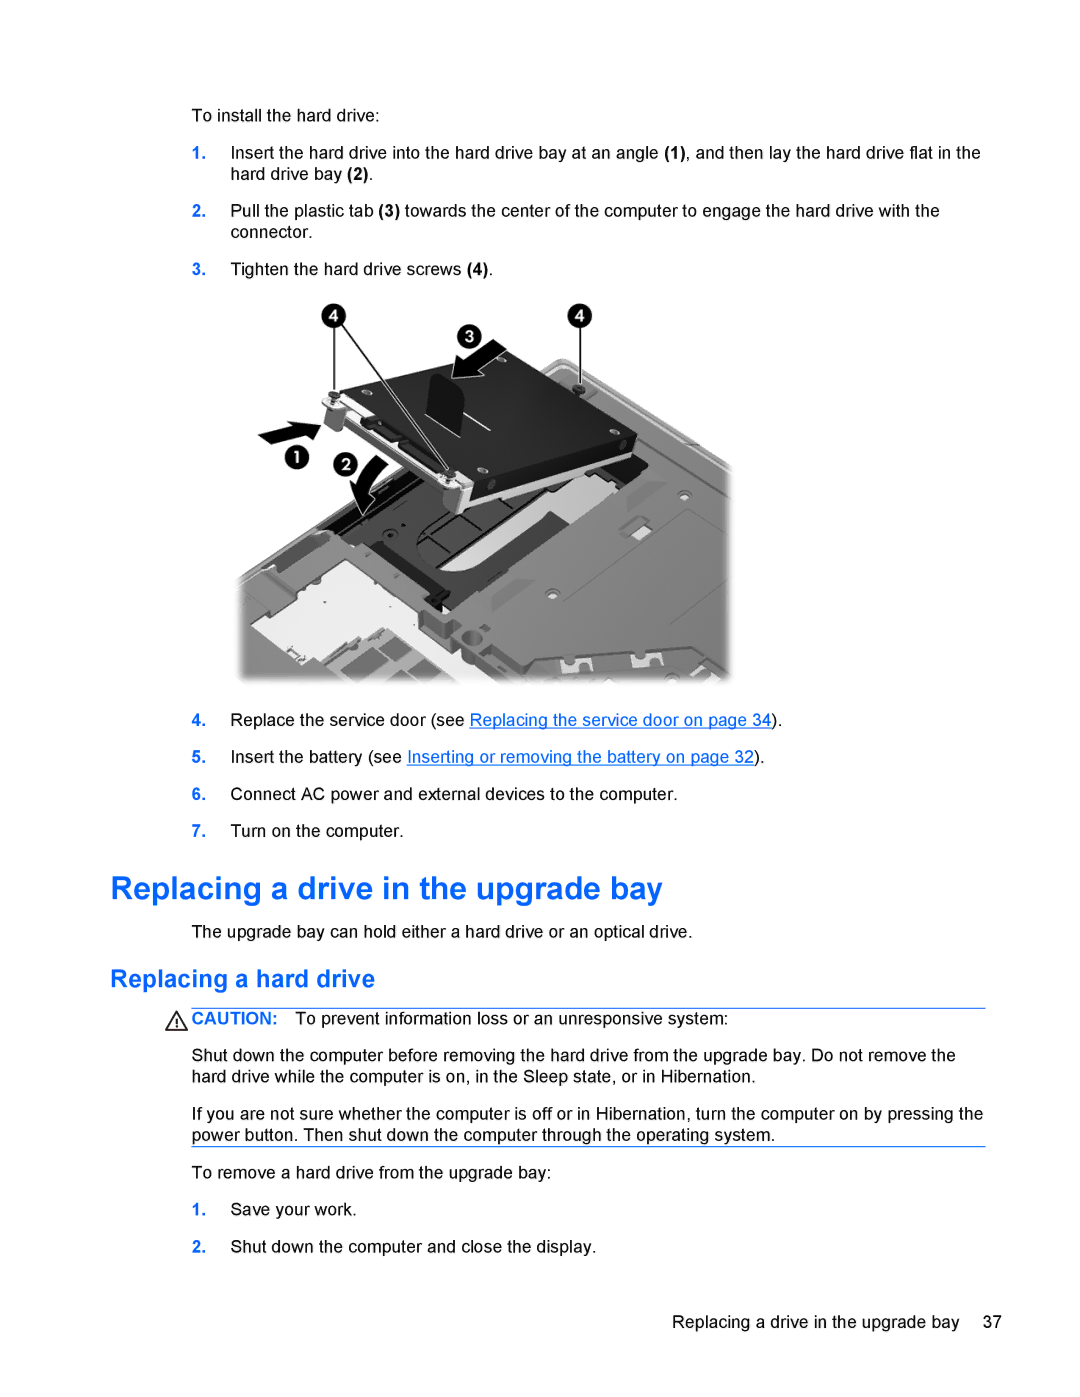
To install the hard drive:
1.Insert the hard drive into the hard drive bay at an angle (1), and then lay the hard drive flat in the hard drive bay (2).
2.Pull the plastic tab (3) towards the center of the computer to engage the hard drive with the connector.
3.Tighten the hard drive screws (4).
4.Replace the service door (see Replacing the service door on page 34).
5.Insert the battery (see Inserting or removing the battery on page 32).
6.Connect AC power and external devices to the computer.
7.Turn on the computer.
Replacing a drive in the upgrade bay
The upgrade bay can hold either a hard drive or an optical drive.
Replacing a hard drive
![]() CAUTION: To prevent information loss or an unresponsive system:
CAUTION: To prevent information loss or an unresponsive system:
Shut down the computer before removing the hard drive from the upgrade bay. Do not remove the hard drive while the computer is on, in the Sleep state, or in Hibernation.
If you are not sure whether the computer is off or in Hibernation, turn the computer on by pressing the power button. Then shut down the computer through the operating system.
To remove a hard drive from the upgrade bay:
1.Save your work.
2.Shut down the computer and close the display.
Replacing a drive in the upgrade bay 37