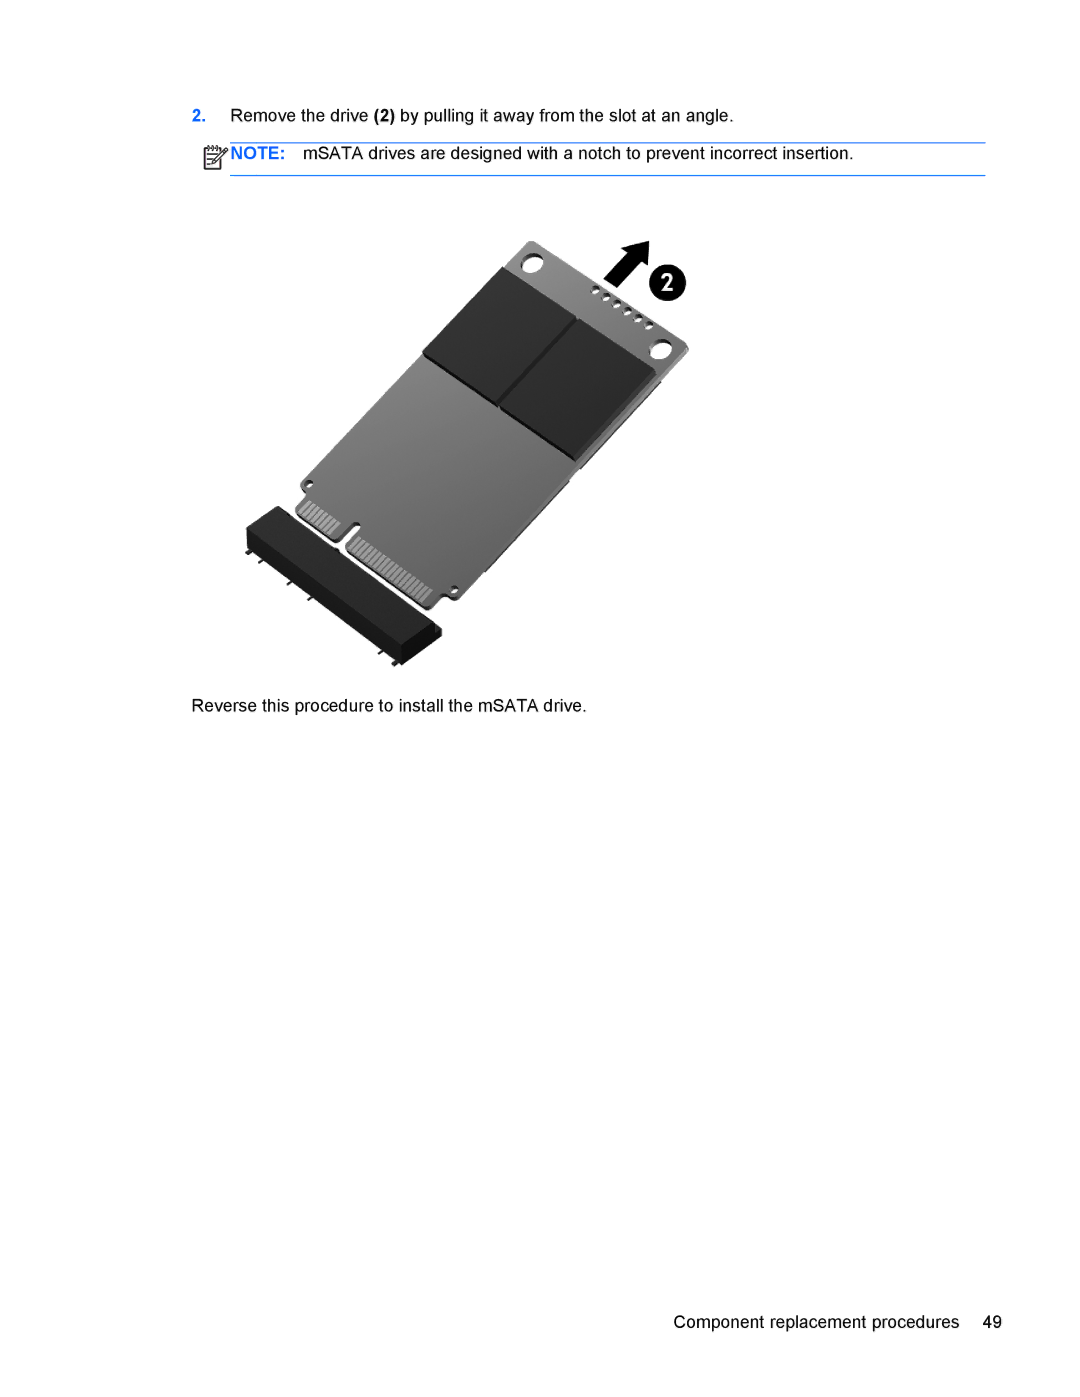
2.Remove the drive (2) by pulling it away from the slot at an angle.
![]() NOTE: mSATA drives are designed with a notch to prevent incorrect insertion.
NOTE: mSATA drives are designed with a notch to prevent incorrect insertion.
Reverse this procedure to install the mSATA drive.
Component replacement procedures 49