APOLLO 60 HP | Page 8 | ||
|
|
|
|
5.1Prior to operation, thoroughly inspect and clean the helmet, breathing tube, respirator hose, air entry ports, and fittings of all dust and debris. Inspect the helmet suspension and adjust if necessary per Section 6.2.
5.2Start the compressor and open the service valve to pressurize the air supply line.
5.3Check air pressure at the point of attachment. Set the pressure between the minimum pressure assigned in Section 4.2.4 and the maximum of 100 psi. Pressure must be set with the respirator connected.
5.4Check all safety, and breathing equipment used in conjunction with the respirator as recommended by the manufacturer.
5.5Check respirator hoses and connections for tight- ness and leaks.
5.6Put the respirator on in a clean
5.7Position the chin strap so it fits comfortably under the chin.
5.8Position the knit cuff on the inner collar so that it fits snugly around the neck in turtleneck fashion, without any interference from clothing such as shirt collars. When correctly positioned the smaller elastic end of the collar must face up.
! WARNING
Correct placement of the inner collar is critical for providing the protection for which the respirator is designed. The collar must be positioned and maintained without any interference from items such as hair, facial hair, or shirt collars, between the collar and user’s neck.
5.9Pull the cape down to fully extend it and connect the four elastic straps (two on each side) under the arms, and tighten using the slides provided.
5.10Put the belt and control valve on over the cape. Buckle the belt around the waist, and tighten it by pulling the belt end through the buckle insert.
5.11When finished blasting and with cleanup, remove the respirator in a clean,
! WARNING
Do not put the respirator on, or store it in a blast contaminated environment. Do not remove the respirator in a contaminated environment except for emergency evacuation when the use of the respirator hinders escape.
6.0ADJUSTMENTS
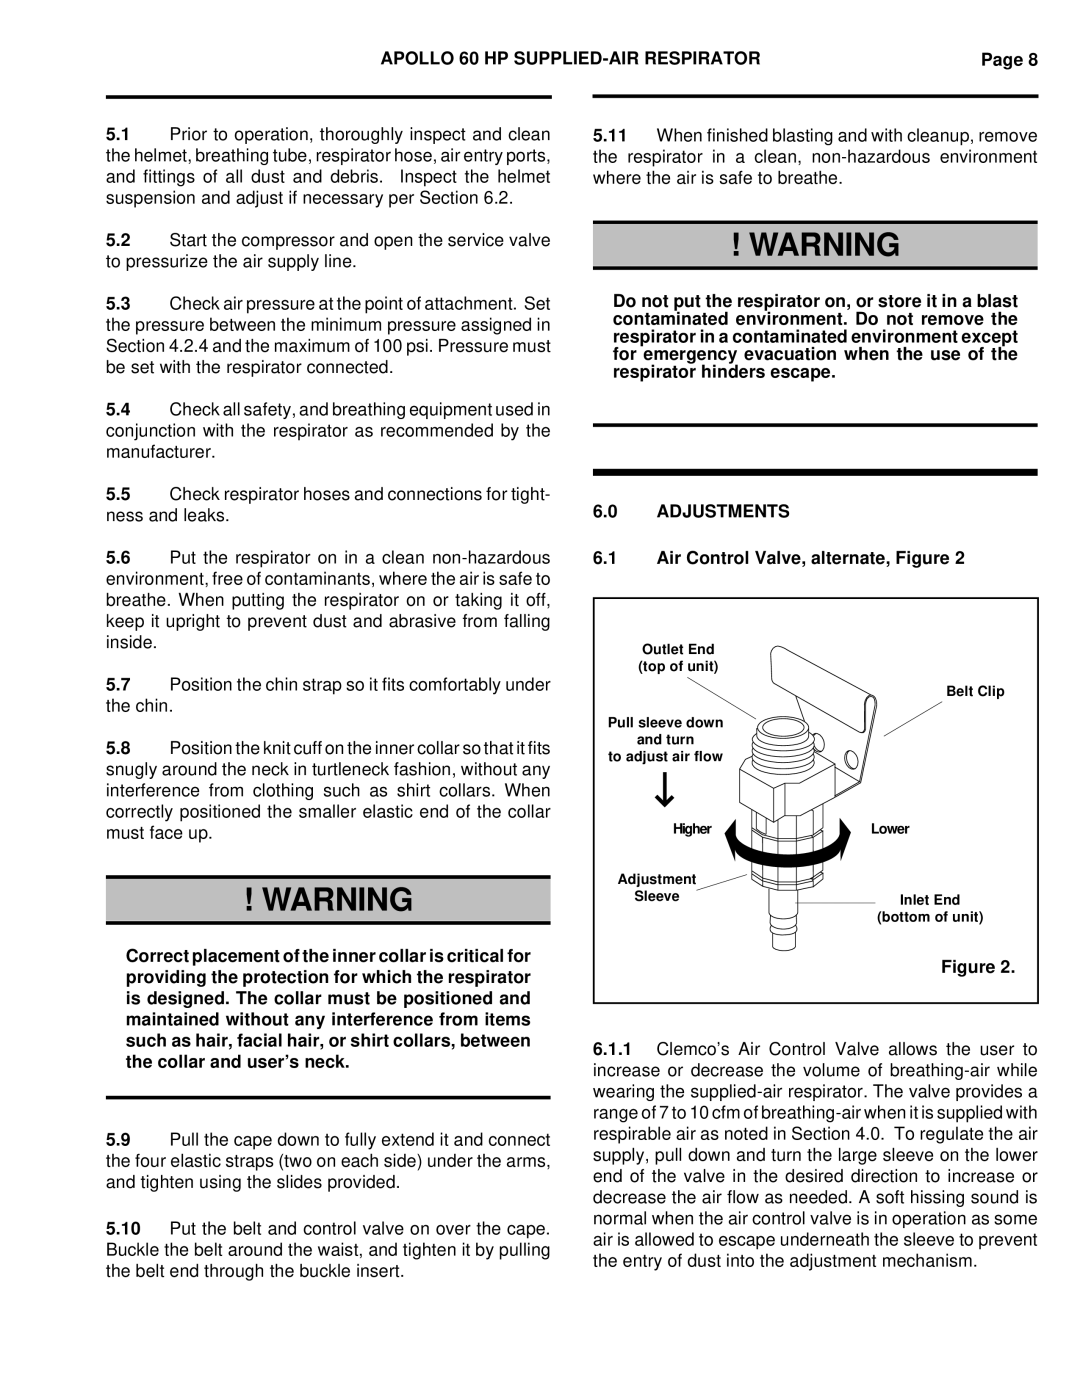
6.1Air Control Valve, alternate, Figure 2
Outlet End (top of unit)
Belt Clip
Pull sleeve down
and turn
to adjust air flow
Higher | Lower |
Adjustment![]()
SleeveInlet End
(bottom of unit)
Figure 2.
6.1.1Clemco’s Air Control Valve allows the user to increase or decrease the volume of