4.Run swinstall to install the software. Enter the following command:
/usr/sbin/swinstall
The Software Selection window and the Specify Source window open.
5.In the Specify Source window, change the Source Host Name if necessary. Enter the mount point of the drive in the Source Depot Path field and click OK to return to the Software Selection Window.
Click Help to get more information.
6.Select the appropriate software bundle for your adapter.
7.Select Mark for Install from the Actions menu.
8.Select Install from the Actions menu. Installation begins and the Install Analysis window opens.
9.Click OK in the Install Analysis window to confirm that you want to install the software. The Install window opens.
View the Install window to read processing data while the software installs. When the Status field indicates Ready, the Confirmation window opens
10.Click OK. A second Confirmation window opens.
11.Click OK again. The Install window opens.
12.Click Done. The Note window opens.
13.Click OK in the Note window to reboot. The user interface disappears and the system reboots.
14.Once the system returns to a login, log in as root and open the following files to see any error or warning messages that may have occurred during the installation:
/var/adm/sw/swagent.log
/var/adm/sw/swinstall.log
15.Proceed to “Installing OnlineDiag” (page 10)
Installing OnlineDiag
Failure to properly complete the steps in this procedure may result in erratic system behavior or system failure and may void the warranty. For assistance with this procedure, contact your local HP Authorized Service Provider.
Install OnlineDiag, which is available at the Software Depot website:
https://h20392.www2.hp.com/portal/swdepot/index.do
OnlineDiag is also available from the IPF CD for
Verify the Ethernet adapter installation
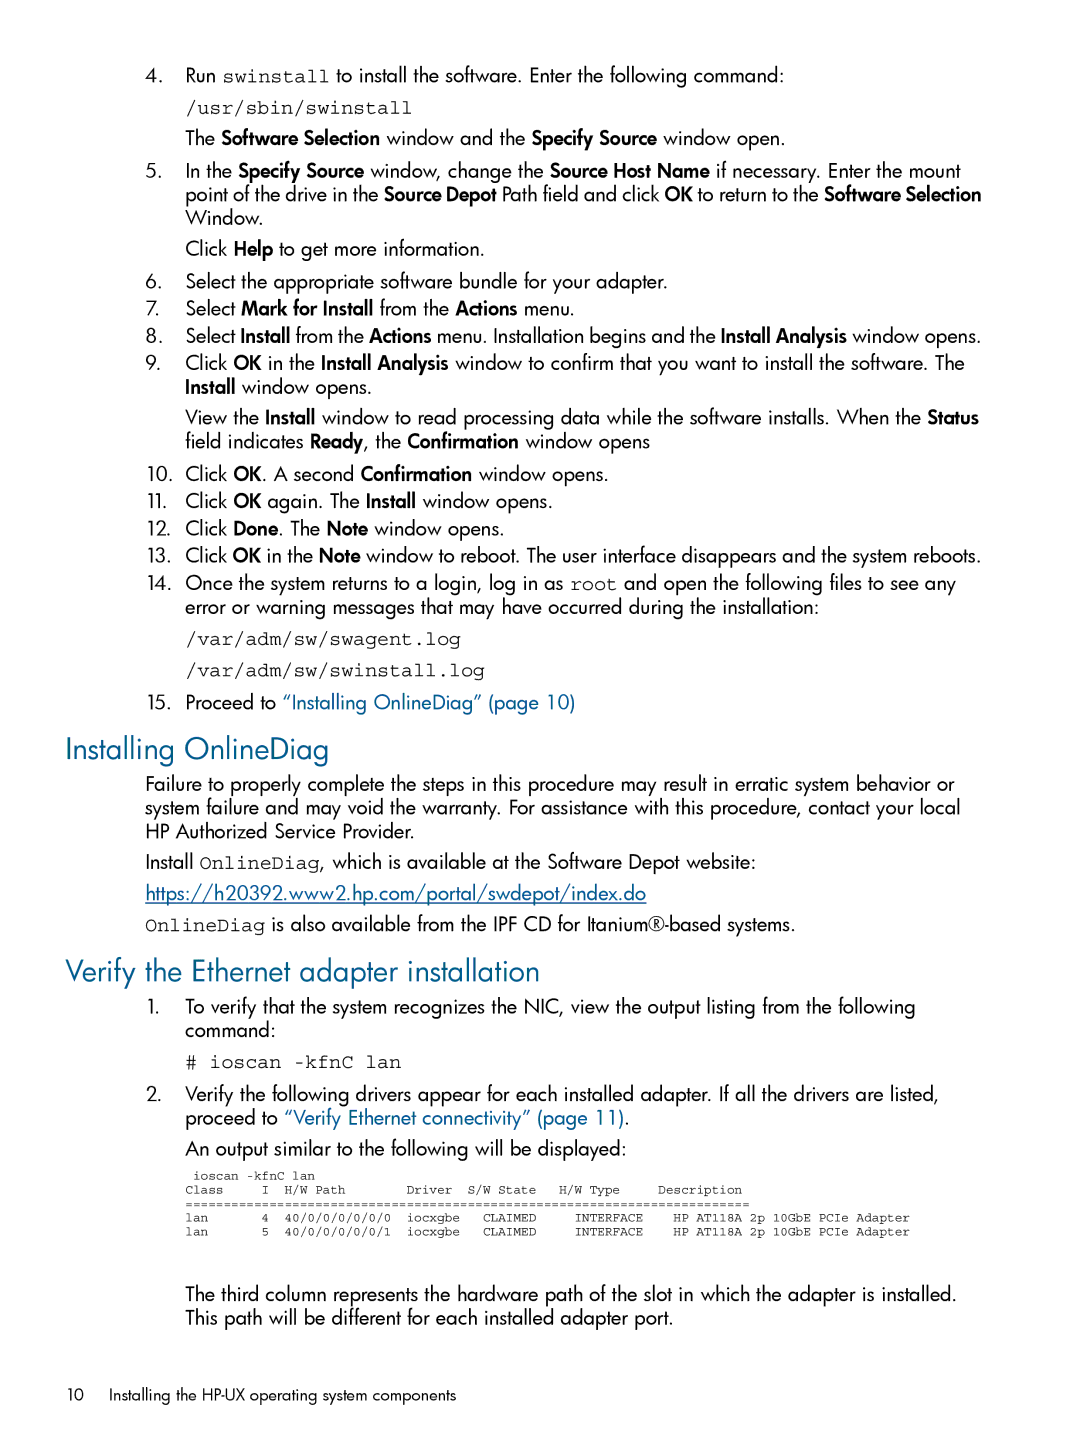
1.To verify that the system recognizes the NIC, view the output listing from the following command:
# ioscan -kfnC lan
2.Verify the following drivers appear for each installed adapter. If all the drivers are listed, proceed to “Verify Ethernet connectivity” (page 11).
An output similar to the following will be displayed:
ioscan |
|
|
|
|
|
|
| ||
Class | I | H/W Path | Driver | S/W State | H/W Type | Description |
|
|
|
========================================================================== |
|
|
| ||||||
lan | 4 | 40/0/0/0/0/0/0 | iocxgbe | CLAIMED | INTERFACE | HP AT118A 2p | 10GbE | PCIe | Adapter |
lan | 5 | 40/0/0/0/0/0/1 | iocxgbe | CLAIMED | INTERFACE | HP AT118A 2p | 10GbE | PCIe | Adapter |
The third column represents the hardware path of the slot in which the adapter is installed. This path will be different for each installed adapter port.
10 Installing the