HP CQ40-106AX, CQ40-300, CQ40-152XX, CQ40-151XX, CQ40-201XX, CQ40-148TU, CQ40-120TU, CQ40-120AU manual

Models: CQ40-105TU CQ40-109AX CQ40-111AU CQ40-114AU CQ40-300 CQ40-106AX CQ40-123AU CQ40-126AX CQ40-109TU CQ40-109AU CQ40-139TU CQ40-152XX CQ40-122TU CQ40-141TU CQ40-115AU CQ40-118AX CQ40-107TU CQ40-108AU CQ40-128AU CQ40-146TU CQ40-140TU CQ40-117TU CQ40-135TU CQ40-110AU CQ40-118TU CQ40-108AX CQ40-124AU CQ40-111AX CQ40-112AX CQ40-148TU CQ40-119AX CQ40-106AU CQ40-125AX CQ40-150TU CQ40-122AU CQ40-120TU CQ40-201XX CQ40-132TU CQ40-138TU CQ40-114AX CQ40-119TU CQ40-151XX CQ40-134TU CQ40-129AU CQ40-131TU CQ40-120AX CQ40-117AX CQ40-120AU CQ40-130TU CQ40-115TU CQ40-125AU CQ40-147TU CQ40-112TU CQ40-116AX

1 155
Download 155 pages 57.87 Kb
Page 53
Image 53

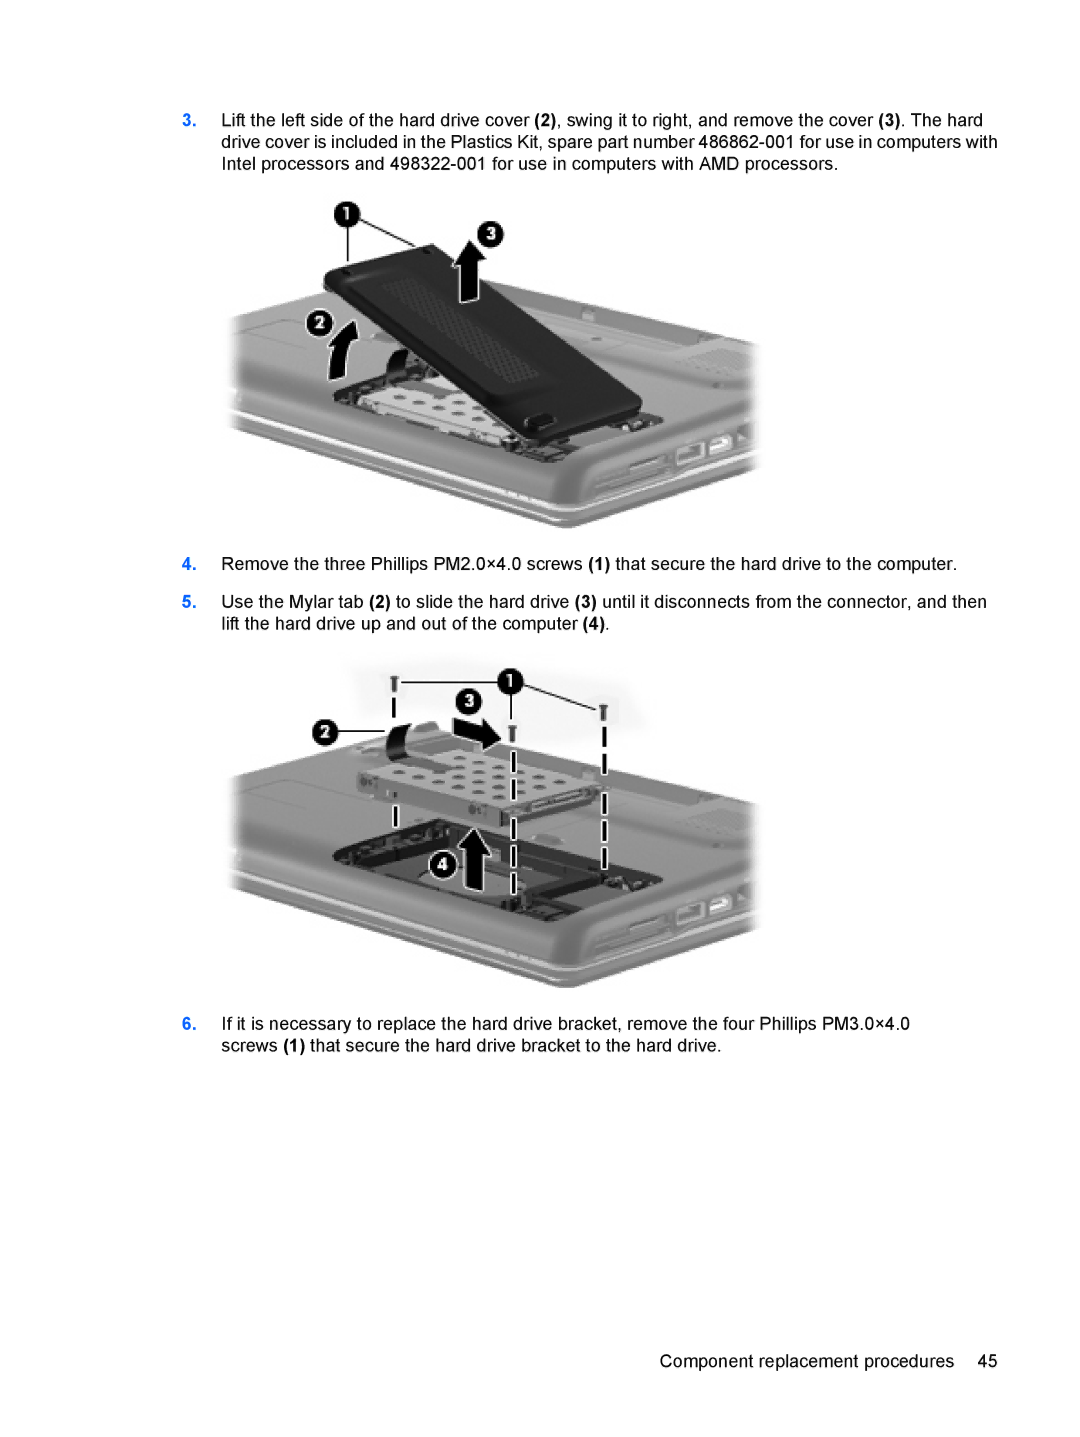
3.Lift the left side of the hard drive cover (2), swing it to right, and remove the cover (3). The hard drive cover is included in the Plastics Kit, spare part number 486862-001 for use in computers with Intel processors and 498322-001 for use in computers with AMD processors.

4.Remove the three Phillips PM2.0×4.0 screws (1) that secure the hard drive to the computer.

5.Use the Mylar tab (2) to slide the hard drive (3) until it disconnects from the connector, and then lift the hard drive up and out of the computer (4).

6.If it is necessary to replace the hard drive bracket, remove the four Phillips PM3.0×4.0 screws (1) that secure the hard drive bracket to the hard drive.

Component replacement procedures 45
Page 53
Image 53
HP CQ40-106AX, CQ40-300, CQ40-152XX, CQ40-151XX, CQ40-201XX, CQ40-148TU, CQ40-120TU, CQ40-120AU, CQ40-119TU, CQ40-119AX, CQ40-118TU