Operating the Monitor
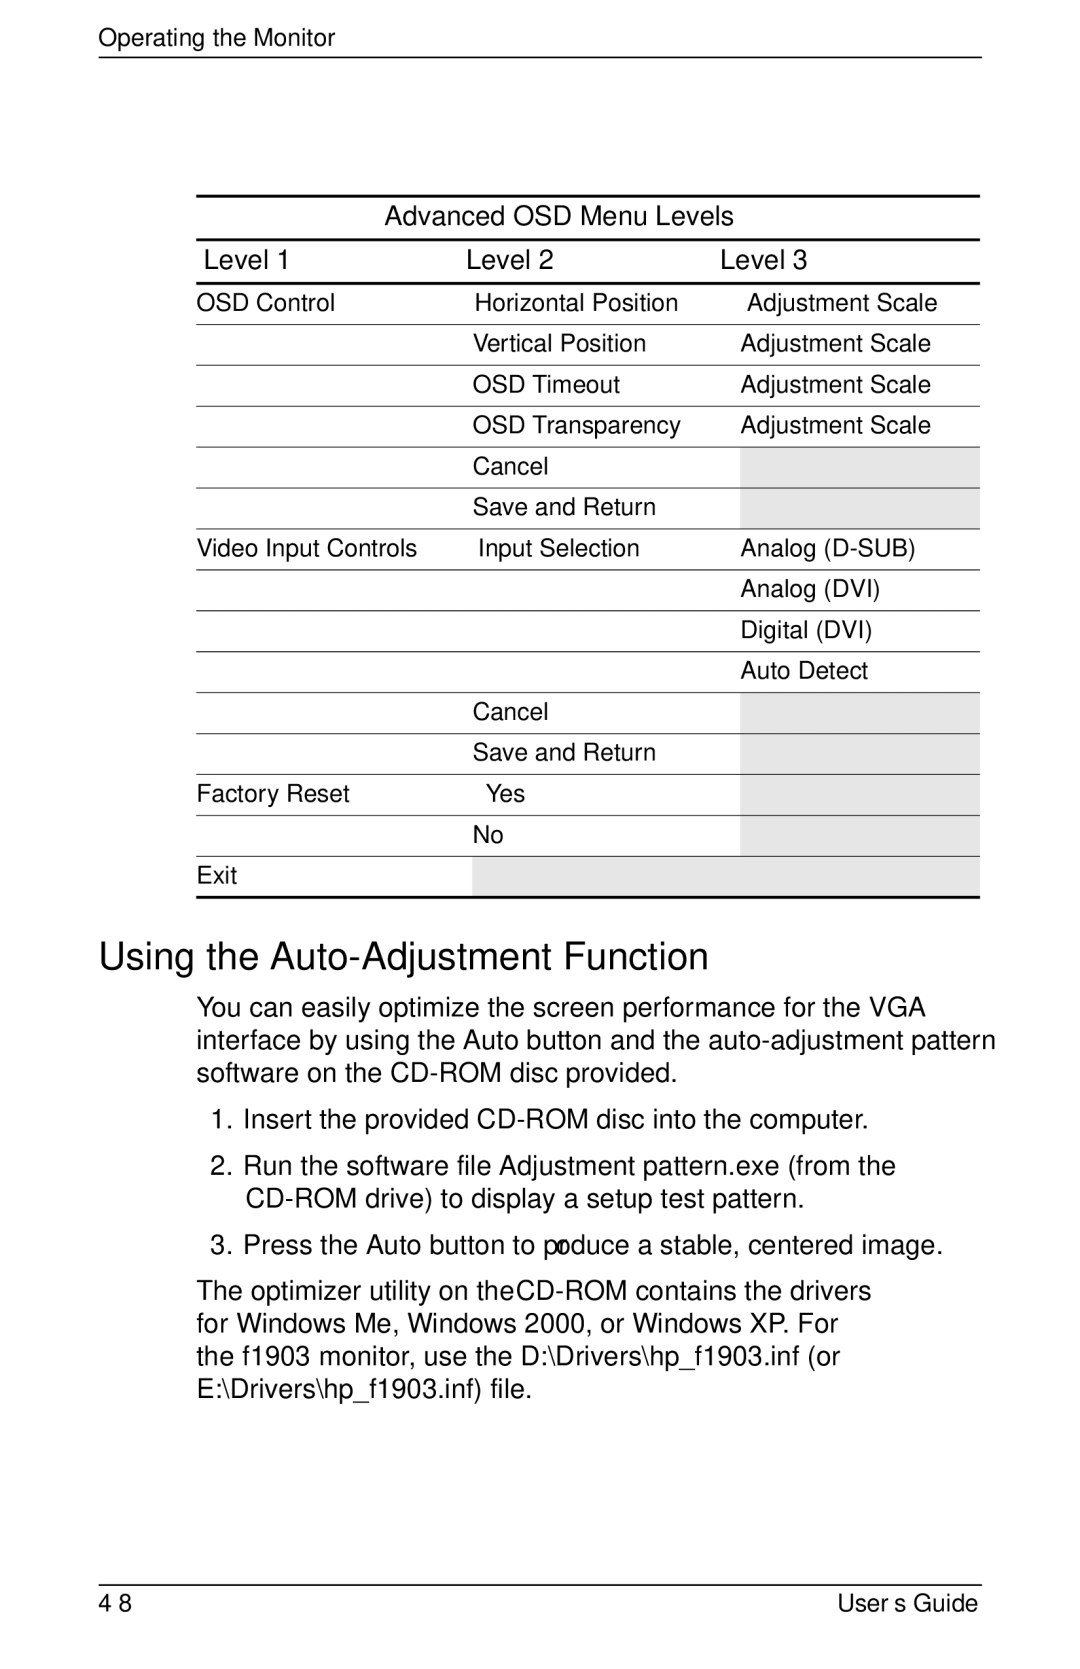
Advanced OSD Menu Levels
Level 1 | Level 2 | Level 3 |
OSD Control | Horizontal Position | Adjustment Scale |
|
|
|
| Vertical Position | Adjustment Scale |
|
|
|
| OSD Timeout | Adjustment Scale |
|
|
|
| OSD Transparency | Adjustment Scale |
|
|
|
| Cancel |
|
| Save and Return |
|
Video Input Controls | Input Selection | Analog |
|
|
|
|
| Analog (DVI) |
|
|
|
|
| Digital (DVI) |
|
|
|
|
| Auto Detect |
|
|
|
| Cancel |
|
| Save and Return |
|
Factory Reset | Yes |
|
| No |
|
Exit |
|
|
|
|
|
Using the Auto-Adjustment Function
You can easily optimize the screen performance for the VGA interface by using the Auto button and the
1.Insert the provided
2.Run the software file Adjustment pattern.exe (from the
3.Press the Auto button to produce a stable, centered image.
The optimizer utility on the
User’s Guide |