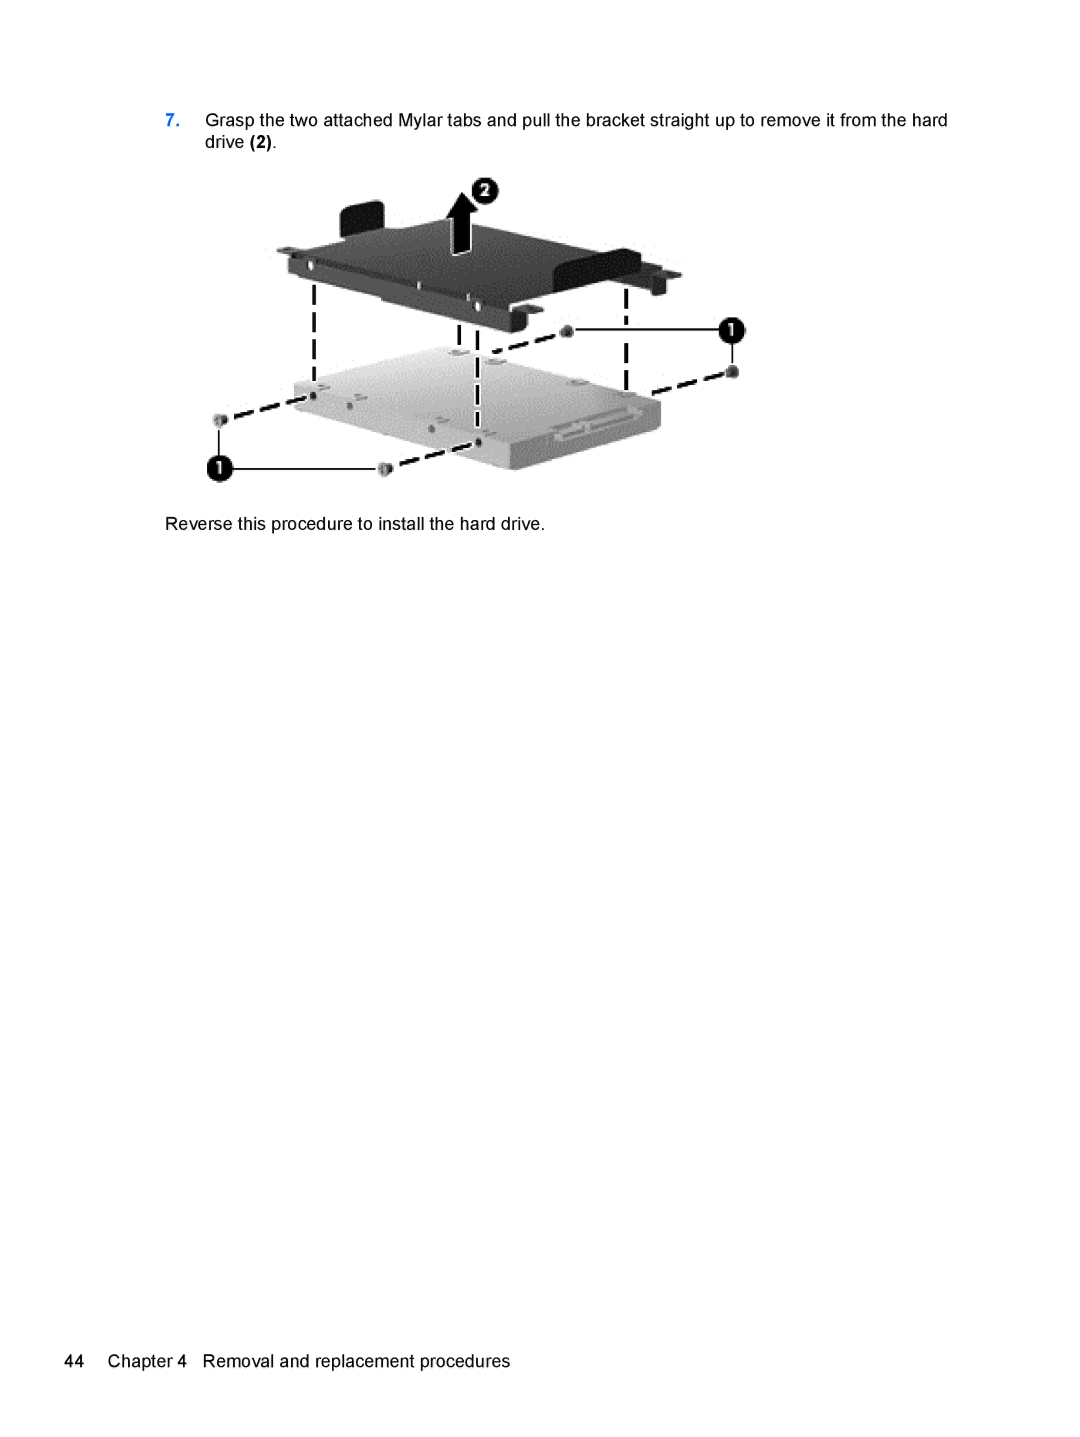
7.Grasp the two attached Mylar tabs and pull the bracket straight up to remove it from the hard drive (2).
Reverse this procedure to install the hard drive.
44 Chapter 4 Removal and replacement procedures
7.Grasp the two attached Mylar tabs and pull the bracket straight up to remove it from the hard drive (2).
Reverse this procedure to install the hard drive.
44 Chapter 4 Removal and replacement procedures