Front components
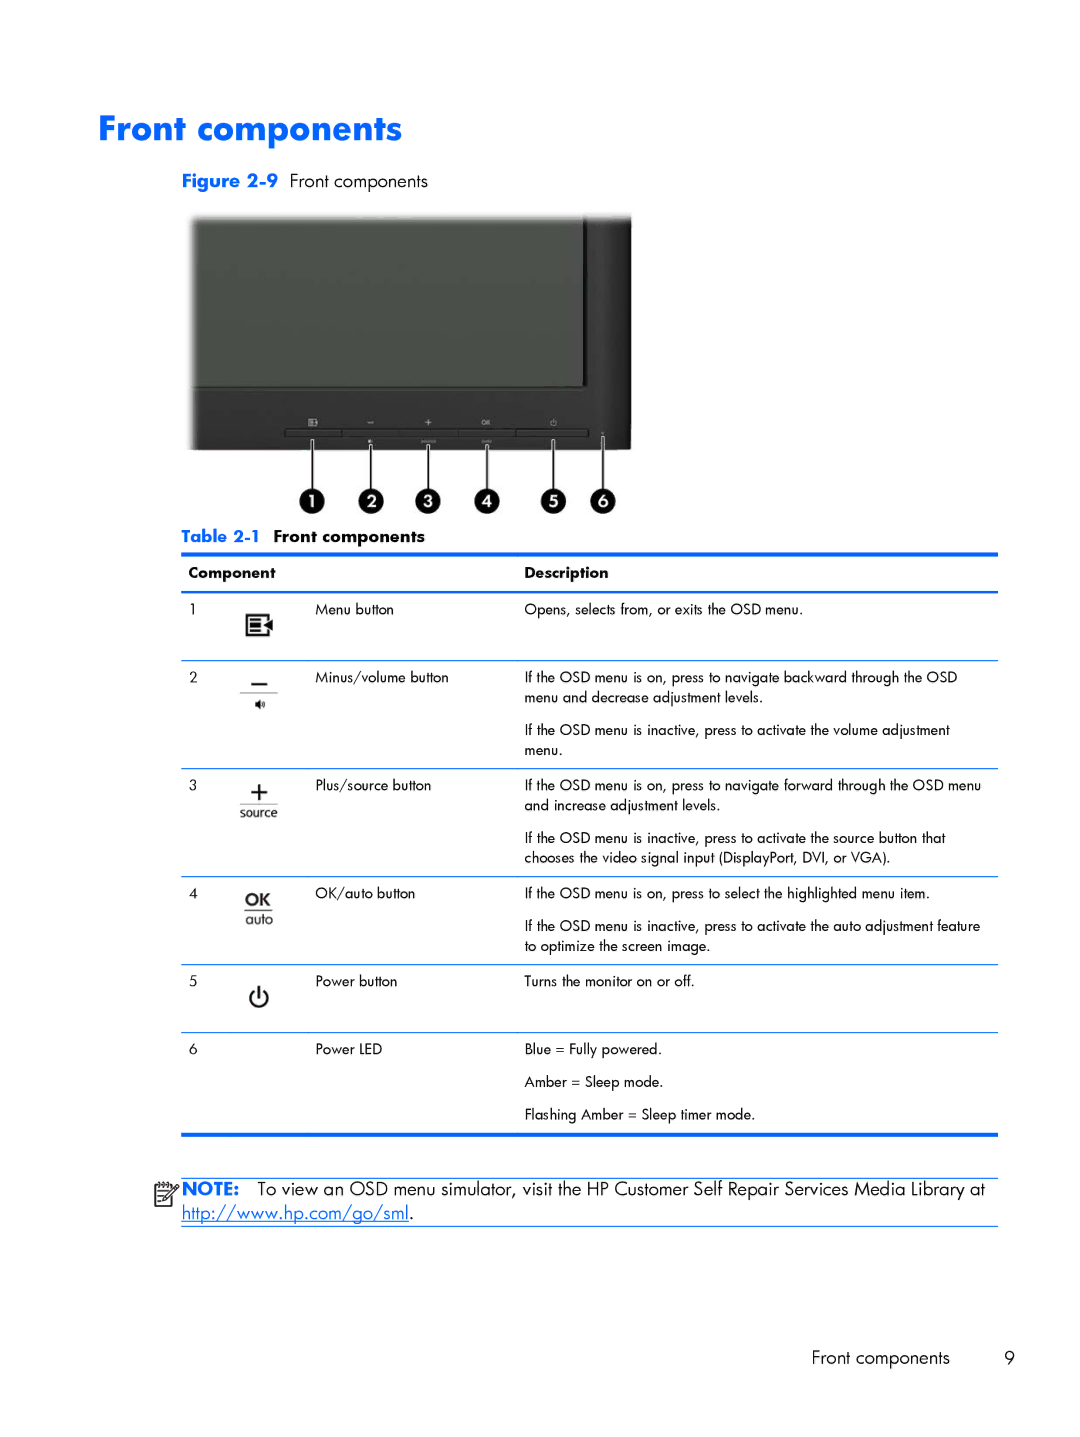
Figure 2-9 Front components
Table | Front components |
|
|
| |
Component | Description | |
|
|
|
1 | Menu button | Opens, selects from, or exits the OSD menu. |
|
|
|
2 | Minus/volume button | If the OSD menu is on, press to navigate backward through the OSD |
|
| menu and decrease adjustment levels. |
|
| If the OSD menu is inactive, press to activate the volume adjustment |
|
| menu. |
|
|
|
3 | Plus/source button | If the OSD menu is on, press to navigate forward through the OSD menu |
|
| and increase adjustment levels. |
|
| If the OSD menu is inactive, press to activate the source button that |
|
| chooses the video signal input (DisplayPort, DVI, or VGA). |
|
|
|
4 | OK/auto button | If the OSD menu is on, press to select the highlighted menu item. |
|
| If the OSD menu is inactive, press to activate the auto adjustment feature |
|
| to optimize the screen image. |
|
|
|
5 | Power button | Turns the monitor on or off. |
|
|
|
6 | Power LED | Blue = Fully powered. |
|
| Amber = Sleep mode. |
|
| Flashing Amber = Sleep timer mode. |
|
|
|
![]()
![]()
![]()
![]() NOTE: To view an OSD menu simulator, visit the HP Customer Self Repair Services Media Library at http://www.hp.com/go/sml.
NOTE: To view an OSD menu simulator, visit the HP Customer Self Repair Services Media Library at http://www.hp.com/go/sml.
Front components | 9 |
