Turning on the Monitor
1.Press the power button on the computer to turn it on.
2.Press the power button on the front of the monitor to turn it on.
![]() CAUTION:
CAUTION:
* A prolonged period of time is 12 consecutive hours of
![]() NOTE: If pressing the power button has no effect, the Power Button Lockout feature may be enabled. To disable this feature, press and hold the monitor power button for 10 seconds.
NOTE: If pressing the power button has no effect, the Power Button Lockout feature may be enabled. To disable this feature, press and hold the monitor power button for 10 seconds.
Mounting the Monitor Panel
You can remove the monitor panel from the pedestal base to install the panel on a wall, a swing arm, or other mounting fixture. Four threaded mounting holes are provided on the monitor back panel to be used for mounting purposes.
![]() NOTE: This apparatus is intended to be supported by UL or CSA Listed wall mount bracket.
NOTE: This apparatus is intended to be supported by UL or CSA Listed wall mount bracket.
![]() CAUTION: Before beginning to disassemble the monitor, be sure the monitor is turned off and the power and signal cables are both disconnected. If the monitor has a connected audio cable, disconnect it.
CAUTION: Before beginning to disassemble the monitor, be sure the monitor is turned off and the power and signal cables are both disconnected. If the monitor has a connected audio cable, disconnect it.
1.Disconnect and remove the signal and power cables from the back of the monitor.
2.Lay the monitor face down on a flat surface.
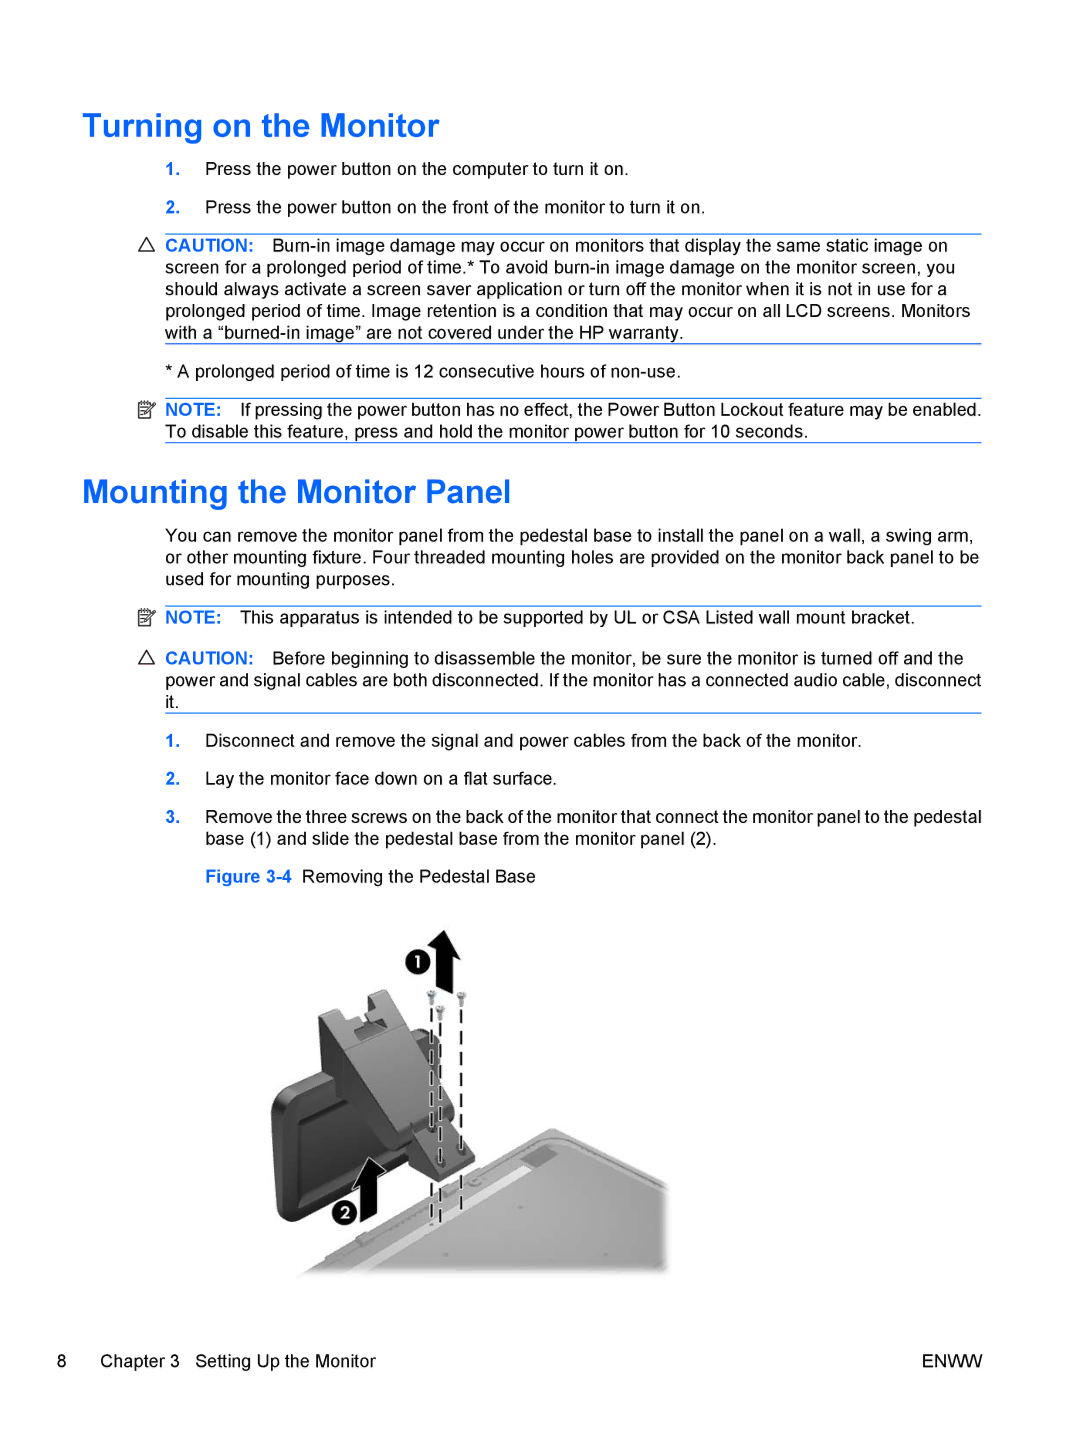
3.Remove the three screws on the back of the monitor that connect the monitor panel to the pedestal base (1) and slide the pedestal base from the monitor panel (2).
Figure 3-4 Removing the Pedestal Base
8 Chapter 3 Setting Up the Monitor | ENWW |