Chapter 1
Set the region
Along with the Language setting, the Region setting determines the default date format and the format of the video signal for displaying camera images on a television when connected through an optional
HP Photosmart Premium dock or wireless dock base (see Using the Setup Menu on page 31).
Use ![]() to choose the region you want, then press
to choose the region you want, then press
![]() .
.
Set the date and time
Accurately setting the date and time will help you locate images once you have transferred them to your computer, and will ensure that images are accurately marked if you use the date and time imprint feature. See Date & Time Imprint under Using the Capture Menu on page 17.
1.Use ![]() to adjust the highlighted value.
to adjust the highlighted value.
2.Use ![]()
![]() to move to the other selections and repeat Step 1 until the date and time are set correctly.
to move to the other selections and repeat Step 1 until the date and time are set correctly.
3.Press ![]() when the date, time, and format settings
when the date, time, and format settings
are correct, then press ![]() again to confirm.
again to confirm.
To change the date and time later, use the Setup
Menu (see Using the Setup Menu on page 31).
Install and format an optional memory card
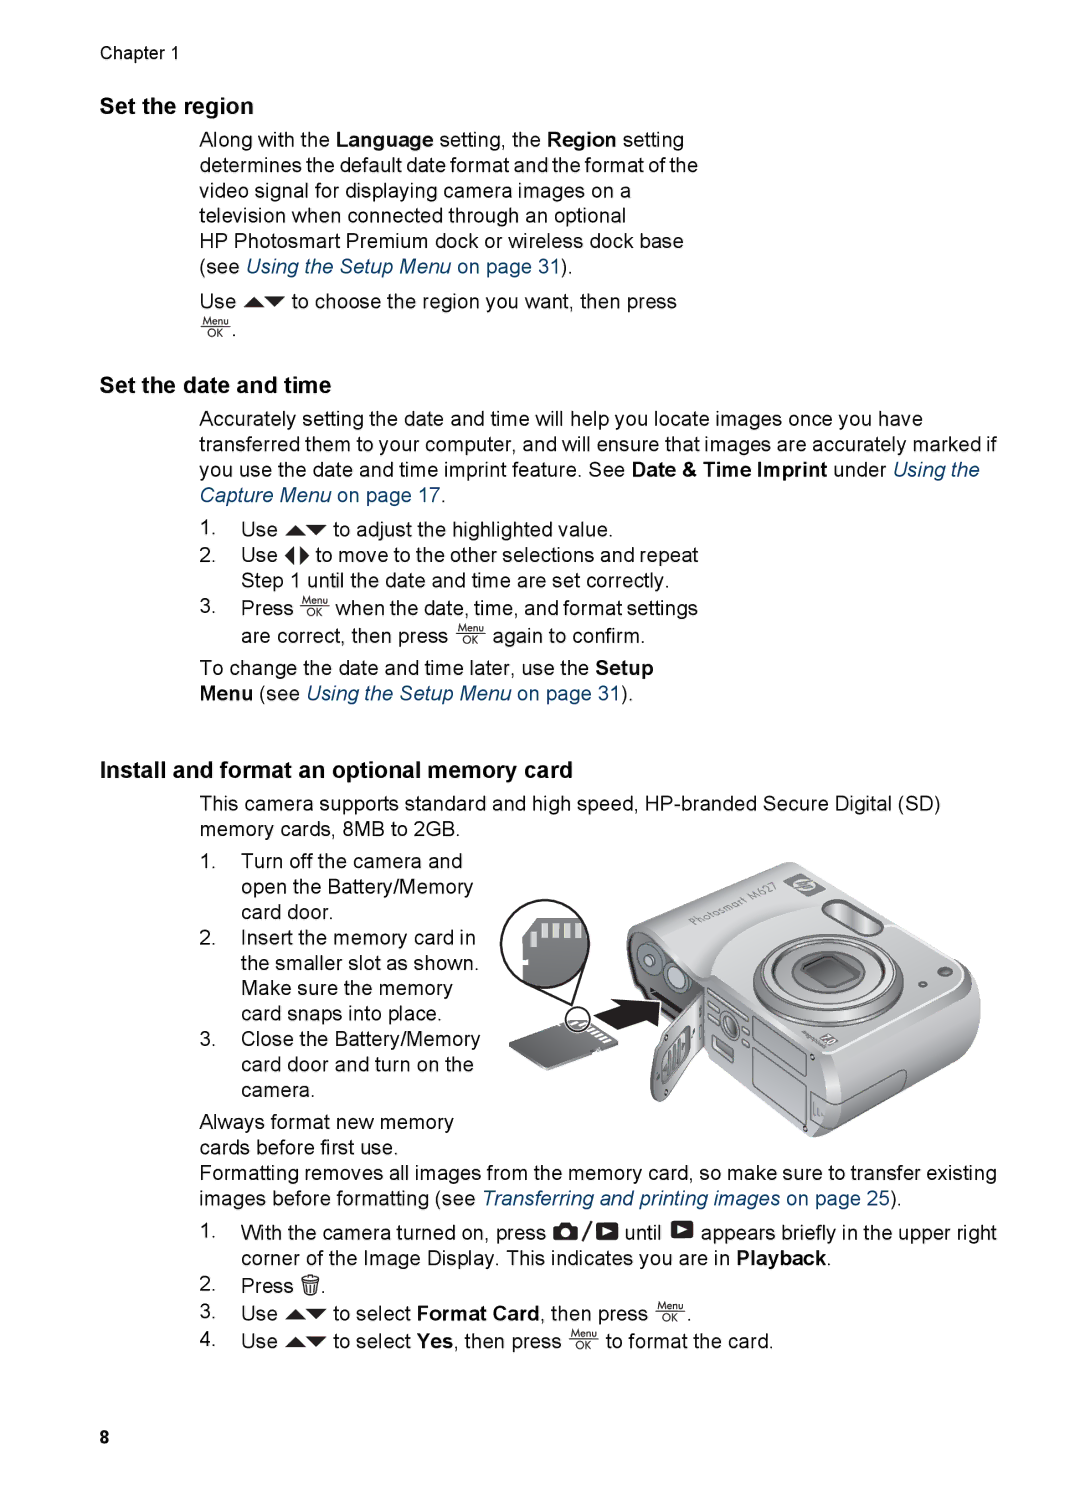
This camera supports standard and high speed,
1.Turn off the camera and
open the Battery/Memory card door.
2. Insert the memory card in
the smaller slot as shown. Make sure the memory
card snaps into place.
3. Close the Battery/Memory card door and turn on the camera.
Always format new memory cards before first use.
Formatting removes all images from the memory card, so make sure to transfer existing images before formatting (see Transferring and printing images on page 25).
1.With the camera turned on, press ![]()
![]()
![]() until
until ![]() appears briefly in the upper right corner of the Image Display. This indicates you are in Playback.
appears briefly in the upper right corner of the Image Display. This indicates you are in Playback.
2.Press ![]() .
.
3.Use ![]() to select Format Card, then press
to select Format Card, then press ![]() .
.
4.Use ![]() to select Yes, then press
to select Yes, then press ![]() to format the card.
to format the card.
8
