S T O R E I T
Automatic backup5
HP Data Vault set up
Setting up the HP Data Vault is easy. The unit comes with a power cable, Ethernet
You will need:
•One or more computers run- ning Microsoft® Windows® Vista, Windows® XP, Windows® MCE or Mac® OS X 10.5 or later (for any Macs on the network). Note: Up to 10 PC clients and Macs are supported.
•A router with DHCP enabled to provide an automatic IP address to the server
•A broadband connection, such as DSL or cable, for remote access functionality
•A 100 Mbps to 1000 Mbps (Gigabit Ethernet) wired network connection
Hardware set up
Simply plug the power cord into the HP Data Vault and the other end into an electrical outlet. Connect one end of the Ethernet cable to the HP Data Vault and the other to an Ethernet port on your router. Press the power button on the back of the HP Data Vault, and it is ready to go in 60 seconds.
Software installation
The first installation must be on a Windows computer. Subsequent installations can be on a Windows or Mac computer. Insert the software installation disk into a network computer and follow the online instructions to install the HP Data Vault. Repeat the software installation on each network computer running either Windows® or Mac® OS X 10.5 or later.
With the HP Data Vault, you can restore files, folders or even an entire hard drive from
For better efficiency, Microsoft® Windows Home Server® backup software supports
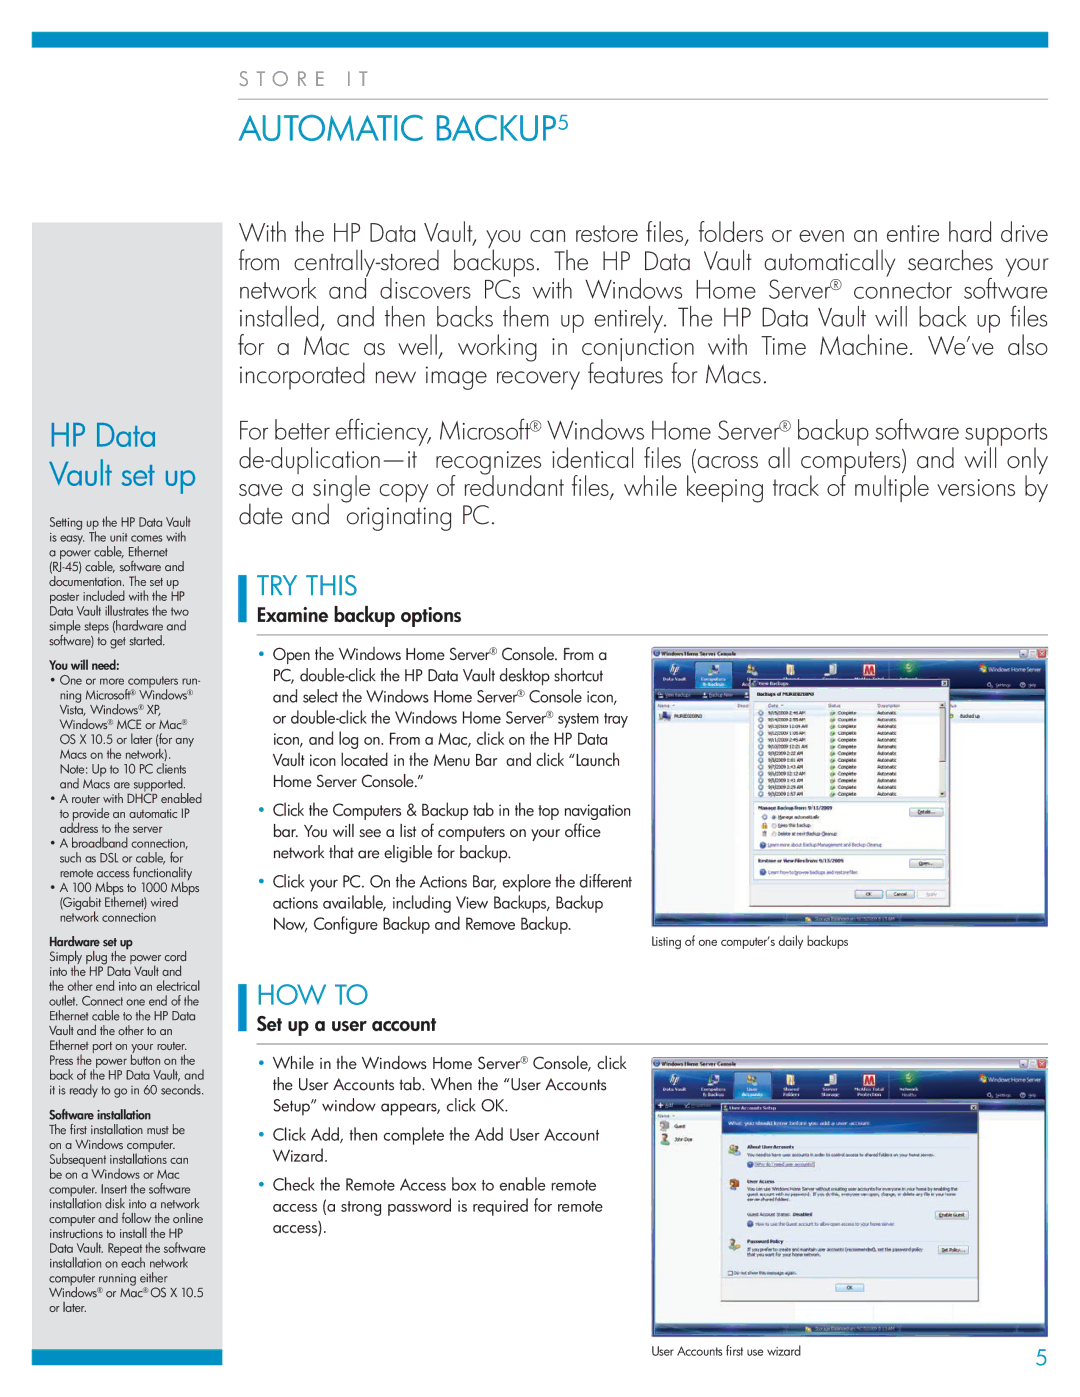
TRY THIS
Examine backup options
•Open the Windows Home Server® Console. From a PC,
•Click the Computers & Backup tab in the top navigation bar. You will see a list of computers on your office network that are eligible for backup.
•Click your PC. On the Actions Bar, explore the different actions available, including View Backups, Backup Now, Configure Backup and Remove Backup.
Listing of one computer’s daily backups
HOW TO
Set up a user account
•While in the Windows Home Server® Console, click the User Accounts tab. When the “User Accounts Setup” window appears, click OK.
•Click Add, then complete the Add User Account Wizard.
•Check the Remote Access box to enable remote access (a strong password is required for remote access).
User Accounts first use wizard | 5 |
|