FA 500.2
Tightening the feed belt
The feed belt should not slip when loaded with material.
•Switch off the shredder.
•Remove the feeding table and the left and right side covers.
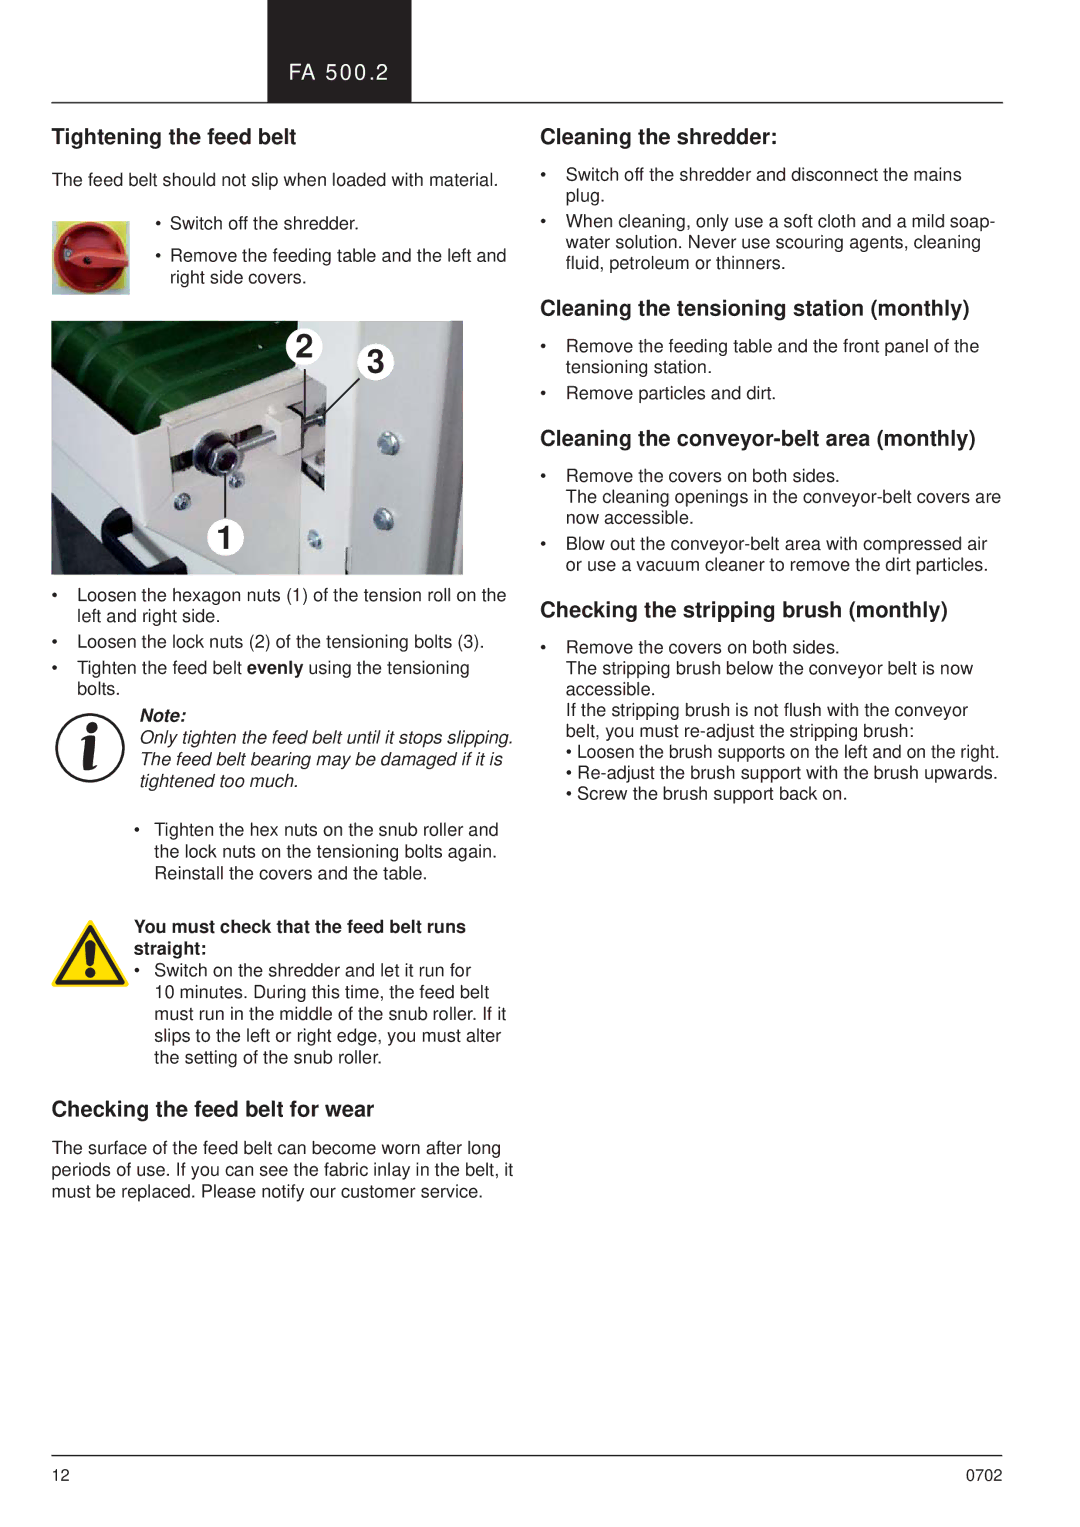
2 3
1
•Loosen the hexagon nuts (1) of the tension roll on the left and right side.
•Loosen the lock nuts (2) of the tensioning bolts (3).
•Tighten the feed belt evenly using the tensioning bolts.
Note:
Only tighten the feed belt until it stops slipping. The feed belt bearing may be damaged if it is tightened too much.
•Tighten the hex nuts on the snub roller and the lock nuts on the tensioning bolts again. Reinstall the covers and the table.
You must check that the feed belt runs straight:
• Switch on the shredder and let it run for 10 minutes. During this time, the feed belt must run in the middle of the snub roller. If it slips to the left or right edge, you must alter the setting of the snub roller.
Checking the feed belt for wear
The surface of the feed belt can become worn after long periods of use. If you can see the fabric inlay in the belt, it must be replaced. Please notify our customer service.
Cleaning the shredder:
•Switch off the shredder and disconnect the mains plug.
•When cleaning, only use a soft cloth and a mild soap- water solution. Never use scouring agents, cleaning fluid, petroleum or thinners.
Cleaning the tensioning station (monthly)
•Remove the feeding table and the front panel of the tensioning station.
•Remove particles and dirt.
Cleaning the conveyor-belt area (monthly)
•Remove the covers on both sides.
The cleaning openings in the
•Blow out the
Checking the stripping brush (monthly)
•Remove the covers on both sides.
The stripping brush below the conveyor belt is now accessible.
If the stripping brush is not flush with the conveyor belt, you must
•Loosen the brush supports on the left and on the right.
•
•Screw the brush support back on.
12 | 0702 |