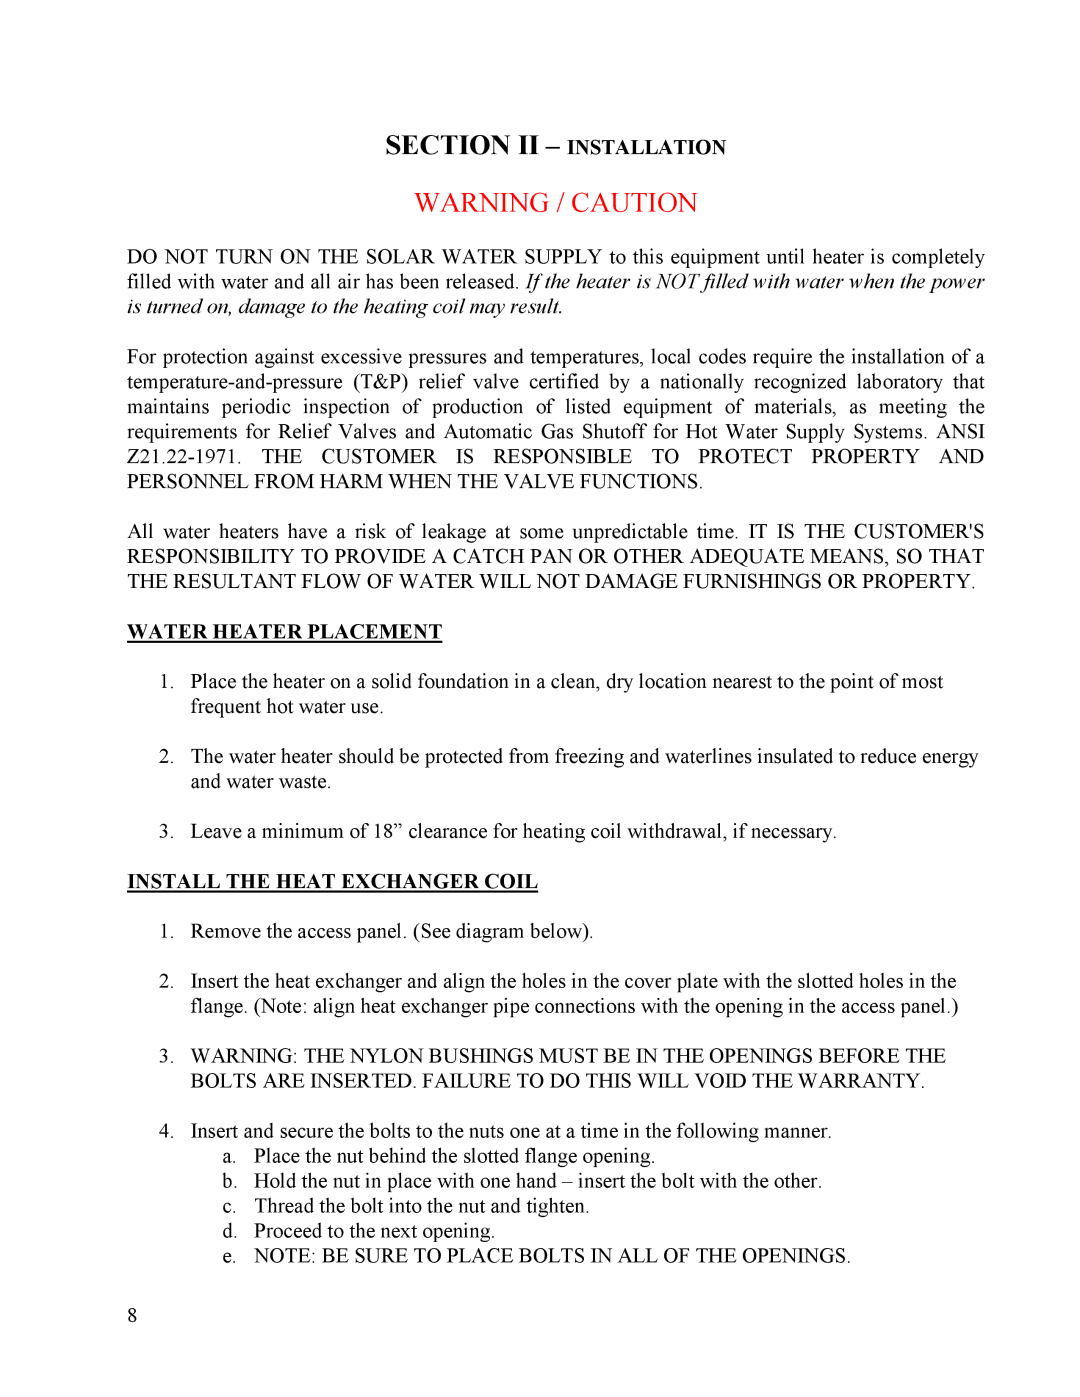
SLN specifications
Hubbell Electric Heater Company, a renowned name in the industrial heating sector, has established a strong reputation for manufacturing high-quality electric heating solutions. Among their diverse range of products, the Hubbell Electric Heater Company SLN series stands out as a pioneer in energy-efficient heating technologies, tailored for various industrial applications.The SLN series comprises electric unit heaters designed to deliver optimal heating performance while minimizing energy consumption. One of the most notable features of the SLN heaters is their robust construction, which ensures durability and longevity, making them suitable for harsh industrial environments. These heaters are constructed with high-grade materials that withstand corrosion and wear, guaranteeing reliability over extended periods.
A key technology utilized in the SLN heaters is the advanced ceramic heating element. This innovative design not only enhances the efficiency of the heating process but also provides quicker heat-up times, resulting in reduced operational costs. The ceramic element allows for consistent heat distribution, creating a comfortable and stable temperature in the workspace.
Another significant characteristic of the SLN series is its versatility in application. These heaters are available in various configurations, including wall-mounted, ceiling-mounted, or portable models, catering to different industrial needs. The ability to customize settings such as wattage and temperature control further adds to their adaptability, making the SLN heaters ideal for warehouses, factories, and workshops.
Energy efficiency is a critical consideration for many modern industries, and Hubbell’s SLN series excels in this regard. By incorporating features such as thermostatic controls and programmable timers, these heaters allow for effective management of energy use, minimizing waste and lowering utility bills. This focus on energy conservation aligns with global sustainability trends, making them an appealing choice for environmentally conscious companies.
Furthermore, the SLN heaters are designed with user-safety in mind, incorporating features like overheat protection and durable, non-combustible housing. This ensures that the devices operate safely in the diverse conditions found in industrial settings.
In summary, the Hubbell Electric Heater Company SLN series represents an impressive blending of durability, efficiency, and versatility in electric heating solutions. With advanced technologies, thoughtful design, and a commitment to energy savings, the SLN heaters are well-suited for modern industrial heating needs, making them a smart investment for businesses aiming to enhance both performance and sustainability.