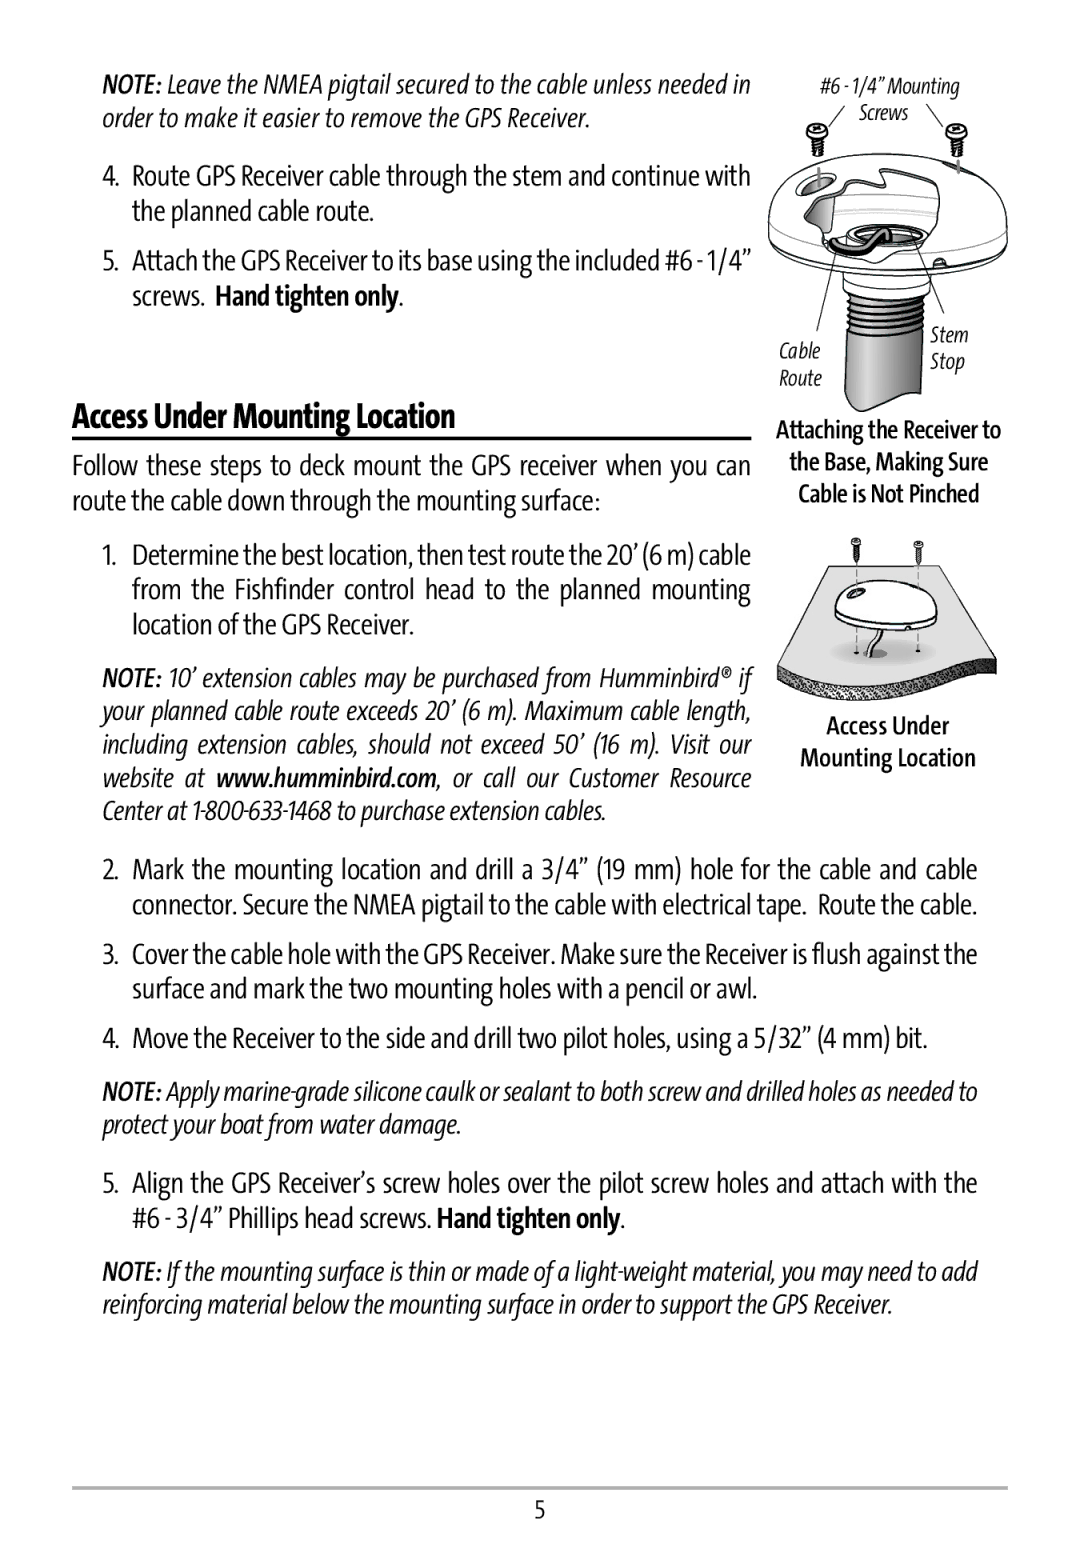
NOTE: Leave the NMEA pigtail secured to the cable unless needed in | #6 - 1/4” Mounting |
order to make it easier to remove the GPS Receiver. | Screws |
4. Route GPS Receiver cable through the stem and continue with the planned cable route.
5. Attach the GPS Receiver to its base using the included #6 - 1/4” screws. Hand tighten only.
![]() Stem
Stem
CableStop
Route
Access Under Mounting Location
Follow these steps to deck mount the GPS receiver when you can route the cable down through the mounting surface:
1.Determine the best location, then test route the 20’ (6 m) cable from the Fishfinder control head to the planned mounting location of the GPS Receiver.
NOTE: 10’ extension cables may be purchased from Humminbird® if your planned cable route exceeds 20’ (6 m). Maximum cable length, including extension cables, should not exceed 50’ (16 m). Visit our website at www.humminbird.com, or call our Customer Resource Center at
Attaching the Receiver to
the Base, Making Sure Cable is Not Pinched
Access Under
Mounting Location
2.Mark the mounting location and drill a 3/4” (19 mm) hole for the cable and cable connector. Secure the NMEA pigtail to the cable with electrical tape. Route the cable.
3.Cover the cable hole with the GPS Receiver. Make sure the Receiver is flush against the surface and mark the two mounting holes with a pencil or awl.
4.Move the Receiver to the side and drill two pilot holes, using a 5/32” (4 mm) bit.
NOTE: Apply
5.Align the GPS Receiver’s screw holes over the pilot screw holes and attach with the #6 - 3/4” Phillips head screws. Hand tighten only.
NOTE: If the mounting surface is thin or made of a
5