3 • Assembling and Hanging the Fan
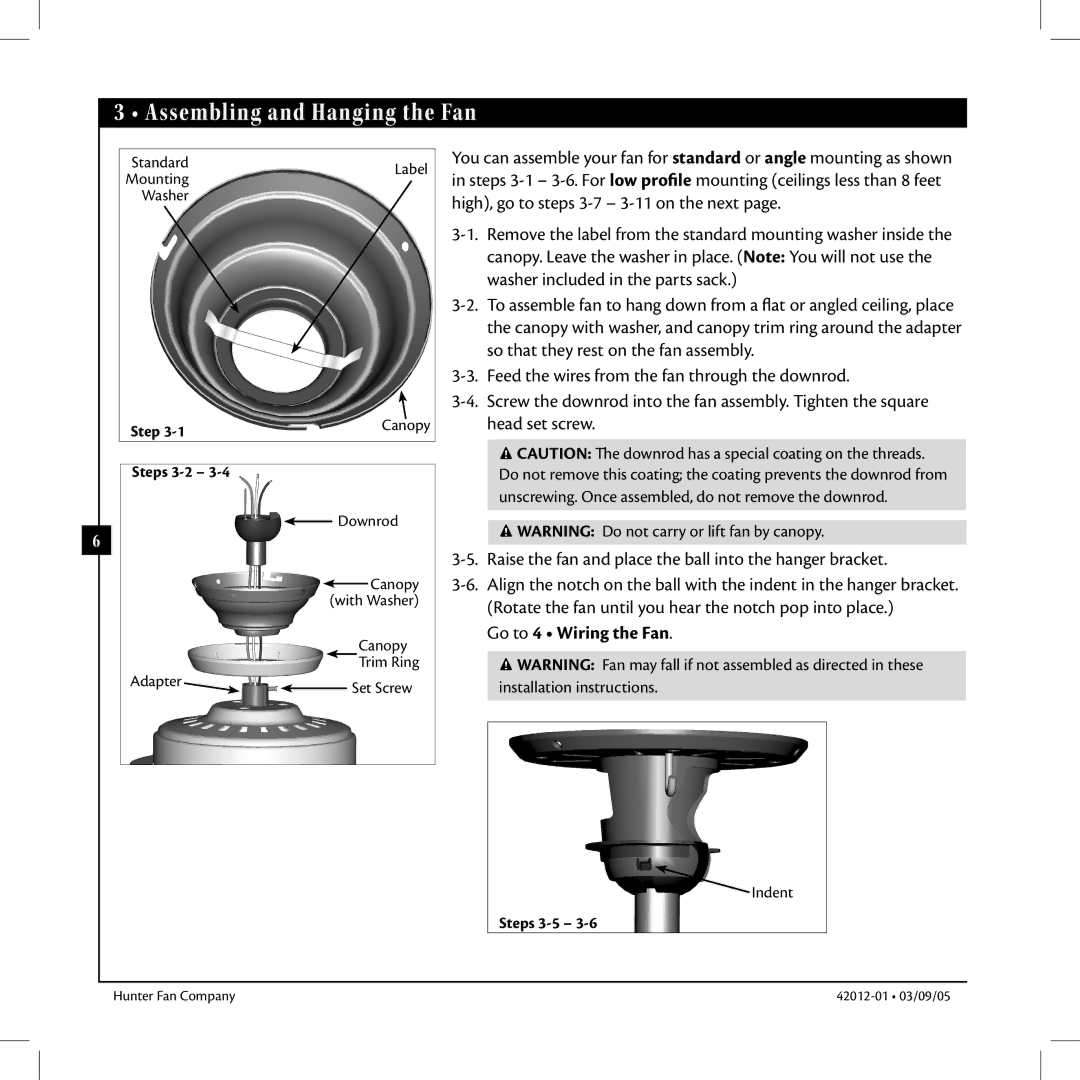
Standard | Label | |
Mounting | ||
| ||
Washer |
| |
Step | Canopy | |
| ||
Steps |
|
![]() Downrod
Downrod
6
![]() Canopy
Canopy
(with Washer)
Canopy
Trim Ring
Adapter | Set Screw |
|
You can assemble your fan for standard or angle mounting as shown in steps
![]() CAUTION: e downrod has a special coating on the threads. Do not remove this coating; the coating prevents the downrod from unscrewing. Once assembled, do not remove the downrod.
CAUTION: e downrod has a special coating on the threads. Do not remove this coating; the coating prevents the downrod from unscrewing. Once assembled, do not remove the downrod.
![]() WARNING: Do not carry or lift fan by canopy.
WARNING: Do not carry or lift fan by canopy.
Go to 4 • Wiring the Fan.
![]() WARNING: Fan may fall if not assembled as directed in these installation instructions.
WARNING: Fan may fall if not assembled as directed in these installation instructions.
![]() Indent
Indent
Steps
Hunter Fan Company |