
27184, 27188 specifications
Hunter Fan Company, a leading name in the ceiling fan industry, offers a variety of models catering to diverse consumer needs. Among its popular offerings, the Hunter Fan models 27188 and 27184 stand out due to their remarkable features and advanced technologies.The Hunter Fan 27188 is designed with functionality and aesthetic appeal in mind. It features a classic design that blends seamlessly with various interior styles, making it suitable for both traditional and modern spaces. One of the main highlights of this model is its WhisperWind motor technology, which delivers powerful airflow without the disruptive noise often associated with ceiling fans. This makes it an excellent choice for bedrooms and living rooms where peace and quiet are essential.
In terms of size, the 27188 is ideal for medium to large rooms. Its blade span accommodates larger areas while ensuring efficient air circulation. The fan is equipped with five blades that are meticulously crafted for optimal airflow, enhancing both comfort and energy efficiency. Moreover, the fan comes with an integrated light kit, providing both illumination and cooling in one unit.
The Hunter Fan 27184 shares many features with its counterpart while offering slightly different aesthetics. This model emphasizes contemporary design, featuring sleek lines and a modern finish. Like the 27188, it utilizes the WhisperWind motor technology, ensuring a serene environment while maintaining air circulation.
Both fans are energy-efficient, contributing to lower electricity bills while providing consistent performance. They are also compatible with Hunter’s Universal Remote Controls, allowing for easy operation from anywhere in the room. This added convenience ensures that users can adjust their comfort without needing to leave their seats.
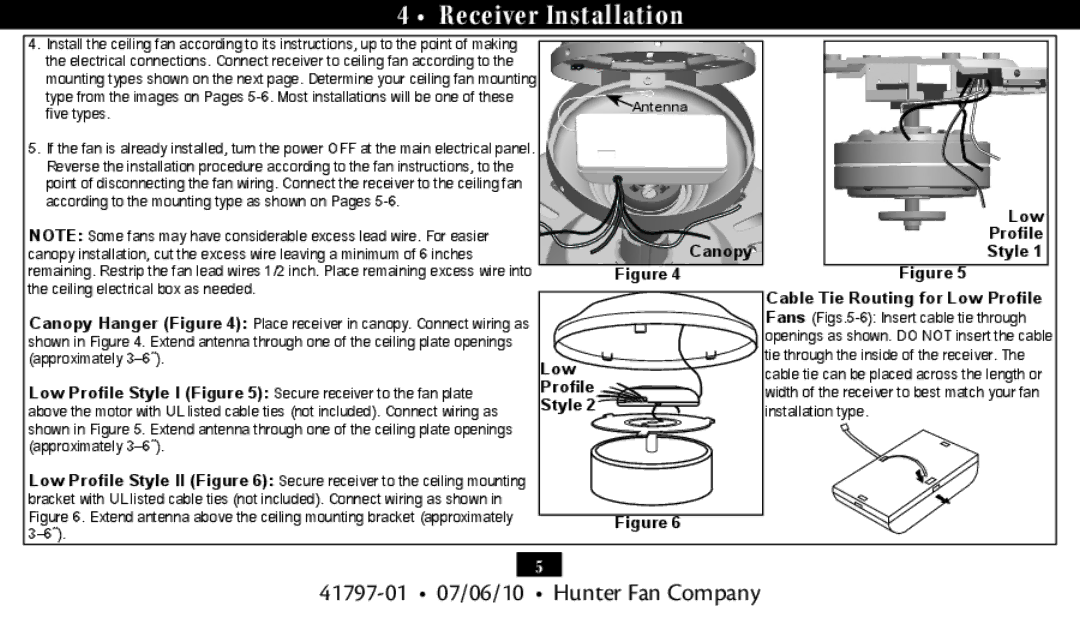
Installation of both models is straightforward, and Hunter provides comprehensive instructions, making the setup process hassle-free. Additionally, these fans are compatible with various mounting options, allowing flexibility depending on ceiling height and room design.
In summary, the Hunter Fan models 27188 and 27184 are excellent additions to any home, providing efficient cooling, beautiful design, and the cutting-edge technology that Hunter Fans is known for. Whether you prefer a classic or contemporary look, both fans deliver an exceptional balance of style and performance, making them ideal choices for enhancing indoor comfort.