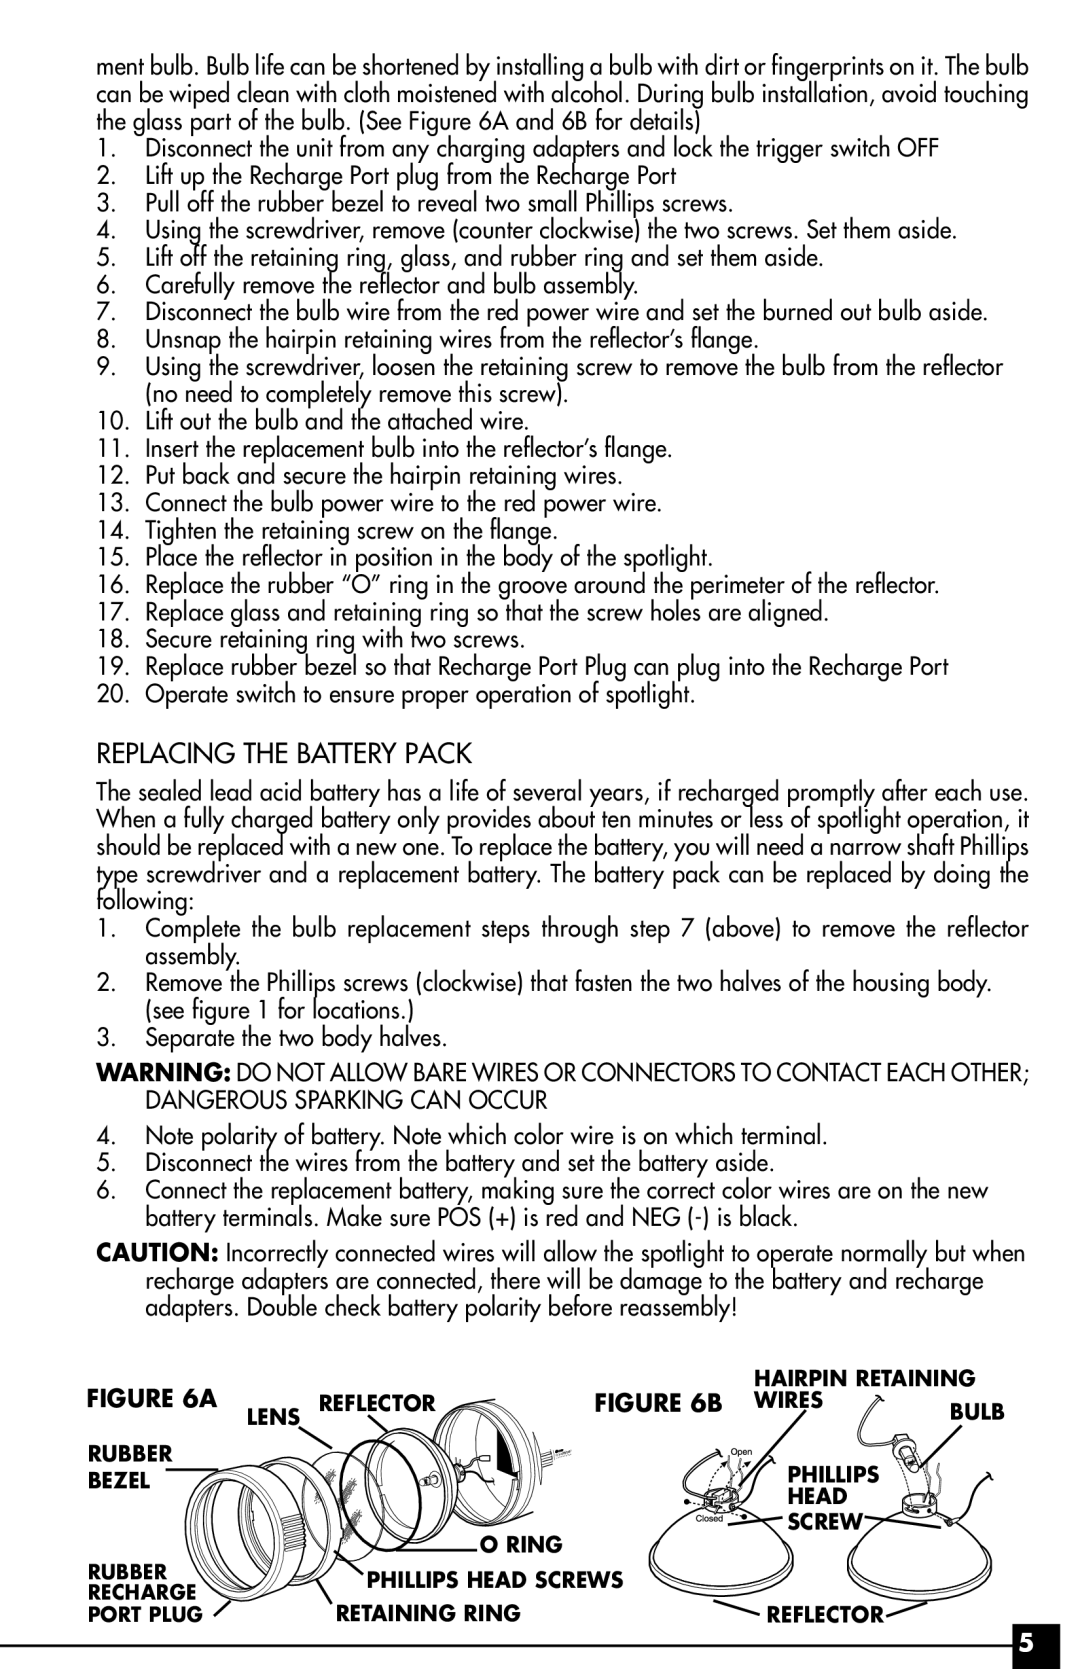
ment bulb. Bulb life can be shortened by installing a bulb with dirt or fingerprints on it. The bulb can be wiped clean with cloth moistened with alcohol. During bulb installation, avoid touching the glass part of the bulb. (See Figure 6A and 6B for details)
1.Disconnect the unit from any charging adapters and lock the trigger switch OFF
2.Lift up the Recharge Port plug from the Recharge Port
3.Pull off the rubber bezel to reveal two small Phillips screws.
4.Using the screwdriver, remove (counter clockwise) the two screws. Set them aside.
5.Lift off the retaining ring, glass, and rubber ring and set them aside.
6.Carefully remove the reflector and bulb assembly.
7.Disconnect the bulb wire from the red power wire and set the burned out bulb aside.
8.Unsnap the hairpin retaining wires from the reflector’s flange.
9.Using the screwdriver, loosen the retaining screw to remove the bulb from the reflector (no need to completely remove this screw).
10.Lift out the bulb and the attached wire.
11.Insert the replacement bulb into the reflector’s flange.
12.Put back and secure the hairpin retaining wires.
13.Connect the bulb power wire to the red power wire.
14.Tighten the retaining screw on the flange.
15.Place the reflector in position in the body of the spotlight.
16.Replace the rubber “O” ring in the groove around the perimeter of the reflector.
17.Replace glass and retaining ring so that the screw holes are aligned.
18.Secure retaining ring with two screws.
19.Replace rubber bezel so that Recharge Port Plug can plug into the Recharge Port
20.Operate switch to ensure proper operation of spotlight.
REPLACING THE BATTERY PACK
The sealed lead acid battery has a life of several years, if recharged promptly after each use. When a fully charged battery only provides about ten minutes or less of spotlight operation, it should be replaced with a new one. To replace the battery, you will need a narrow shaft Phillips type screwdriver and a replacement battery. The battery pack can be replaced by doing the following:
1.Complete the bulb replacement steps through step 7 (above) to remove the reflector assembly.
2.Remove the Phillips screws (clockwise) that fasten the two halves of the housing body. (see figure 1 for locations.)
3.Separate the two body halves.
WARNING: DO NOT ALLOW BARE WIRES OR CONNECTORS TO CONTACT EACH OTHER; DANGEROUS SPARKING CAN OCCUR
4.Note polarity of battery. Note which color wire is on which terminal.
5.Disconnect the wires from the battery and set the battery aside.
6.Connect the replacement battery, making sure the correct color wires are on the new battery terminals. Make sure POS (+) is red and NEG
CAUTION: Incorrectly connected wires will allow the spotlight to operate normally but when recharge adapters are connected, there will be damage to the battery and recharge adapters. Double check battery polarity before reassembly!
FIGURE 6A
RUBBER
BEZEL
RUBBER RECHARGE
PORT PLUG
|
| HAIRPIN RETAINING | |
LENS REFLECTOR | FIGURE 6B | WIRES | BULB |
| |||
ULTRASPORT | SPOT |
|
|
|
| PHILLIPS |
|
|
| HEAD |
|
O RING |
| SCREW |
|
|
|
| |
PHILLIPS HEAD SCREWS |
|
| |
RETAINING RING |
| REFLECTOR |
|
5