Operation
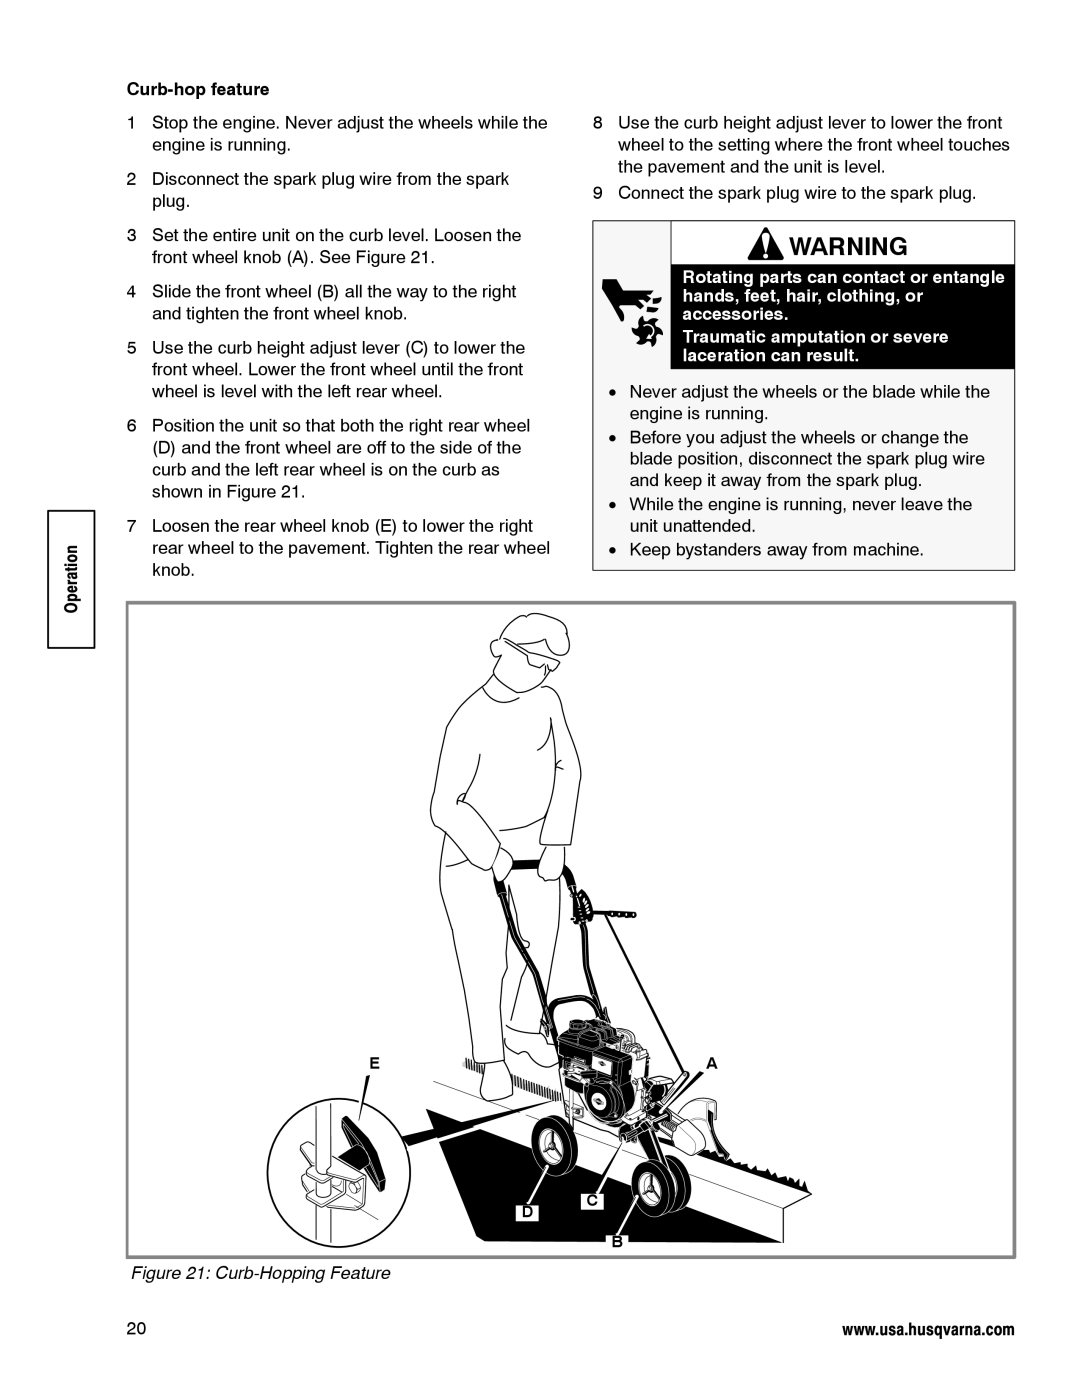
Curb-hop feature
1Stop the engine. Never adjust the wheels while the engine is running.
2Disconnect the spark plug wire from the spark plug.
3Set the entire unit on the curb level. Loosen the front wheel knob (A). See Figure 21.
4Slide the front wheel (B) all the way to the right and tighten the front wheel knob.
5Use the curb height adjust lever (C) to lower the front wheel. Lower the front wheel until the front wheel is level with the left rear wheel.
6Position the unit so that both the right rear wheel
(D) and the front wheel are off to the side of the curb and the left rear wheel is on the curb as shown in Figure 21.
7Loosen the rear wheel knob (E) to lower the right rear wheel to the pavement. Tighten the rear wheel knob.
8Use the curb height adjust lever to lower the front wheel to the setting where the front wheel touches the pavement and the unit is level.
9Connect the spark plug wire to the spark plug.
![]() WARNING
WARNING
Rotating parts can contact or entangle hands, feet, hair, clothing, or accessories.
Traumatic amputation or severe laceration can result.
•Never adjust the wheels or the blade while the engine is running.
•Before you adjust the wheels or change the blade position, disconnect the spark plug wire and keep it away from the spark plug.
•While the engine is running, never leave the unit unattended.
•Keep bystanders away from machine.
E |
| A |
| D | C |
|
| |
|
| B |
Figure 21: Curb-Hopping Feature
20 | www.usa.husqvarna.com |