ASSEMBLY
INSTALL BATTERY (See Figs. 4 & 5)
CAUTION: Do not short battery termi- nals. Before installing battery, remove metal bracelets, wristwatch bands, rings, etc.
Positive terminal must be connected first to prevent sparking from acciden- tal grounding.
•Lift seat to raised position.
•Open battery box door.
•Be sure battery drain tube is attached to battery box.
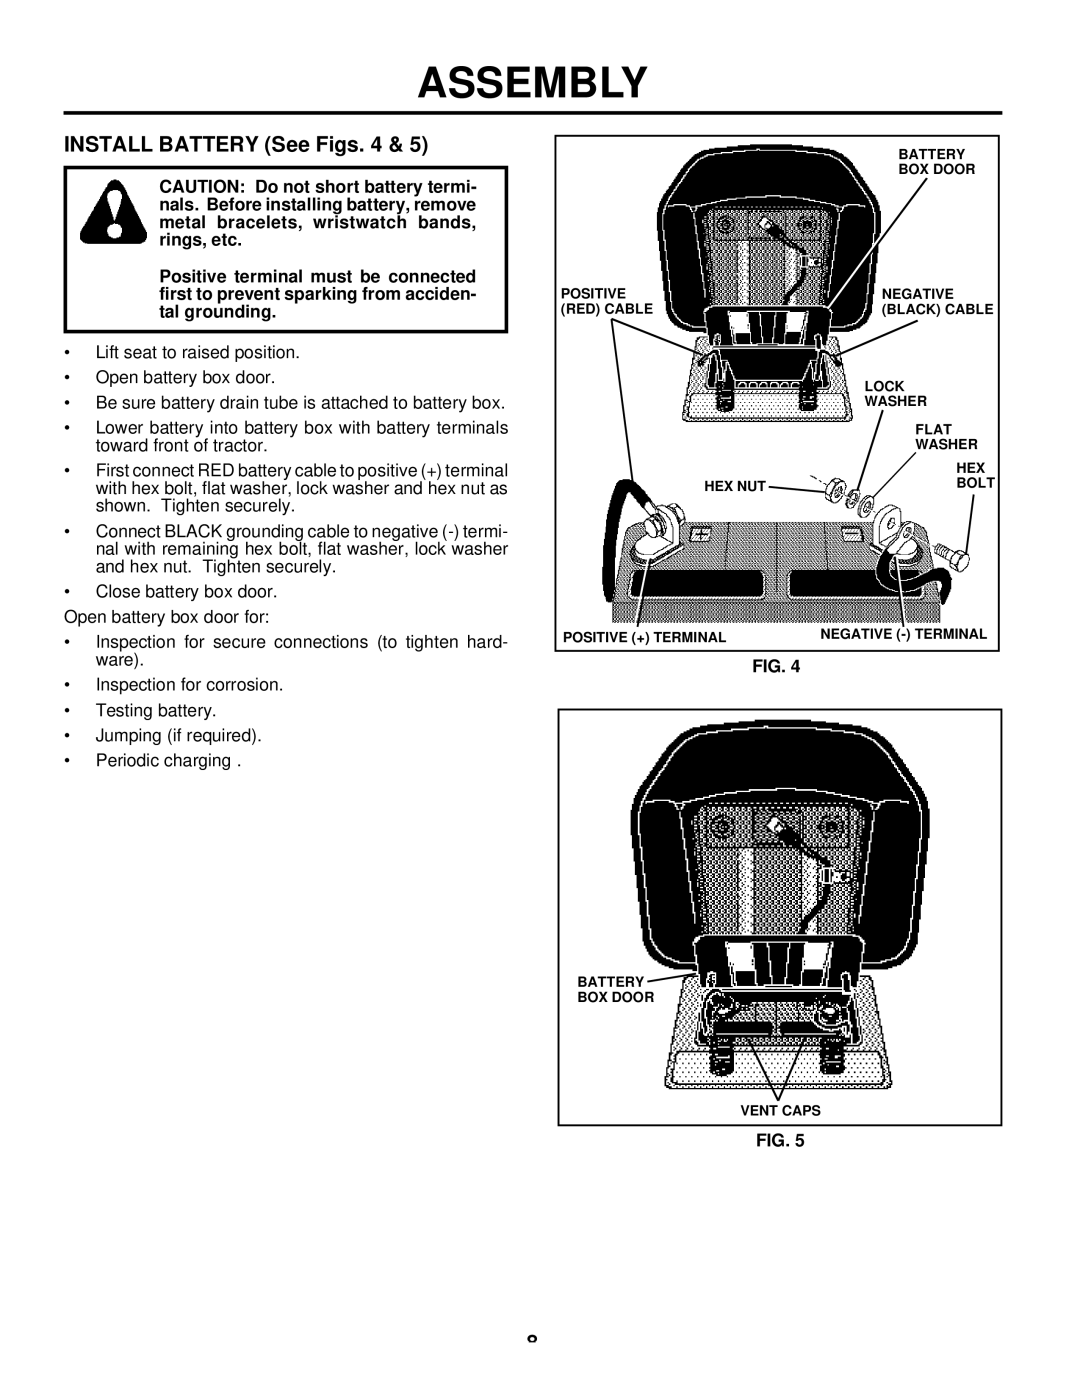
•Lower battery into battery box with battery terminals toward front of tractor.
•First connect RED battery cable to positive (+) terminal with hex bolt, flat washer, lock washer and hex nut as shown. Tighten securely.
•Connect BLACK grounding cable to negative
•Close battery box door.
Open battery box door for:
•Inspection for secure connections (to tighten hard- ware).
•Inspection for corrosion.
•Testing battery.
•Jumping (if required).
•Periodic charging .
BATTERY
BOX DOOR
POSITIVE | NEGATIVE |
(RED) CABLE | (BLACK) CABLE |
LOCK
WASHER
FLAT
WASHER
| HEX |
HEX NUT | BOLT |
POSITIVE (+) TERMINAL | NEGATIVE |
FIG. 4
BATTERY ![]()
BOX DOOR
VENT CAPS
FIG. 5
8