Installation (Cont'd)
5.Apply liberal bead of case joint sealant (butyl) to first case. Sealant area is shown using a dotted line in illustration in Step 8. Apply heavy amount to cover entire shaded area.
DO NOT USE PERMAGUM!
It is the contractor’s responsibility to install case(s) according to local construction and health codes.
6.Slide second case up to first case snugly. Then level second case to the first case so glass front, bumper and top are flush.
7.To compress butyl at joint, use two Jurgenson wood clamps. Make sure case is level from front to back and side to side on inside bulkheads at joint.
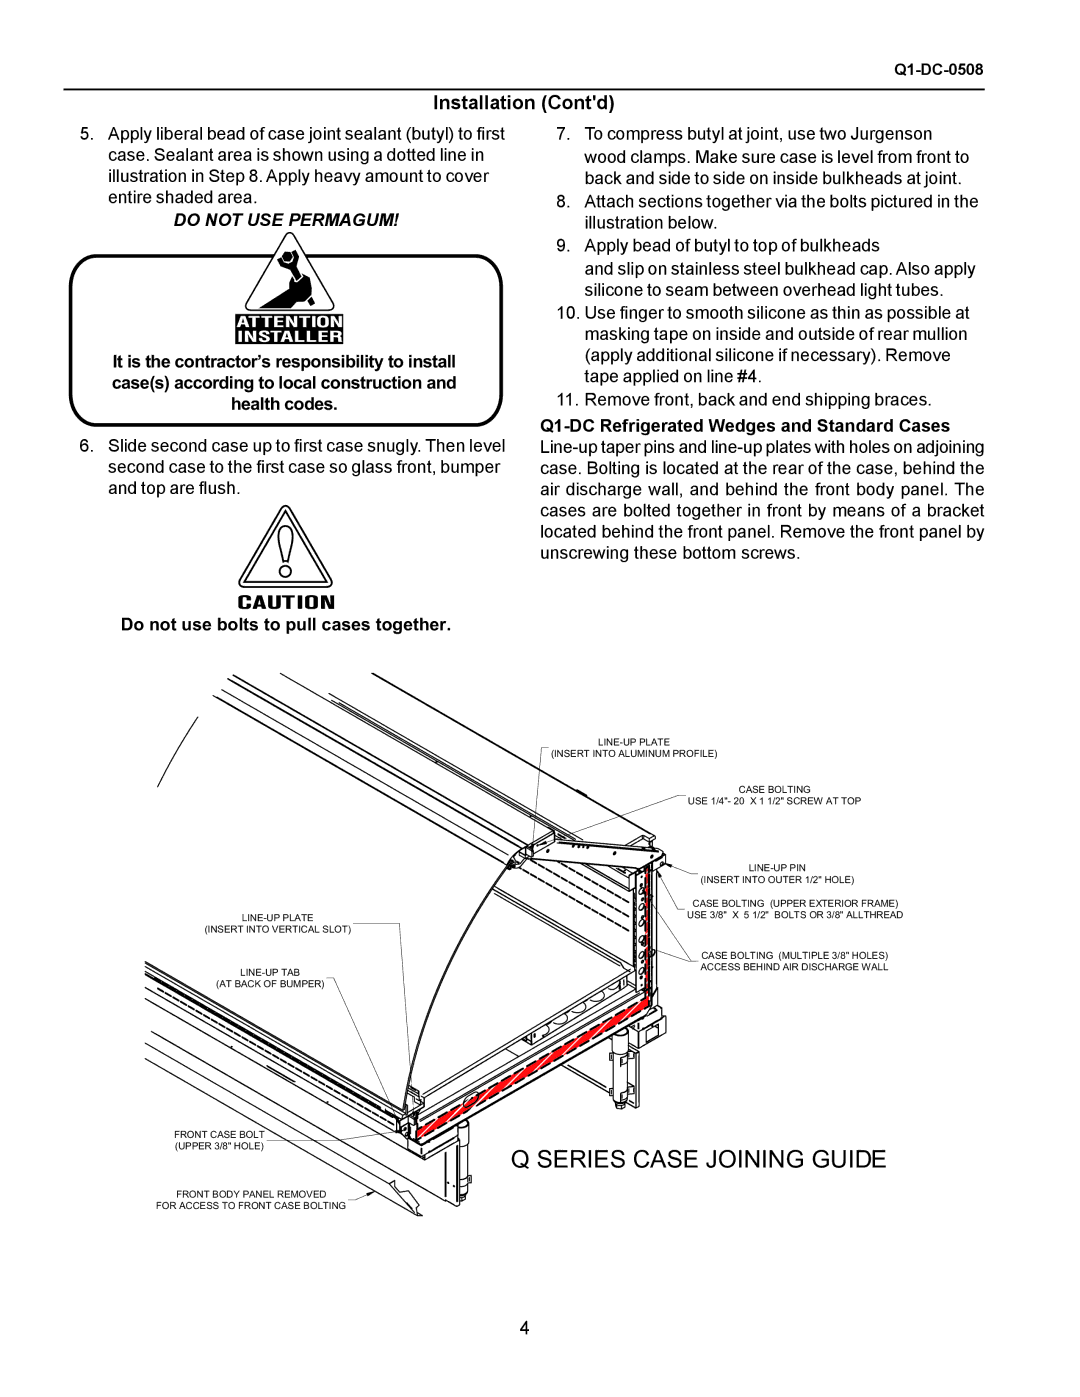
8.Attach sections together via the bolts pictured in the illustration below.
9.Apply bead of butyl to top of bulkheads
and slip on stainless steel bulkhead cap. Also apply silicone to seam between overhead light tubes.
10.Use finger to smooth silicone as thin as possible at masking tape on inside and outside of rear mullion (apply additional silicone if necessary). Remove tape applied on line #4.
11.Remove front, back and end shipping braces.
Do not use bolts to pull cases together.
(INSERT INTO VERTICAL SLOT)
(AT BACK OF BUMPER)
FRONT CASE BOLT (UPPER 3/8" HOLE)
FRONT BODY PANEL REMOVED
FOR ACCESS TO FRONT CASE BOLTING
(INSERT INTO ALUMINUM PROFILE)
CASE BOLTING
USE 1/4"- 20 X 1 1/2" SCREW AT TOP
(INSERT INTO OUTER 1/2" HOLE)
CASE BOLTING (UPPER EXTERIOR FRAME)
USE 3/8" X 5 1/2" BOLTS OR 3/8" ALLTHREAD
CASE BOLTING (MULTIPLE 3/8" HOLES)
ACCESS BEHIND AIR DISCHARGE WALL