tightened the siphon hose will no longer swivel or move, as such, ensure the siphon hose is positioned in the desired direction prior to making the final tightening. The desired position is straight back from the intake. Use caution to avoid over tightening which may result in cracked or broken fittings.
7 |
|
|
|
| 11 |
|
|
|
|
|
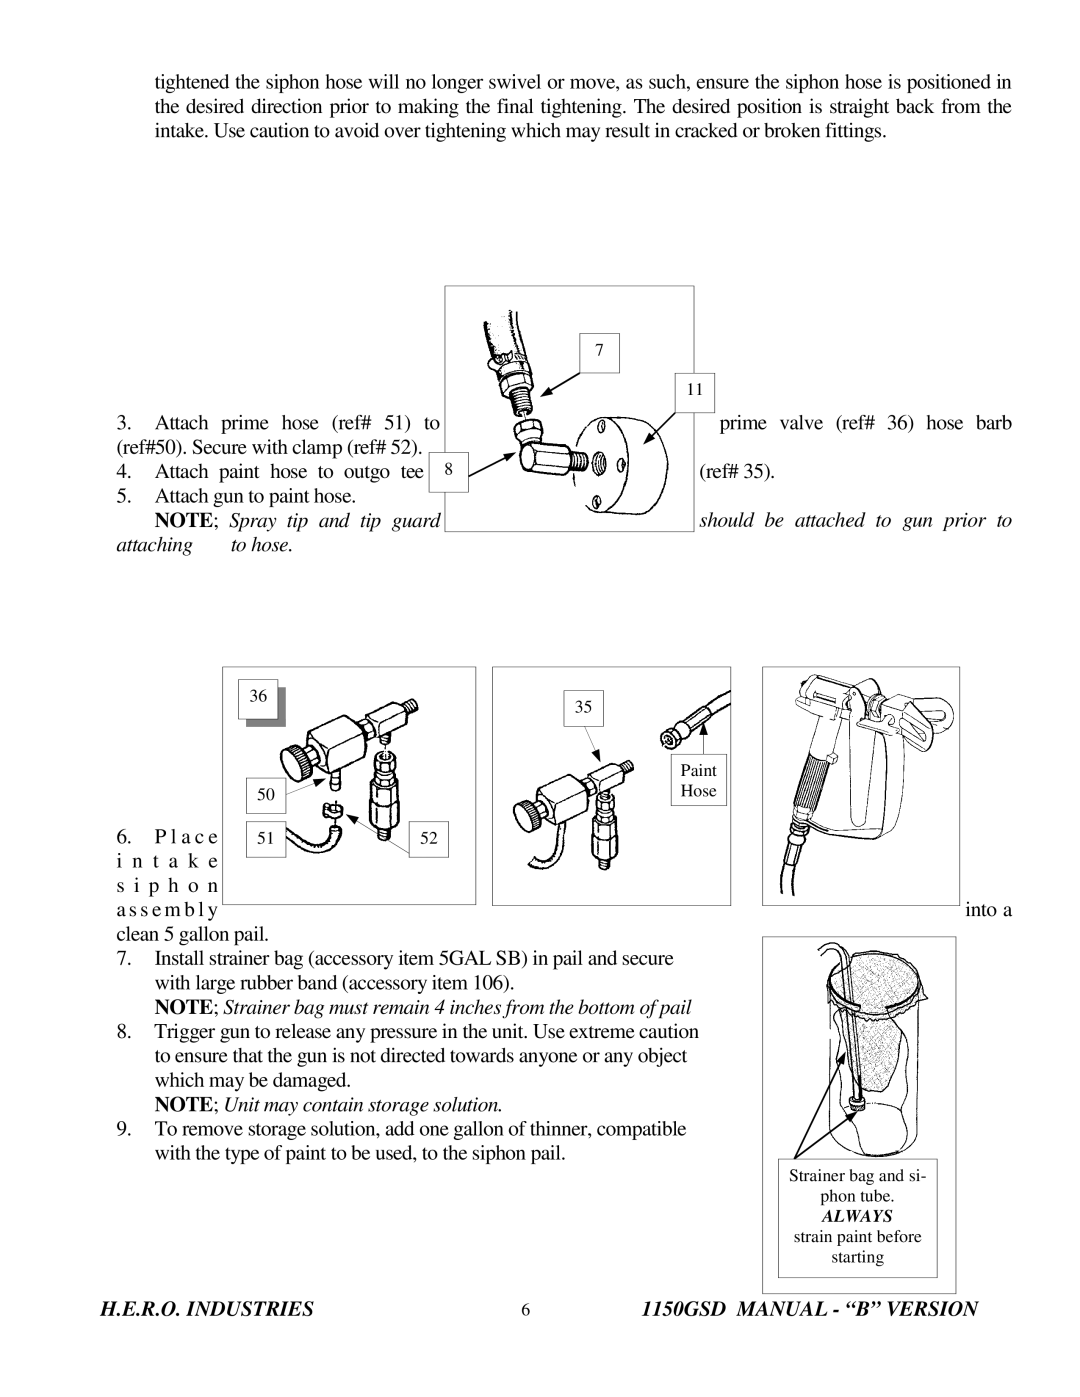
3. | Attach | prime hose (ref# 51) to |
| prime | valve | (ref# | 36) | hose | barb |
(ref#50). Secure with clamp (ref# 52). | 8 |
|
|
|
|
|
| ||
4. | Attach | paint hose to outgo tee | (ref# 35). |
|
|
|
|
| |
5.Attach gun to paint hose.
NOTE; | Spray tip and tip guard |
| should be attached to gun prior to |
attaching | to hose. |
|
|
36 | 35 |
|
| Paint |
50 | Hose |
6. | P l a c e | 51 | 52 |
i n t a k e |
|
| |
s i p h o n |
|
| |
a s s e m b l y |
| into a | |
clean 5 gallon pail. |
| ||
7. | Install strainer bag (accessory item 5GAL SB) in pail and secure | ||
| with large rubber band (accessory item 106). | ||
| NOTE; Strainer bag must remain 4 inches from the bottom of pail | ||
8. | Trigger gun to release any pressure in the unit. Use extreme caution | ||
| to ensure that the gun is not directed towards anyone or any object | ||
| which may be damaged. |
| |
| NOTE; Unit may contain storage solution. | ||
9. | To remove storage solution, add one gallon of thinner, compatible | ||
| with the type of paint to be used, to the siphon pail. | ||
|
|
| Strainer bag and si- |
|
|
| phon tube. |
|
|
| ALWAYS |
|
|
| strain paint before |
|
|
| starting |
H.E.R.O. INDUSTRIES | 6 | 1150GSD MANUAL - “B” VERSION |
