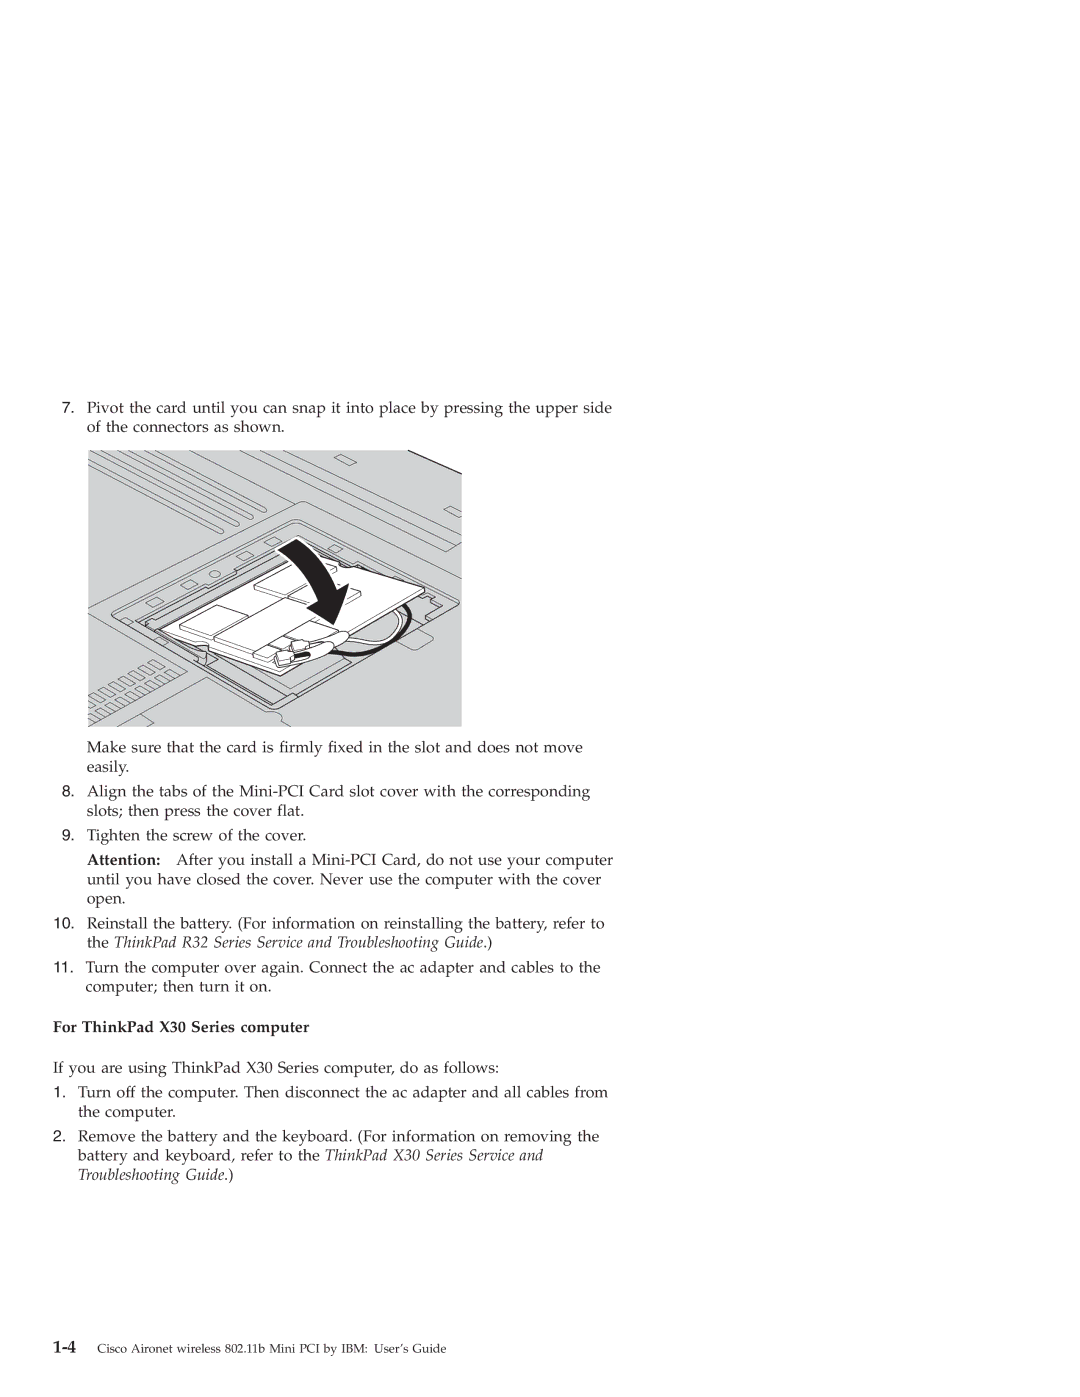
7.Pivot the card until you can snap it into place by pressing the upper side of the connectors as shown.
Make sure that the card is firmly fixed in the slot and does not move easily.
8.Align the tabs of the
9.Tighten the screw of the cover.
Attention: After you install a
10.Reinstall the battery. (For information on reinstalling the battery, refer to the ThinkPad R32 Series Service and Troubleshooting Guide.)
11.Turn the computer over again. Connect the ac adapter and cables to the computer; then turn it on.
For ThinkPad X30 Series computer
If you are using ThinkPad X30 Series computer, do as follows:
1.Turn off the computer. Then disconnect the ac adapter and all cables from the computer.
2.Remove the battery and the keyboard. (For information on removing the battery and keyboard, refer to the ThinkPad X30 Series Service and Troubleshooting Guide.)
