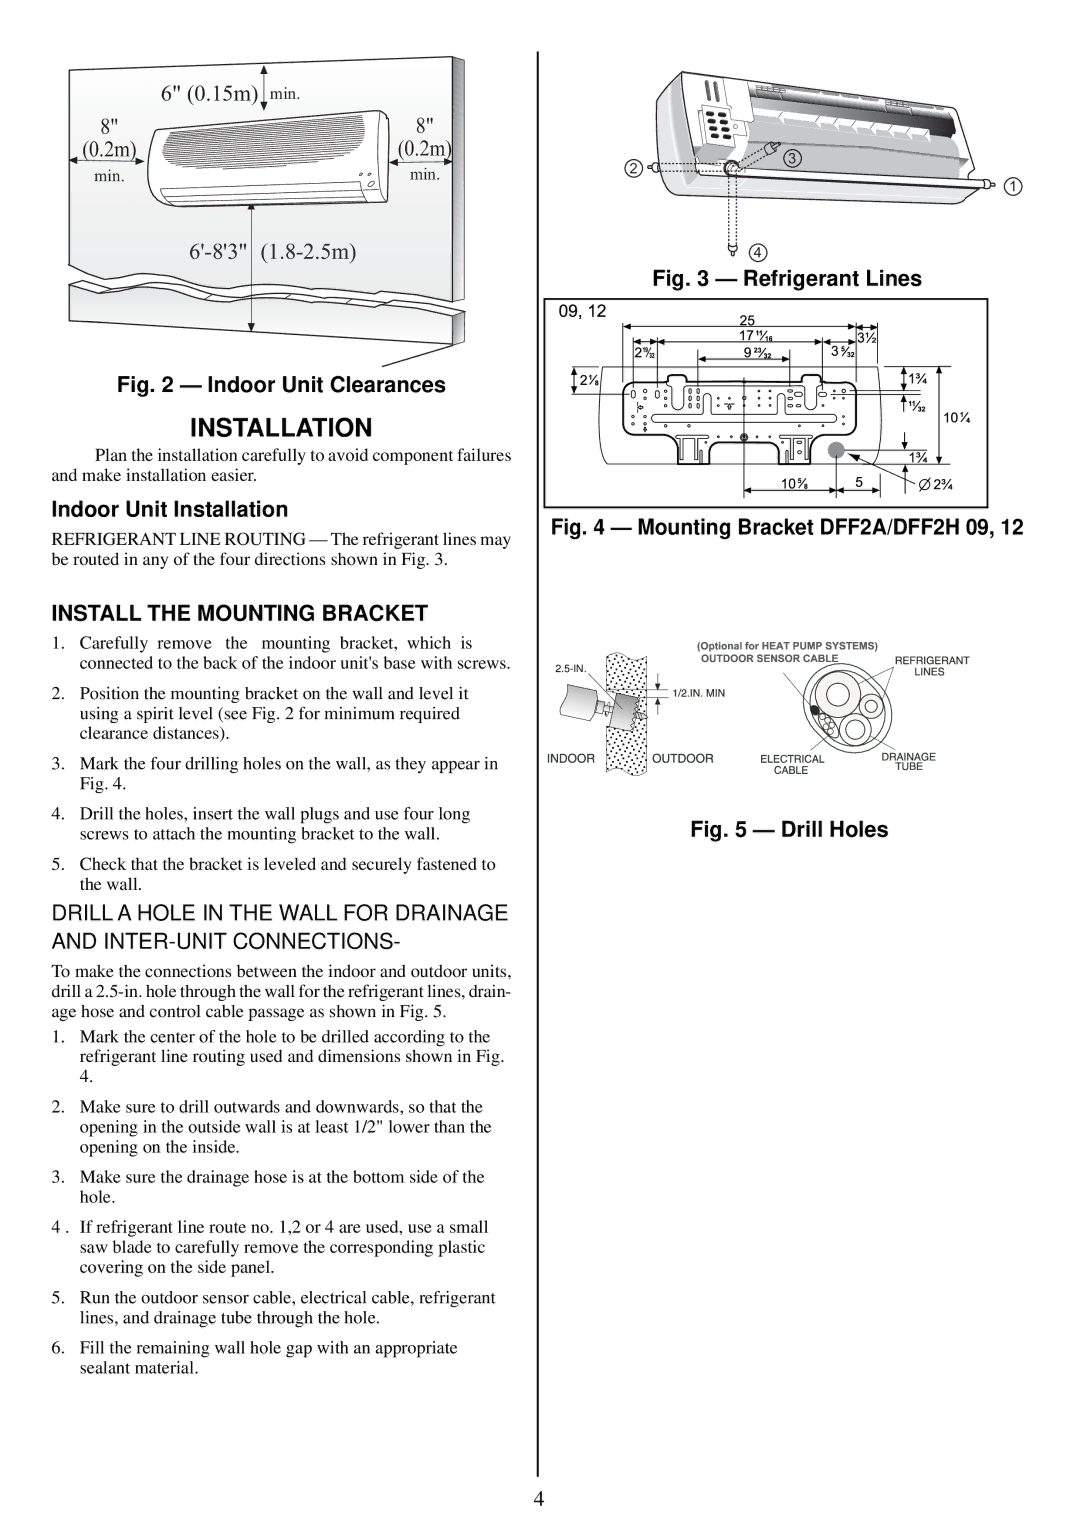
| 6" (0.15m) min. |
8" | 8" |
(0.2m) | (0.2m) |
min. | min. |
Fig. 2 — Indoor Unit Clearances
INSTALLATION
Plan the installation carefully to avoid component failures and make installation easier.
Indoor Unit Installation
REFRIGERANT LINE ROUTING — The refrigerant lines may be routed in any of the four directions shown in Fig. 3.
INSTALL THE MOUNTING BRACKET
1.Carefully remove the mounting bracket, which is connected to the back of the indoor unit's base with screws.
2.Position the mounting bracket on the wall and level it using a spirit level (see Fig. 2 for minimum required clearance distances).
3.Mark the four drilling holes on the wall, as they appear in Fig. 4.
4.Drill the holes, insert the wall plugs and use four long screws to attach the mounting bracket to the wall.
5.Check that the bracket is leveled and securely fastened to the wall.
DRILL A HOLE IN THE WALL FOR DRAINAGE AND
To make the connections between the indoor and outdoor units, drill a
1.Mark the center of the hole to be drilled according to the refrigerant line routing used and dimensions shown in Fig. 4.
2.Make sure to drill outwards and downwards, so that the opening in the outside wall is at least 1/2" lower than the opening on the inside.
3.Make sure the drainage hose is at the bottom side of the hole.
4 . If refrigerant line route no. 1,2 or 4 are used, use a small saw blade to carefully remove the corresponding plastic covering on the side panel.
5.Run the outdoor sensor cable, electrical cable, refrigerant lines, and drainage tube through the hole.
6.Fill the remaining wall hole gap with an appropriate sealant material.
2 | 3 |
| |
| 1 |
4
Fig. 3 — Refrigerant Lines
Fig. 4 — Mounting Bracket DFF2A/DFF2H 09, 12 |
Fig. 5 — Drill Holes
4