Setting Up the iP39
Setting the Clock
Setting the Time and Calendar using iPhone/iPod Time Sync
Time sync mode allows you to sync the iP39 to the time and calendar from your iPhone or recent models of iPod like iPod Touch, iPod Nano and iPod Classic (older models such as iPod Mini do not support this feature).
1.Make sure your iPhone or iPod is properly docked. Press the time sync/time set Button located at the back of the unit. “SYNC” will appear on the display, indicating sync function is in progrress.
2.After sync is complete, the display will show the current time and date on your iPhone/iPod clock and two beeps will confirm time sync is done.
3.If time sync fails, 2 second long beep sounds and the unit exits time sync mode. Try syncing agin, or set time and calendar manually (see below).
NOTE: The iPhone is constantly updated to current time via cell phone towers. The time on your iPod is only accurate to the last time it was synced to a computer. It’s possible to have up to 59 seconds difference between the iP39 and synced iPhone/iPod.
Setting Time and Calendar Manually
1.Set the DST Switch located on the back of the unit to +1 to add one hour or to
2.Press and hold the time sync/time set Button located at the back of the unit until the time display flashes.
Press the ![]() or
or ![]() button to set the correct time (press and hold for rapid advance). Remember to set the correct AM or PM tme. The PM Indicator is located to the upper left side of the time digits; there is no AM indicator.
button to set the correct time (press and hold for rapid advance). Remember to set the correct AM or PM tme. The PM Indicator is located to the upper left side of the time digits; there is no AM indicator.
3.Press the ![]() Alarm Button at any time during clock setting to toggle the display between 24 hour (military) and 12 hour (standard) display mode.
Alarm Button at any time during clock setting to toggle the display between 24 hour (military) and 12 hour (standard) display mode.
4.Press the time sync/time set Button. The year will flash. Press the ![]() or
or ![]() button to set the current year.
button to set the current year.
5.Press the time sync/time set Button. The date will flash. Press the ![]() or
or ![]() button to select the current date (press and hold to enter fast scroll mode). The correct day will appear for the date set.
button to select the current date (press and hold to enter fast scroll mode). The correct day will appear for the date set.
6.Press the time sync/time set again (or no button press within 10 seconds) to exit the clock setting mode.
Timer Operation
iP39 has 2 independent timers, a quick timer that lets you quickly set the timer in 1 minute steps and Timer 2, a normal timer which can be set in 5 minute increments. Both timers can run at the same time.
Setting the timers
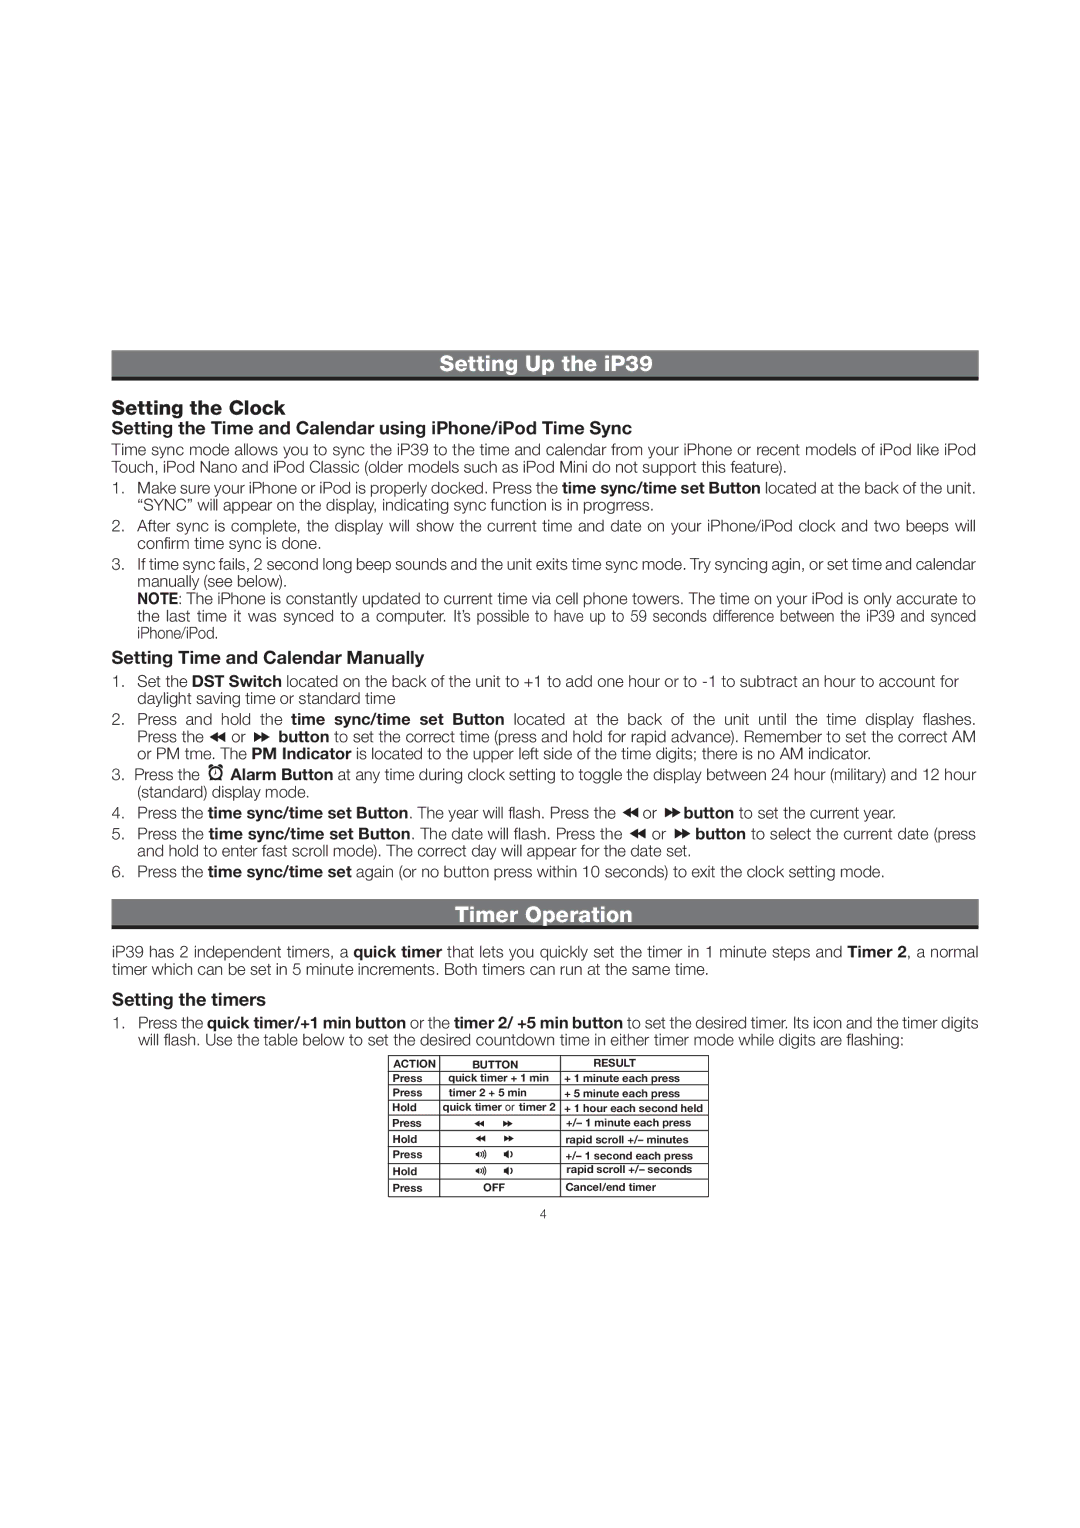
1.Press the quick timer/+1 min button or the timer 2/ +5 min button to set the desired timer. Its icon and the timer digits will flash. Use the table below to set the desired countdown time in either timer mode while digits are flashing:
ACTION | BUTTON | RESULT |
Press | quick timer + 1 min | + 1 minute each press |
Press | timer 2 + 5 min | + 5 minute each press |
Hold | quick timer or timer 2 | + 1 hour each second held |
Press |
| +/– 1 minute each press |
Hold |
| rapid scroll +/– minutes |
Press |
| +/– 1 second each press |
Hold |
| rapid scroll +/– seconds |
Press | OFF | Cancel/end timer |
4