ENGLISH | 25 |
If a repair is necessary, the appliance must be easily accessible for the engineer. Put the appliance adjacent to a water tap and a drain.
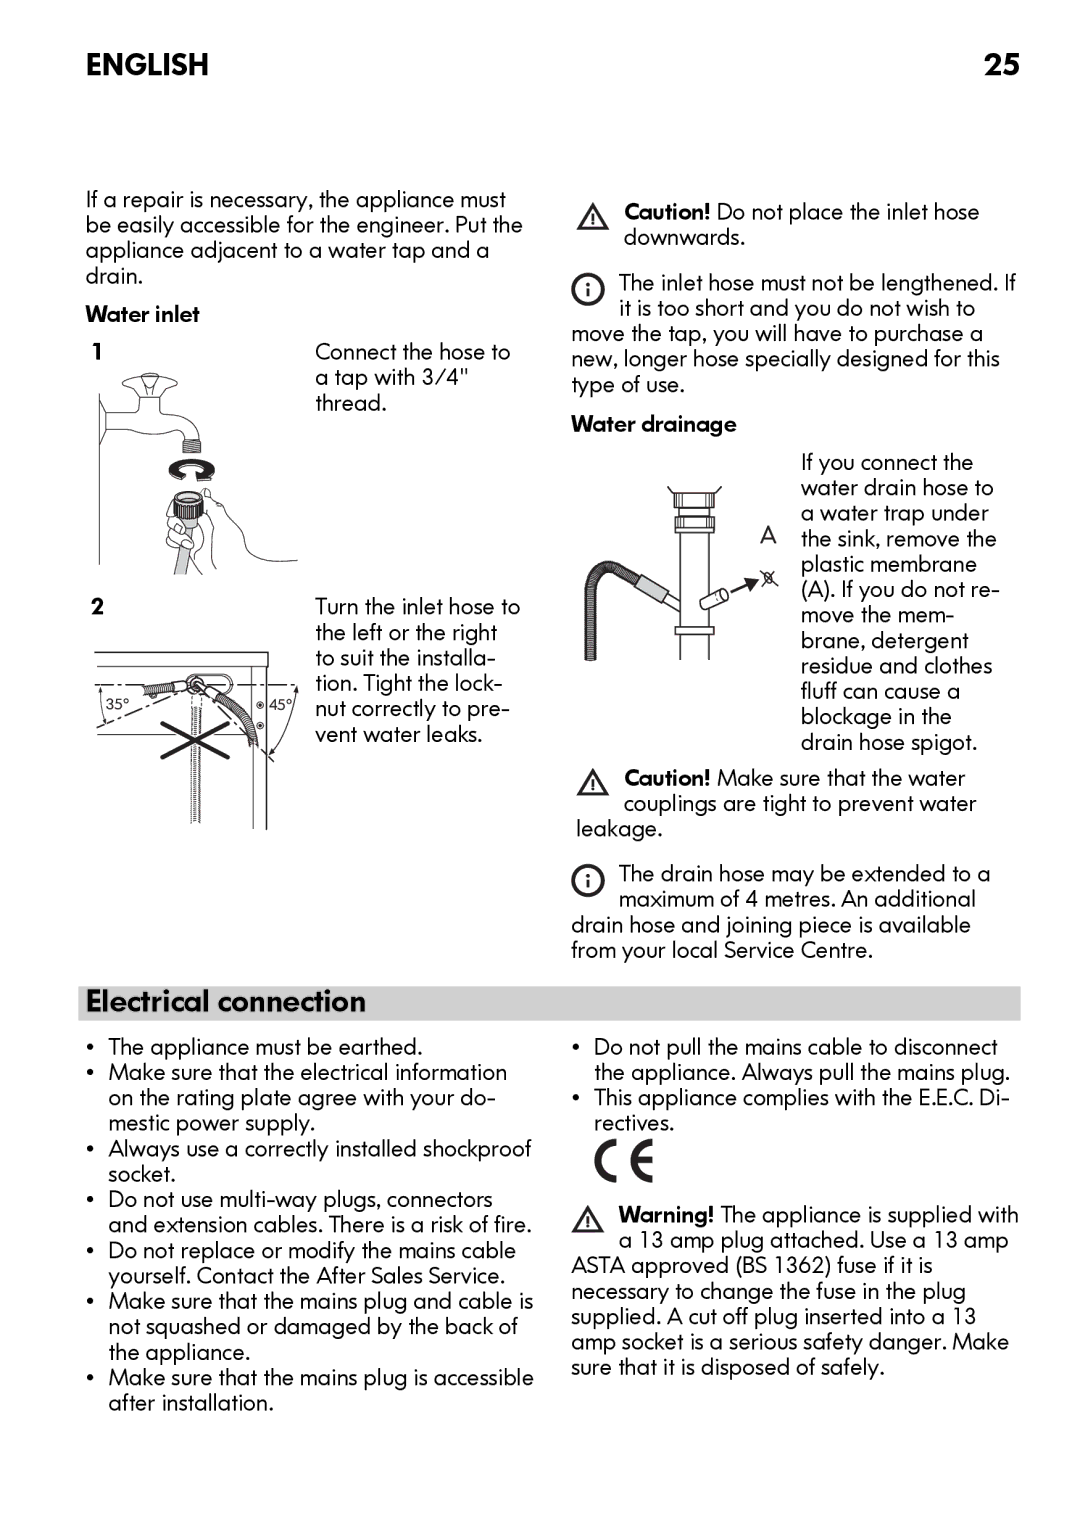
Water inlet
1 | Connect the hose to |
| a tap with 3/4" |
| thread. |
Caution! Do not place the inlet hose downwards.
The inlet hose must not be lengthened. If it is too short and you do not wish to
move the tap, you will have to purchase a new, longer hose specially designed for this type of use.
Water drainage
If you connect the water drain hose to a water trap under
A the sink, remove the plastic membrane
2
35° | 45° |
Turn the inlet hose to the left or the right to suit the installa- tion. Tight the lock- nut correctly to pre- vent water leaks.
(A). If you do not re- move the mem-
brane, detergent residue and clothes fluff can cause a blockage in the drain hose spigot.
Caution! Make sure that the water couplings are tight to prevent water
leakage.
The drain hose may be extended to a maximum of 4 metres. An additional
drain hose and joining piece is available from your local Service Centre.
Electrical connection
•The appliance must be earthed.
•Make sure that the electrical information on the rating plate agree with your do- mestic power supply.
•Always use a correctly installed shockproof socket.
•Do not use
•Do not replace or modify the mains cable yourself. Contact the After Sales Service.
•Make sure that the mains plug and cable is not squashed or damaged by the back of the appliance.
•Make sure that the mains plug is accessible after installation.
•Do not pull the mains cable to disconnect the appliance. Always pull the mains plug.
•This appliance complies with the E.E.C. Di- rectives.
Warning! The appliance is supplied with a 13 amp plug attached. Use a 13 amp
ASTA approved (BS 1362) fuse if it is necessary to change the fuse in the plug supplied. A cut off plug inserted into a 13 amp socket is a serious safety danger. Make sure that it is disposed of safely.
