NOTE: The customer is responsible for the correct selection and use of mounting hardware (available through hardware stores) that will ensure the proper and safe
VERTICAL MOUNTING...
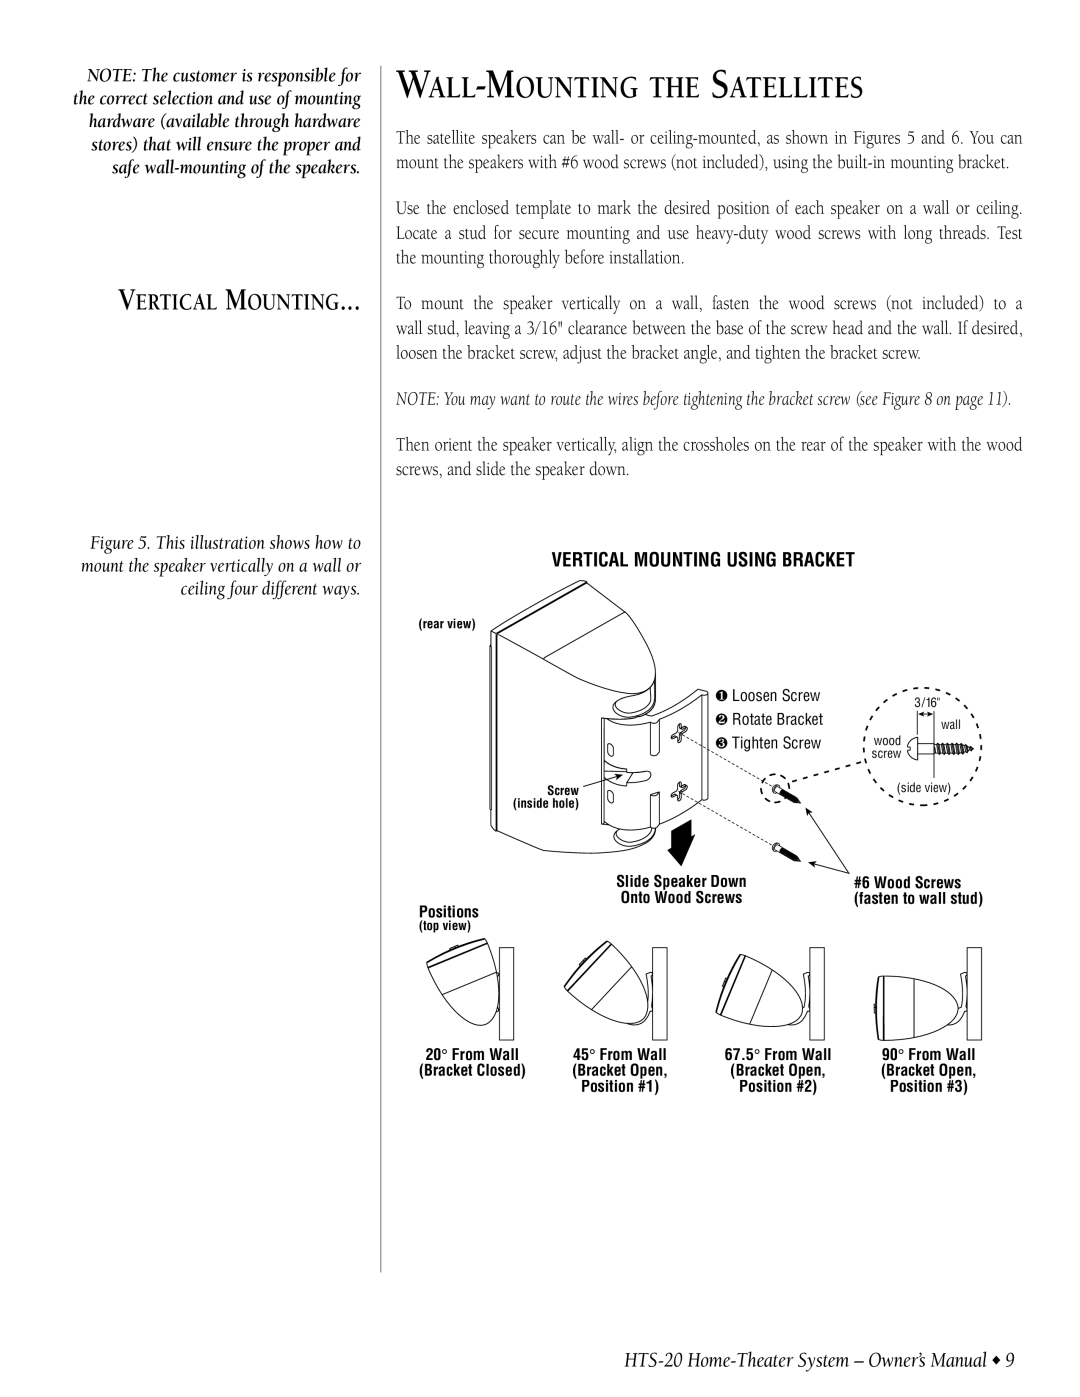
Figure 5. This illustration shows how to mount the speaker vertically on a wall or ceiling four different ways.
WALL-MOUNTING THE SATELLITES
The satellite speakers can be wall- or
Use the enclosed template to mark the desired position of each speaker on a wall or ceiling. Locate a stud for secure mounting and use
To mount the speaker vertically on a wall, fasten the wood screws (not included) to a wall stud, leaving a 3 ⁄16" clearance between the base of the screw head and the wall. If desired, loosen the bracket screw, adjust the bracket angle, and tighten the bracket screw.
NOTE: You may want to route the wires before tightening the bracket screw (see Figure 8 on page 11).
Then orient the speaker vertically, align the crossholes on the rear of the speaker with the wood screws, and slide the speaker down.
VERTICAL MOUNTING USING BRACKET
(rear view)
❶ Loosen Screw | 3/16" | |
❷ Rotate Bracket | ||
wall | ||
❸ Tighten Screw | wood | |
| screw | |
Screw | (side view) | |
(inside hole) |
| |
Slide Speaker Down | #6 Wood Screws | |
Onto Wood Screws | (fasten to wall stud) |
Positions
(top view)
20° From Wall | 45° From Wall | 67.5° From Wall | 90° From Wall |
(Bracket Closed) | (Bracket Open, | (Bracket Open, | (Bracket Open, |
| Position #1) | Position #2) | Position #3) |