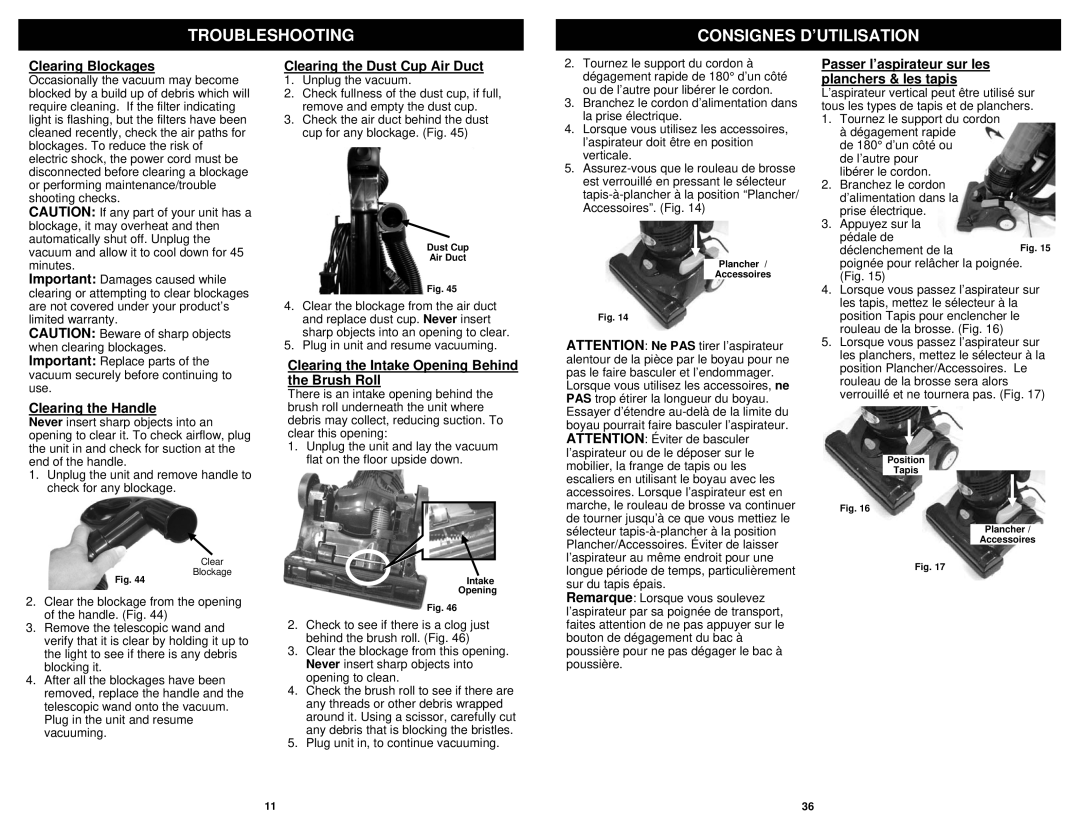
TROUBLESHOOTING
CONSIGNES D’UTILISATION
Clearing Blockages
Occasionally the vacuum may become blocked by a build up of debris which will require cleaning. If the filter indicating light is flashing, but the filters have been cleaned recently, check the air paths for blockages. To reduce the risk of electric shock, the power cord must be disconnected before clearing a blockage or performing maintenance/trouble shooting checks.
CAUTION: If any part of your unit has a blockage, it may overheat and then automatically shut off. Unplug the vacuum and allow it to cool down for 45 minutes.
Important: Damages caused while clearing or attempting to clear blockages are not covered under your product’s limited warranty.
CAUTION: Beware of sharp objects when clearing blockages. Important: Replace parts of the vacuum securely before continuing to use.
Clearing the Handle
Never insert sharp objects into an opening to clear it. To check airflow, plug the unit in and check for suction at the end of the handle.
1.Unplug the unit and remove handle to check for any blockage.
Clearing the Dust Cup Air Duct
1.Unplug the vacuum.
2.Check fullness of the dust cup, if full, remove and empty the dust cup.
3.Check the air duct behind the dust cup for any blockage. (Fig. 45)
Dust Cup
Air Duct
Fig. 45
4.Clear the blockage from the air duct and replace dust cup. Never insert sharp objects into an opening to clear.
5.Plug in unit and resume vacuuming.
Clearing the Intake Opening Behind the Brush Roll
There is an intake opening behind the brush roll underneath the unit where debris may collect, reducing suction. To clear this opening:
1.Unplug the unit and lay the vacuum flat on the floor upside down.
2.Tournez le support du cordon à dégagement rapide de 180° d’un côté ou de l’autre pour libérer le cordon.
3.Branchez le cordon d’alimentation dans la prise électrique.
4.Lorsque vous utilisez les accessoires, l’aspirateur doit être en position verticale.
5.
Plancher /
Accessoires
Fig. 14
ATTENTION: Ne PAS tirer l’aspirateur alentour de la pièce par le boyau pour ne pas le faire basculer et l’endommager.
Lorsque vous utilisez les accessoires, ne PAS trop étirer la longueur du boyau. Essayer d’étendre
Passer l’aspirateur sur les planchers & les tapis
L’aspirateur vertical peut être utilisé sur tous les types de tapis et de planchers. 1. Tournez le support du cordon
à dégagement rapide de 180° d’un côté ou de l’autre pour libérer le cordon.
2.Branchez le cordon d’alimentation dans la prise électrique.
3.Appuyez sur la pédale de
déclenchement de la
poignée pour relâcher la poignée. (Fig. 15)
4.Lorsque vous passez l’aspirateur sur les tapis, mettez le sélecteur à la position Tapis pour enclencher le rouleau de la brosse. (Fig. 16)
5.Lorsque vous passez l’aspirateur sur les planchers, mettez le sélecteur à la position Plancher/Accessoires. Le rouleau de la brosse sera alors verrouillé et ne tournera pas. (Fig. 17)
Position
Tapis
Fig. 16
Plancher /
Accessoires
Fig. 44
Clear
Blockage
Intake
Opening
l’aspirateur au même endroit pour une longue période de temps, particulièrement sur du tapis épais.
Fig. 17
2.Clear the blockage from the opening of the handle. (Fig. 44)
3.Remove the telescopic wand and verify that it is clear by holding it up to the light to see if there is any debris blocking it.
4.After all the blockages have been removed, replace the handle and the telescopic wand onto the vacuum. Plug in the unit and resume vacuuming.
Fig. 46
2.Check to see if there is a clog just behind the brush roll. (Fig. 46)
3.Clear the blockage from this opening. Never insert sharp objects into opening to clean.
4.Check the brush roll to see if there are any threads or other debris wrapped around it. Using a scissor, carefully cut any debris that is blocking the bristles.
5.Plug unit in, to continue vacuuming.
Remarque: Lorsque vous soulevez l’aspirateur par sa poignée de transport, faites attention de ne pas appuyer sur le bouton de dégagement du bac à poussière pour ne pas dégager le bac à poussière.
11
36
