Manuals
/
InFocus
/
Computer Equipment
/
Projector
InFocus
LP750
manual
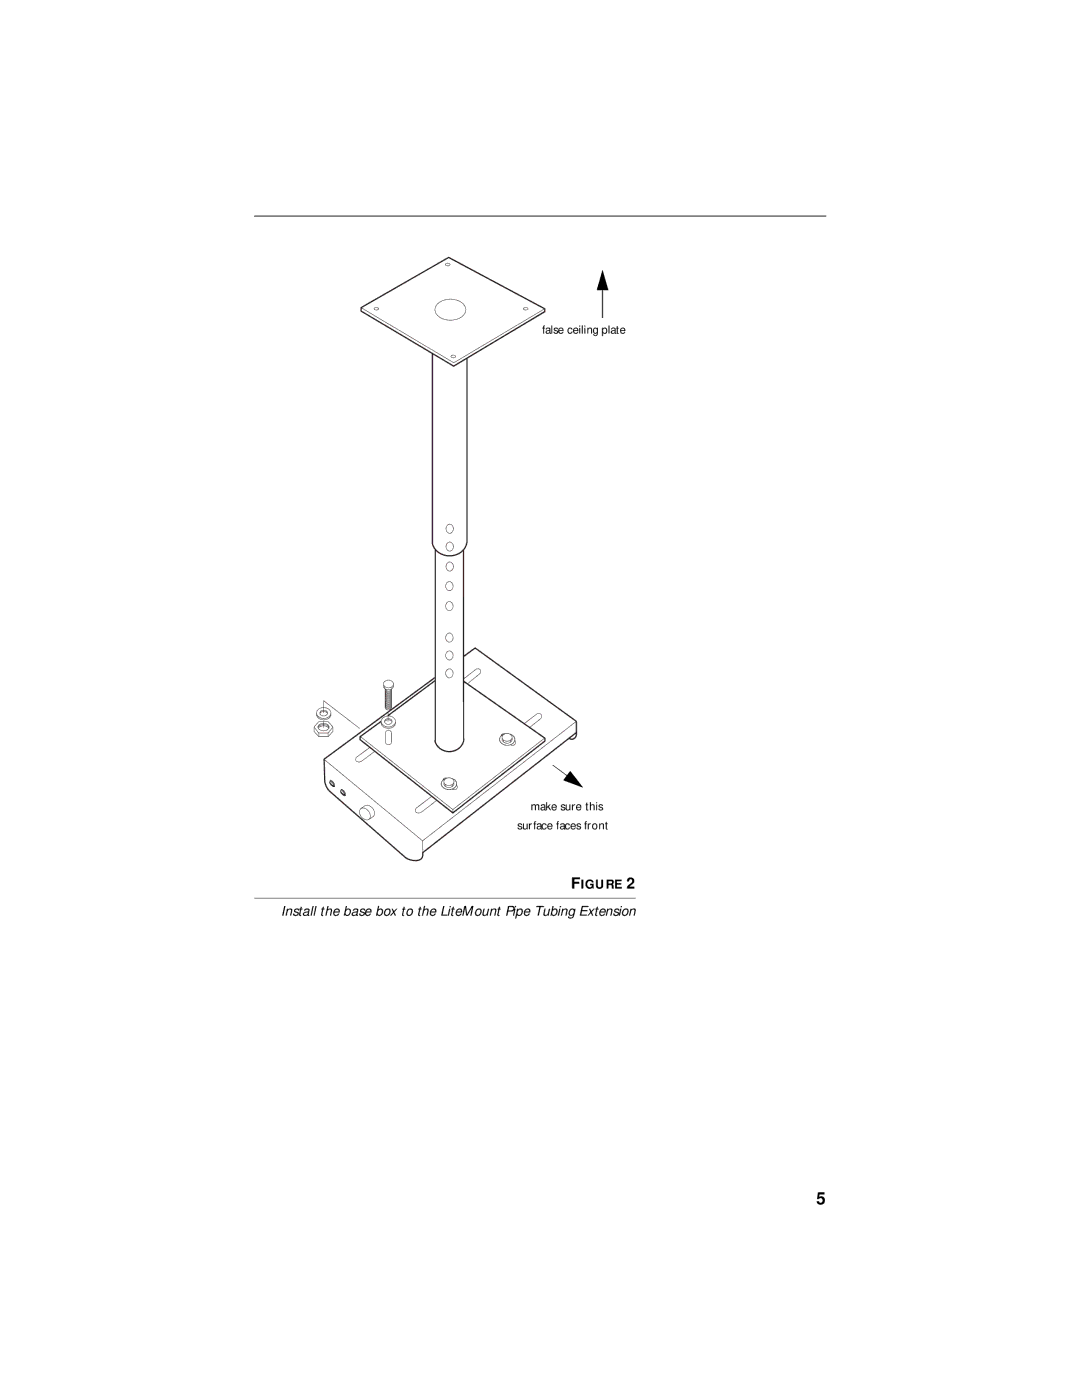
Install the base box to the LiteMount Pipe Tubing Extension
Models:
LP750
1
7
26
26
Download
26 pages
38.96 Kb
4
5
6
7
8
9
10
11
Install
Warranty
Adjusting the Image
Page 7
Image 7
false ceiling plate
make sure this surface faces front
F
IGURE
2
Install the base box to the LiteMount Pipe Tubing Extension
5
Page 6
Page 8
Page 7
Image 7
Page 6
Page 8
Contents
Installation Guide
Page
Additional LiteMount Products
Ceiling Mount Installation Guide
Placing the Projector
Contents
Install the Ceiling Mount Base Box on the Ceiling
Install the base box to the LiteMount False Ceiling Plate
Install the base box to the LiteMount Pipe Tubing Extension
Attach the Mounting Plate to the Projector
Hang the Projector on the Ceiling
N g t h e P r o j e c t o r o n t h e C e i l i n g
Page
Inverting the Image
Adjusting the Image
Warranty Limitation and Exclusion
Limited Warranty
Page
LiteMount-Zusatzprodukte
Installationsanleitung FÜR DIE Deckenbefestigung
Lieferumfang
Plazierung des Projektors
Den Deckenbefestigungssockel an der Decke montieren
E f e r u m f a n g
Befestigung des Sockels an der LiteMount-Rohrverlängerung
Die Montageplatte am Projektor befestigen
Den Projektor an der Decke aufhängen
Befestigung des Projektors am Deckensockel
Page
Das Bild invertieren
DAS Bild Einstellen
Einschränkung und Ausschluß der Garantie
Eingeschränkte Garantie
Top
Page
Image
Contents