Chapter 3 Drivers Installation
•Before installing the drivers, first install the operating system. (The following instructions use
Windows XP as the example operating system.)
•After installing the operating system, insert the motherboard driver disk into your optional drive. The driver Autorun screen is automatically displayed which looks like that shown in the screen shot below. (If the driver Autorun screen does not appear automatically, go to My Computer,
3-1 Installing Chipset Drivers
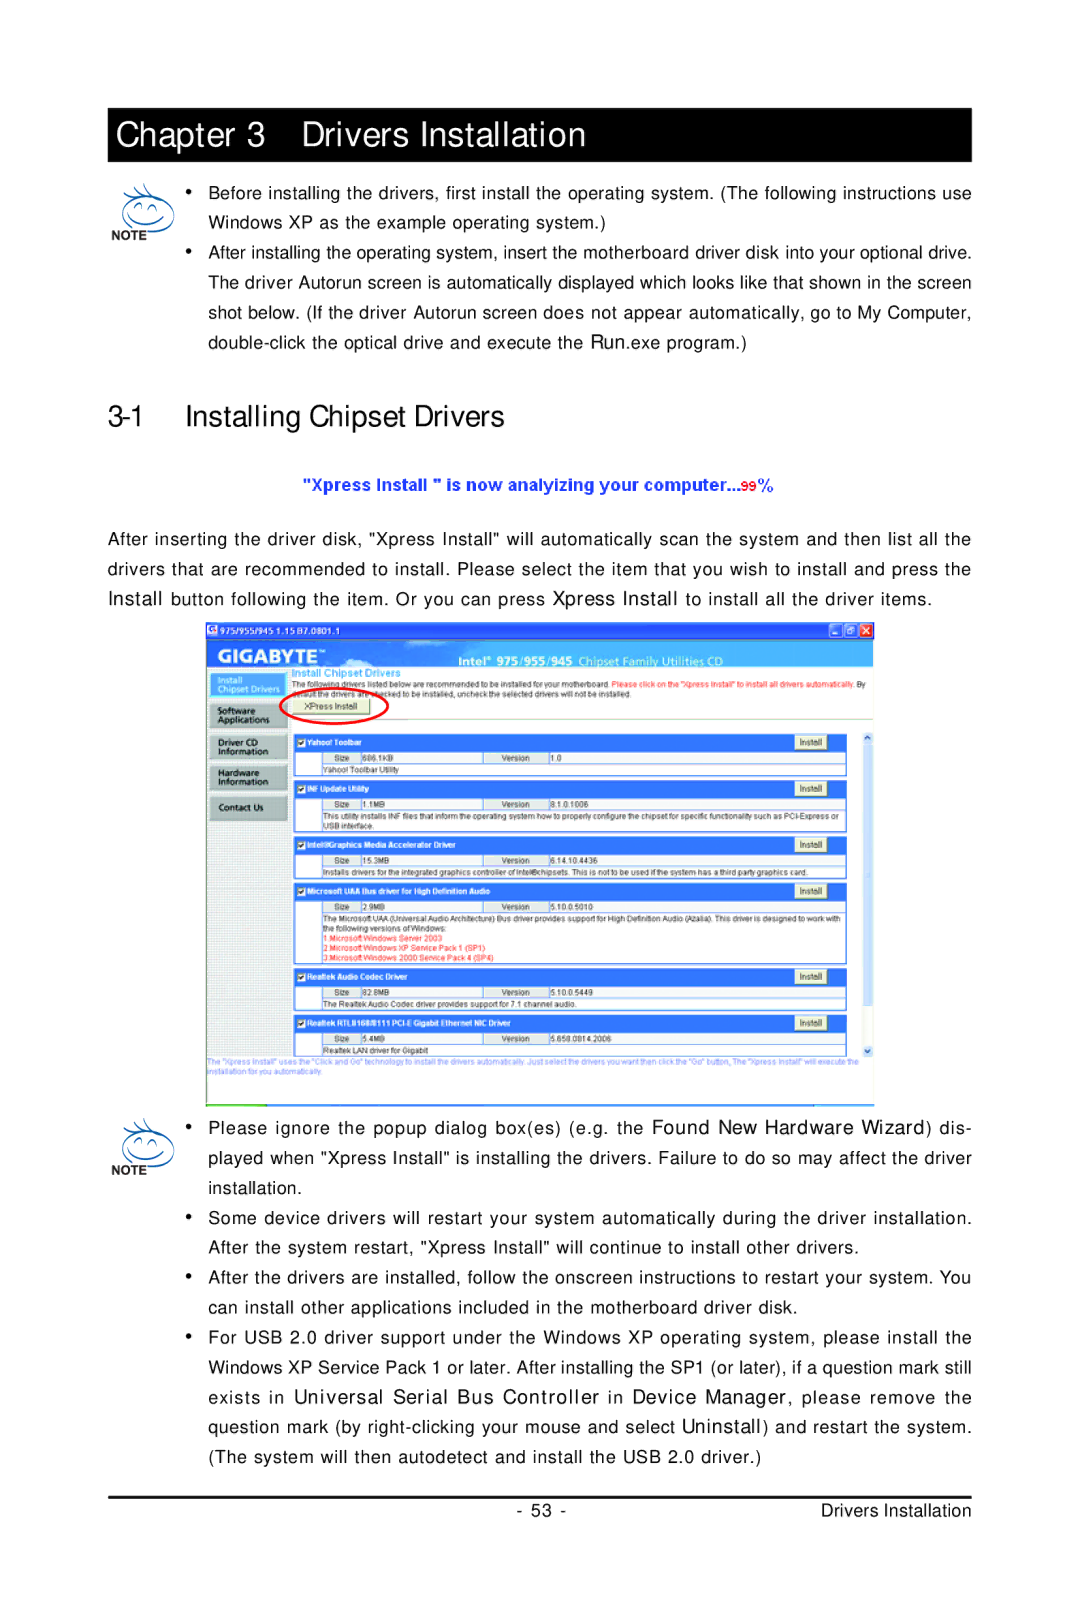
After inserting the driver disk, "Xpress Install" will automatically scan the system and then list all the drivers that are recommended to install. Please select the item that you wish to install and press the Install button following the item. Or you can press Xpress Install to install all the driver items.
•Please ignore the popup dialog box(es) (e.g. the Found New Hardware Wizard) dis-
played when "Xpress Install" is installing the drivers. Failure to do so may affect the driver installation.
•Some device drivers will restart your system automatically during the driver installation. After the system restart, "Xpress Install" will continue to install other drivers.
•After the drivers are installed, follow the onscreen instructions to restart your system. You can install other applications included in the motherboard driver disk.
•For USB 2.0 driver support under the Windows XP operating system, please install the Windows XP Service Pack 1 or later. After installing the SP1 (or later), if a question mark still exists in Universal Serial Bus Controller in Device Manager, please remove the question mark (by
- 53 - | Drivers Installation |