Installation Guide for POC Board
2Installation Guide for POC Board
2.1Before You Begin
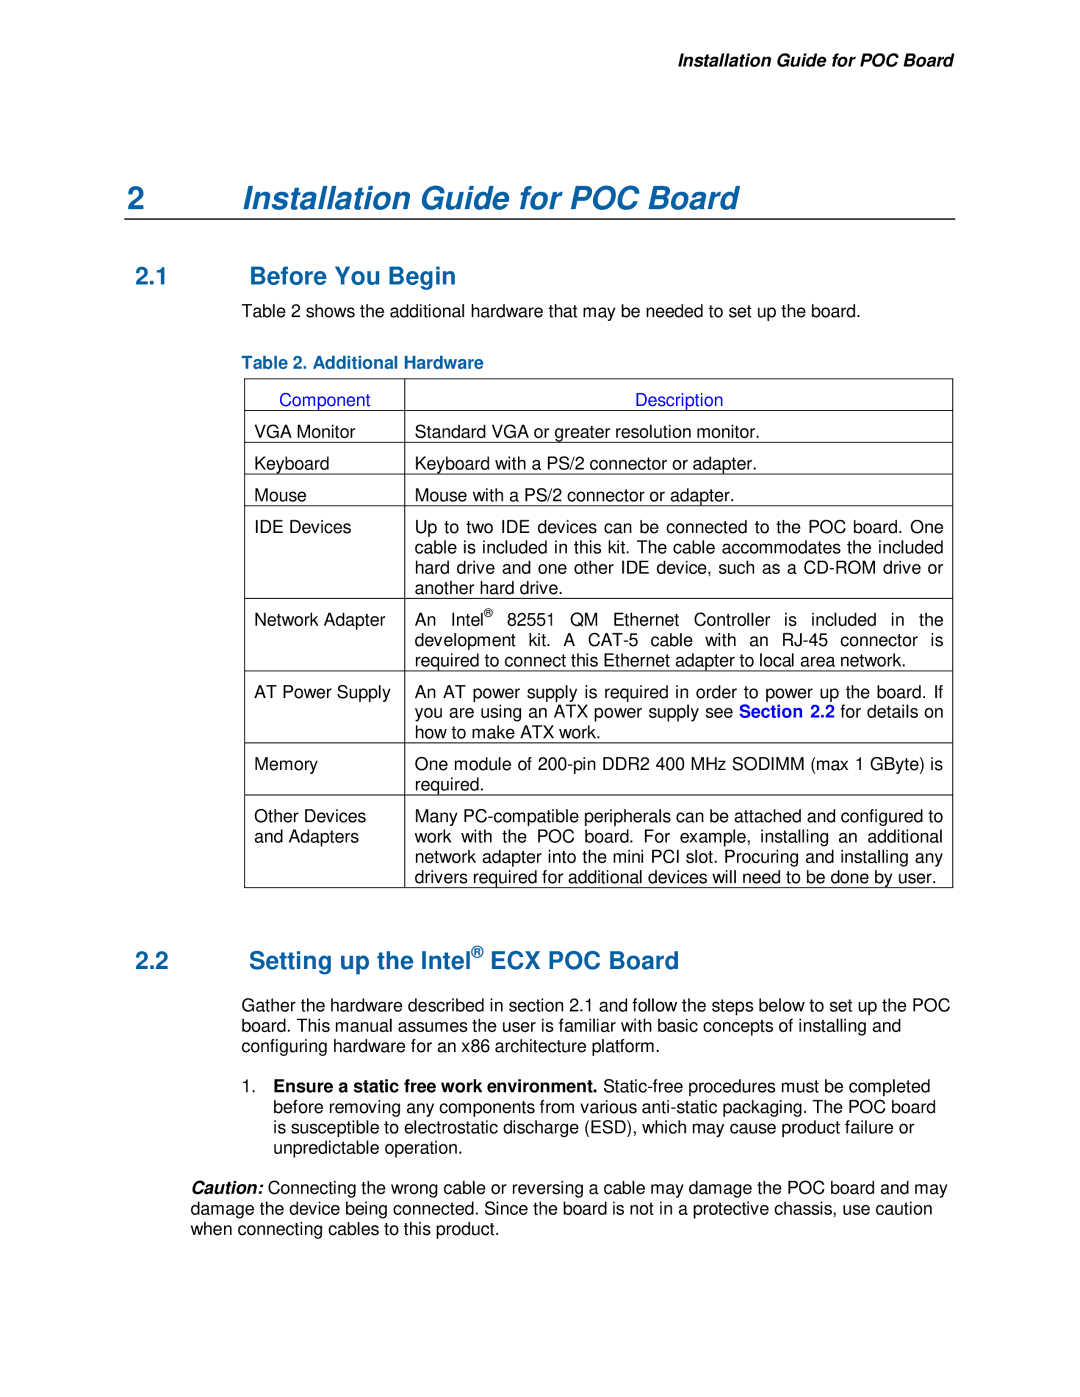
Table 2 shows the additional hardware that may be needed to set up the board.
Table 2. Additional Hardware
Component | Description |
VGA Monitor | Standard VGA or greater resolution monitor. |
Keyboard | Keyboard with a PS/2 connector or adapter. |
Mouse | Mouse with a PS/2 connector or adapter. |
IDE Devices | Up to two IDE devices can be connected to the POC board. One |
| cable is included in this kit. The cable accommodates the included |
| hard drive and one other IDE device, such as a |
| another hard drive. |
Network Adapter | An Intel® 82551 QM Ethernet Controller is included in the |
| development kit. A |
| required to connect this Ethernet adapter to local area network. |
AT Power Supply | An AT power supply is required in order to power up the board. If |
| you are using an ATX power supply see Section 2.2 for details on |
| how to make ATX work. |
Memory | One module of |
| required. |
Other Devices | Many |
and Adapters | work with the POC board. For example, installing an additional |
| network adapter into the mini PCI slot. Procuring and installing any |
| drivers required for additional devices will need to be done by user. |
2.2Setting up the Intel® ECX POC Board
Gather the hardware described in section 2.1 and follow the steps below to set up the POC board. This manual assumes the user is familiar with basic concepts of installing and configuring hardware for an x86 architecture platform.
1.Ensure a static free work environment.
Caution: Connecting the wrong cable or reversing a cable may damage the POC board and may damage the device being connected. Since the board is not in a protective chassis, use caution when connecting cables to this product.
