Attach the Small Bar of the Slide Assembly to the Server
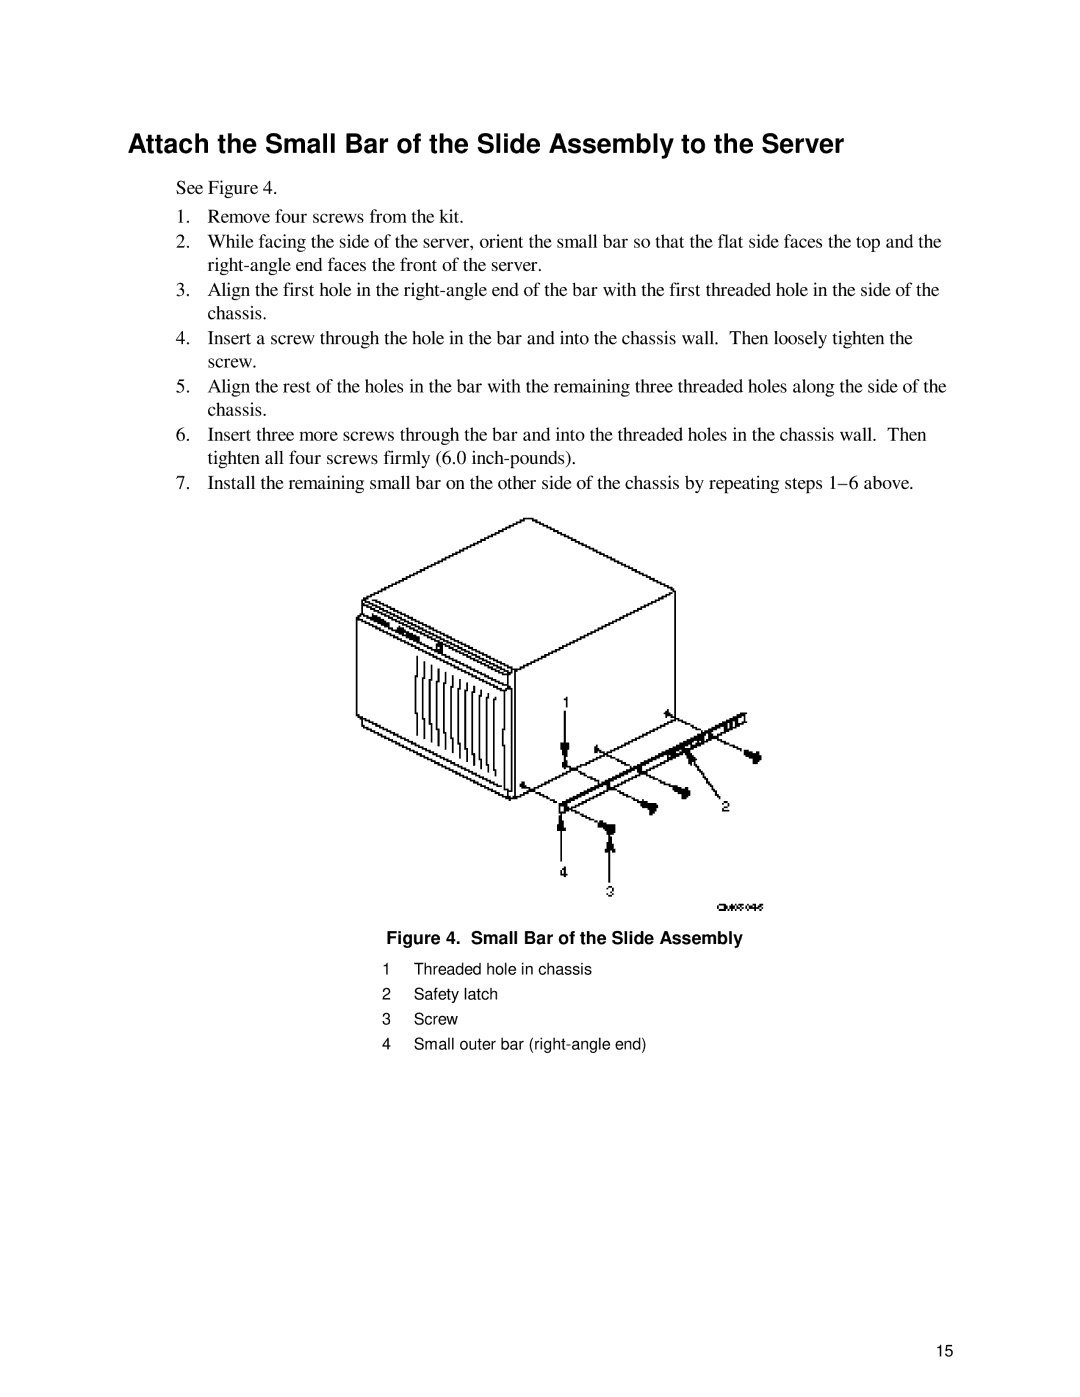
See Figure 4.
1.Remove four screws from the kit.
2.While facing the side of the server, orient the small bar so that the flat side faces the top and the
3.Align the first hole in the
4.Insert a screw through the hole in the bar and into the chassis wall. Then loosely tighten the screw.
5.Align the rest of the holes in the bar with the remaining three threaded holes along the side of the chassis.
6.Insert three more screws through the bar and into the threaded holes in the chassis wall. Then tighten all four screws firmly (6.0
7.Install the remaining small bar on the other side of the chassis by repeating steps
Figure 4. Small Bar of the Slide Assembly
1Threaded hole in chassis
2Safety latch
3Screw
4Small outer bar
15
