SE7221BA1-E specifications
The Intel SE7221BA1-E is a dual processor server motherboard designed for enterprise-level performance and reliability. Tailored for Intel's Xeon processors, it falls within the category of server-class motherboards, making it a preferred choice for data centers and businesses that require robust computing capability.One of the prominent features of the SE7221BA1-E is its support for Intel’s 64-bit architecture, which allows for the handling of large datasets and efficient multitasking. This motherboard accommodates two CPU sockets, specifically designed for Intel Xeon processors, enabling dual-processor configurations that significantly boost processing power and enhance performance for demanding applications.
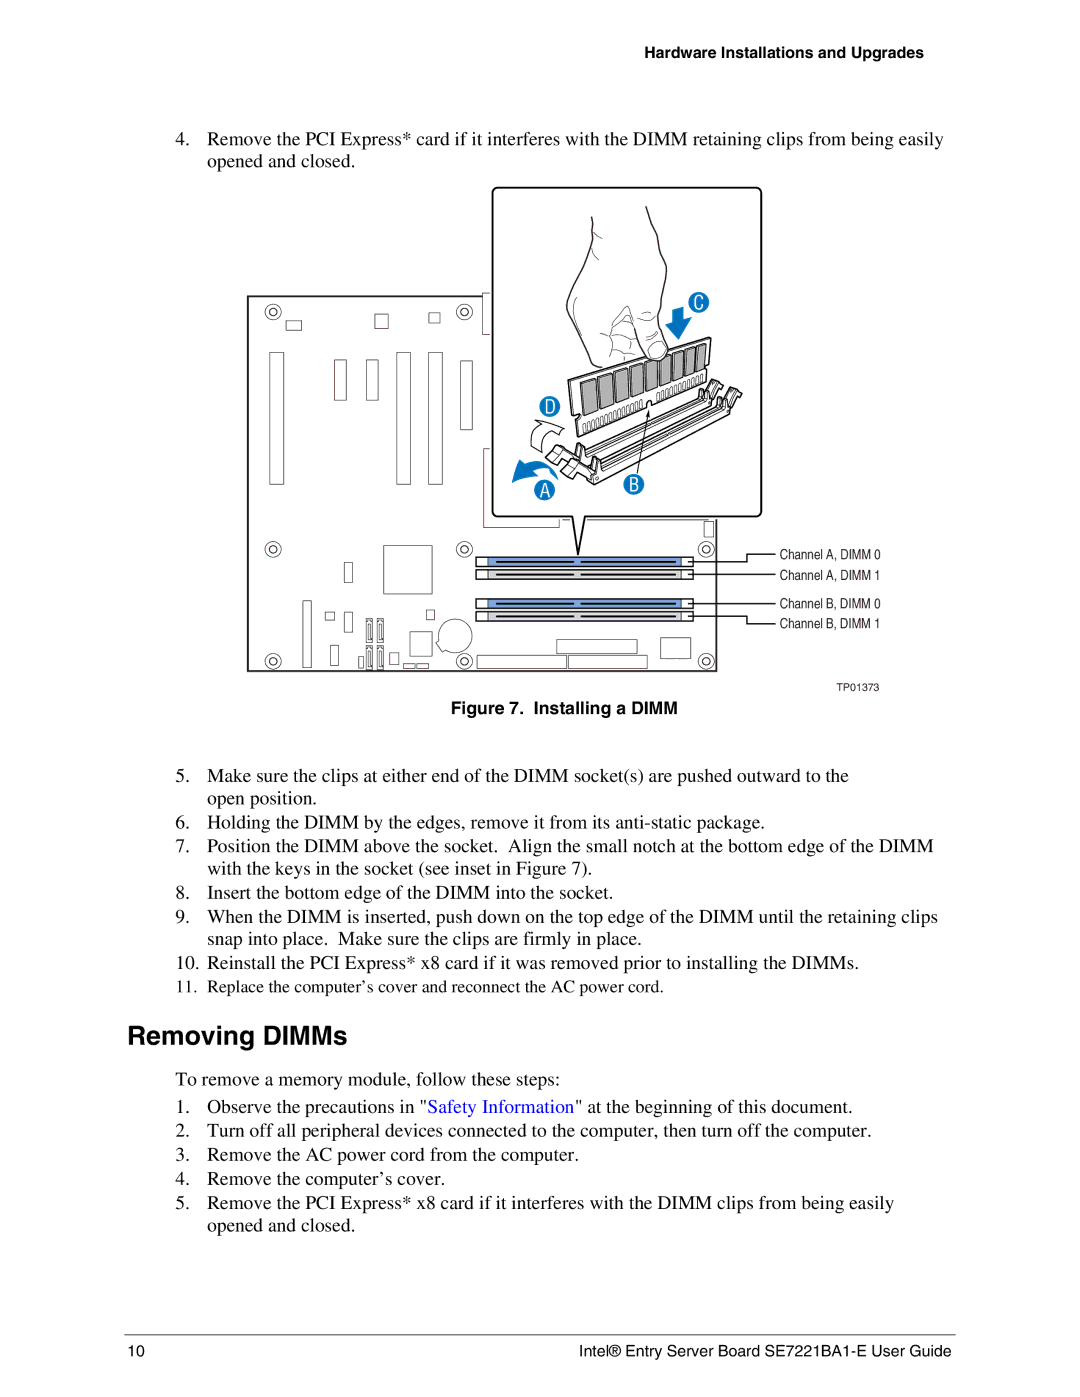
Memory capacity is another critical characteristic of the SE7221BA1-E. It supports up to 16 GB of DDR2 RAM across its four DIMM slots. This substantial memory capability is essential for multiple applications running simultaneously, ensuring that the server can handle high workloads without lag or performance dips. The advanced ECC (Error-Correcting Code) support adds an extra layer of reliability, making it ideal for critical computing environments.
Storage capabilities are well addressed by this motherboard, which features multiple SATA and PATA ports. These interfaces allow for various storage configurations, accommodating a combination of hard drives and SSDs. RAID support enhances data redundancy and performance, which is crucial for enterprise storage solutions.
In terms of connectivity, the SE7221BA1-E includes integrated Gigabit Ethernet, ensuring fast network connections that are vital for server performance and data transfer. Moreover, the motherboard comes equipped with various expansion slots, including PCI Express and PCI, providing flexibility for further enhancements and the integration of additional components such as network cards or graphics processing units.
The Intel SE7221BA1-E motherboard is built on Intel's platform, making it compatible with a range of server technologies and management tools such as Intel Remote Management Module (RMM), enabling remote monitoring and management capabilities. This is particularly beneficial for IT administrators who need to ensure system stability and responsiveness without being physically present.
In conclusion, the Intel SE7221BA1-E motherboard is a tried-and-true solution for businesses looking to establish a solid server infrastructure. Its dual-processor support, substantial memory capacity, robust storage options, and advanced networking capabilities make it ideally suited for handling the demands of modern enterprise environments.