SECTION
Installing/Removing the Propel Back
WARNING
The position of the Propel Back is directly related to the chair’s stability. It may be necessary to reposition the front casters, rear wheels, back angle, and/or seat depth before use. Use EXTREME caution when using a new seating position.
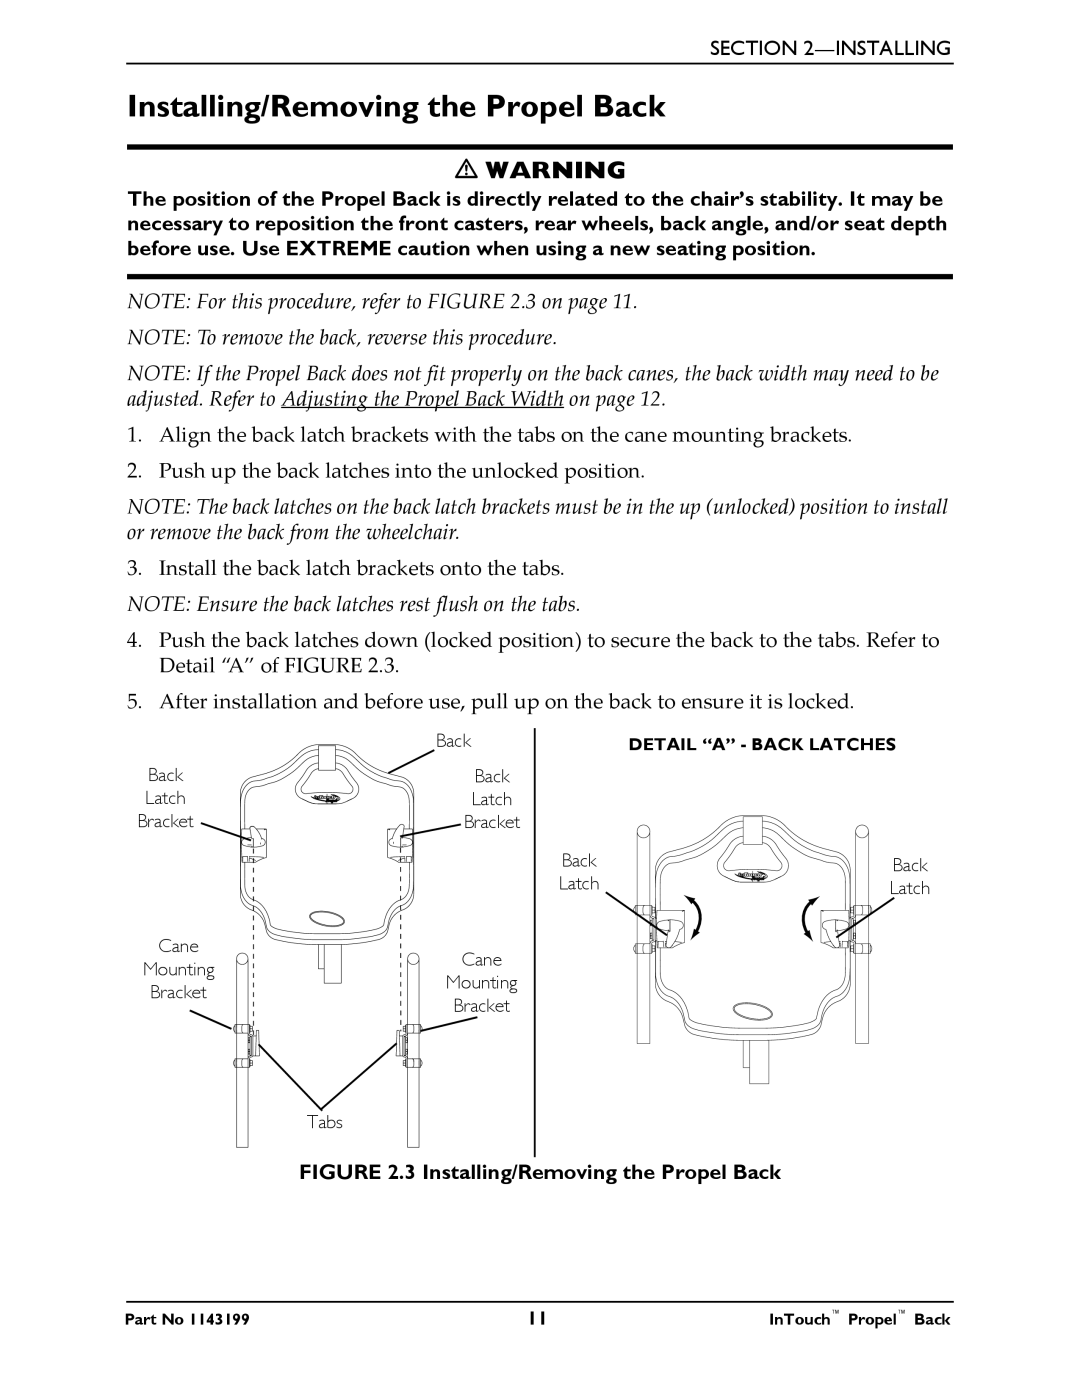
NOTE: For this procedure, refer to FIGURE 2.3 on page 11.
NOTE: To remove the back, reverse this procedure.
NOTE: If the Propel Back does not fit properly on the back canes, the back width may need to be adjusted. Refer to Adjusting the Propel Back Width on page 12.
1.Align the back latch brackets with the tabs on the cane mounting brackets.
2.Push up the back latches into the unlocked position.
NOTE: The back latches on the back latch brackets must be in the up (unlocked) position to install or remove the back from the wheelchair.
3. Install the back latch brackets onto the tabs.
NOTE: Ensure the back latches rest flush on the tabs.
4.Push the back latches down (locked position) to secure the back to the tabs. Refer to Detail “A” of FIGURE 2.3.
5.After installation and before use, pull up on the back to ensure it is locked.
| Back |
Back | Back |
Latch | Latch |
Bracket | Bracket |
Cane | Cane | |
Mounting | ||
Mounting | ||
Bracket | ||
Bracket | ||
|
DETAIL “A” - BACK LATCHES
Back | Back |
Latch | Latch |
Tabs
