SECTION
SECTION 2—INSTALLING
WARNING
Check ALL fasteners periodically to ensure that mechanical connections and attaching hardware are tightened securely - otherwise injury or damage may occur.
DO NOT continue to use this product if problems are discovered. Corrective maintenance can be performed at or arranged through your equipment supplier.
The Propel Back is not designed for use with
Installation Overview
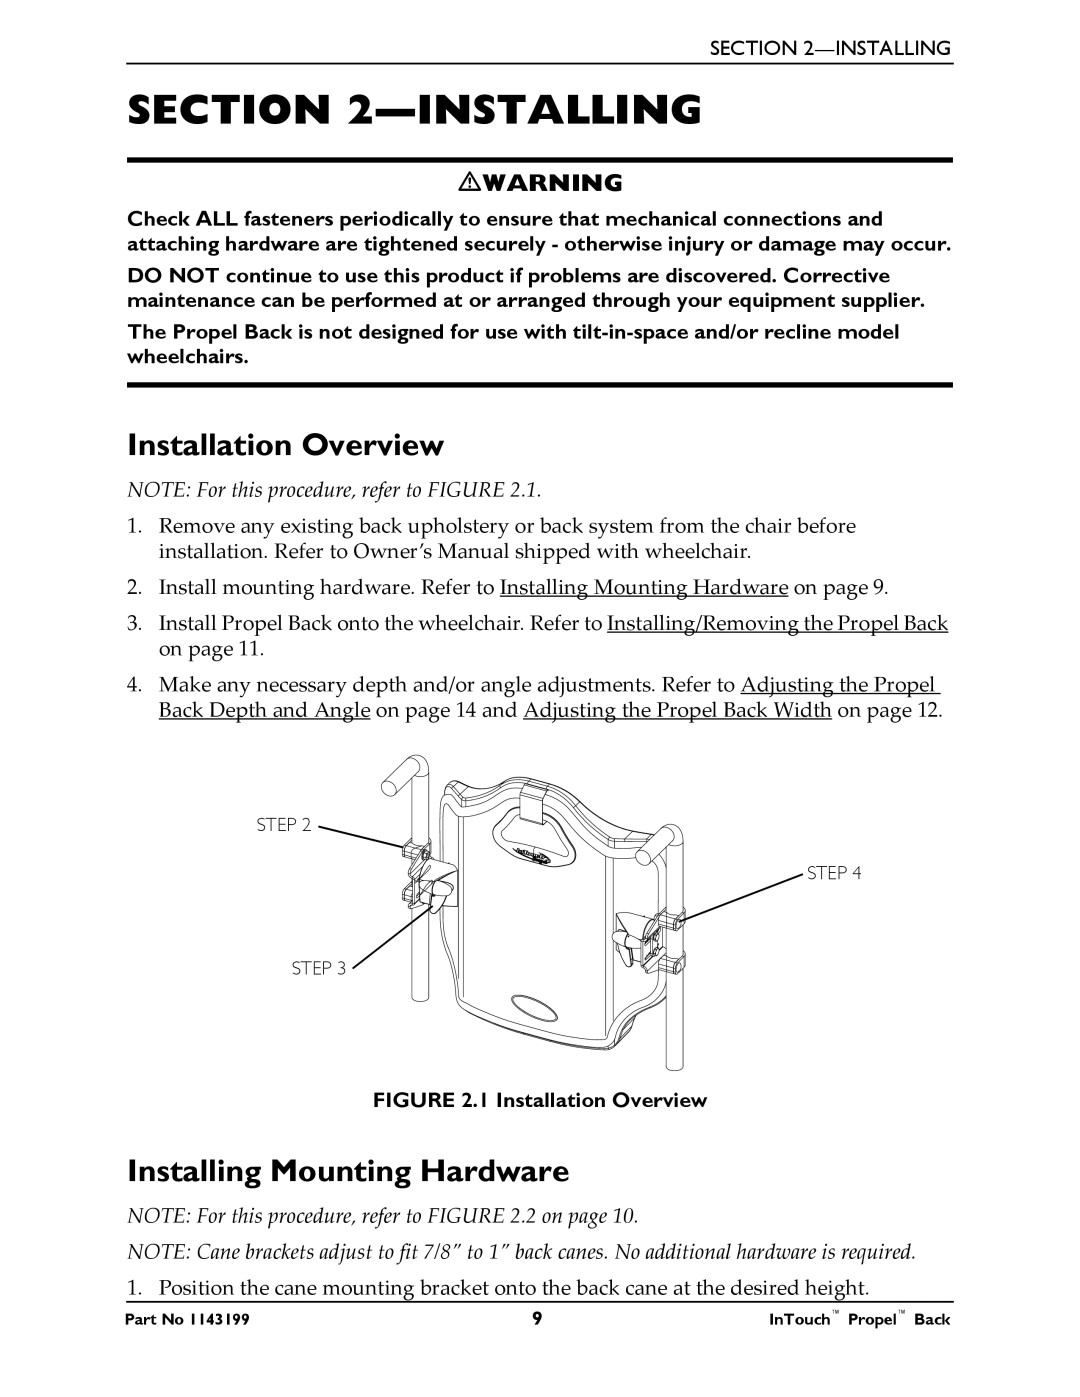
NOTE: For this procedure, refer to FIGURE 2.1.
1.Remove any existing back upholstery or back system from the chair before installation. Refer to Owner’s Manual shipped with wheelchair.
2.Install mounting hardware. Refer to Installing Mounting Hardware on page 9.
3.Install Propel Back onto the wheelchair. Refer to Installing/Removing the Propel Back on page 11.
4.Make any necessary depth and/or angle adjustments. Refer to Adjusting the Propel Back Depth and Angle on page 14 and Adjusting the Propel Back Width on page 12.
STEP 2
STEP 4
STEP 3
FIGURE 2.1 Installation Overview
Installing Mounting Hardware
NOTE: For this procedure, refer to FIGURE 2.2 on page 10.
NOTE: Cane brackets adjust to fit 7/8” to 1” back canes. No additional hardware is required. 1. Position the cane mounting bracket onto the back cane at the desired height.