SEAT AND BACK | SECTION 5 | |
|
|
|
Section 5 - Seat and Back - includes the following:
Replacing the Slip On Back Upholstery | Using Seat Cover |
Removing/Installing Padded Seat | Removing/Installing Seat |
| Positioning Strap |
WARNING
After ANY adjustments, repair or service and BEFORE use, make sure all at- taching hardware is tightened securely - otherwise injury or damage may occur.
When installing the seat, ensure ONLY open palms (and not fingers) are used to press down on the seat to lock on frame. Otherwise injury or damage may occur.
REPLACING THE SLIP ON BACK UPHOLSTERY (FIGURE 1)
SEAT AND BACK
1. | Remove the two (2) mounting screws |
| and washers that secure the existing |
| back upholstery to two (2) back canes. |
2. | Pull existing back upholstery up and |
| over the two (2) back canes. |
Washer
Back Upholstery
3. | Install the NEW back upholstery |
| over the two (2) back canes. |
4. | Secure the NEW back upholstery to |
Mounting
Screws
Back Cane
the back canes with the existing |
mounting screws and washers. |
FIGURE 1 - REPLACING THE SLIP
ON BACK UPHOLSTERY
REMOVING/INSTALLING PADDED SEAT
REMOVING (FIGURE 2)
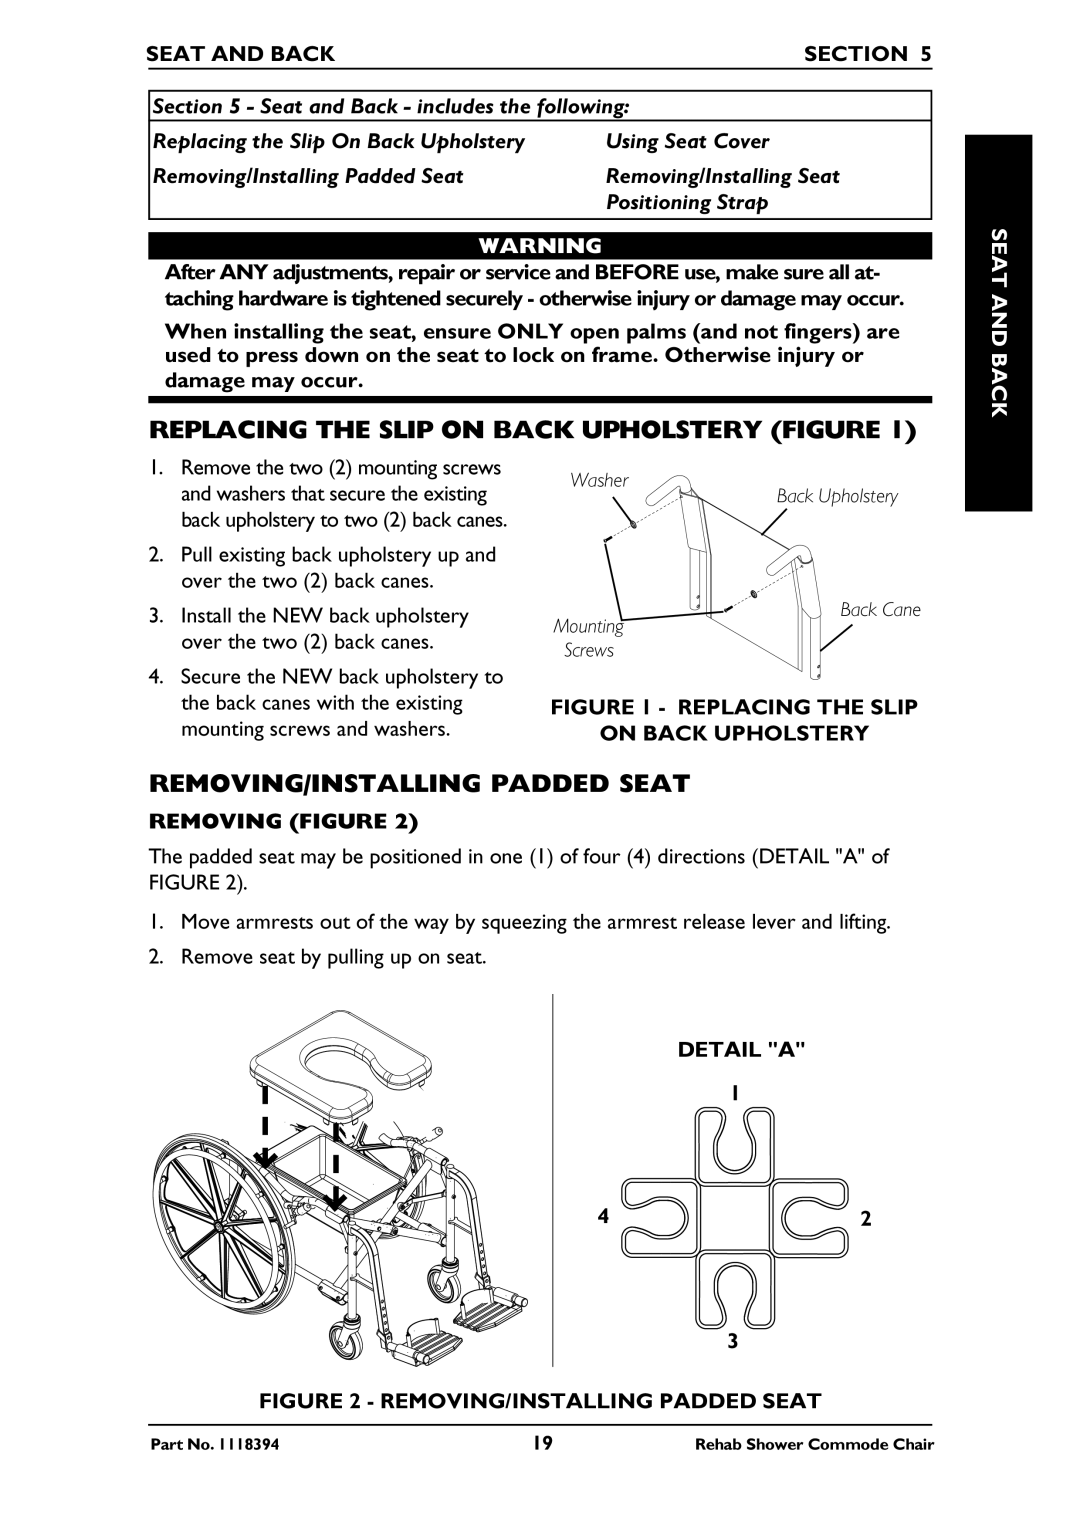
The padded seat may be positioned in one (1) of four (4) directions (DETAIL "A" of FIGURE 2).
1.Move armrests out of the way by squeezing the armrest release lever and lifting.
2.Remove seat by pulling up on seat.
DETAIL "A" 1
4 | 2 |
3
FIGURE 2 - REMOVING/INSTALLING PADDED SEAT
Part No. 1118394 | 19 | Rehab Shower Commode Chair |
