PROCEDURE 4 | ADJUSTING THE INFINITY LOBACK |
A D J U S T I N G
T H E
L O B A C K
7.Reinstall the Infinity LoBack onto the wheelchair. Refer to INSTALLING/REMOVING THE INFINITY LOBACK in PROCEDURE 3 of this manual.
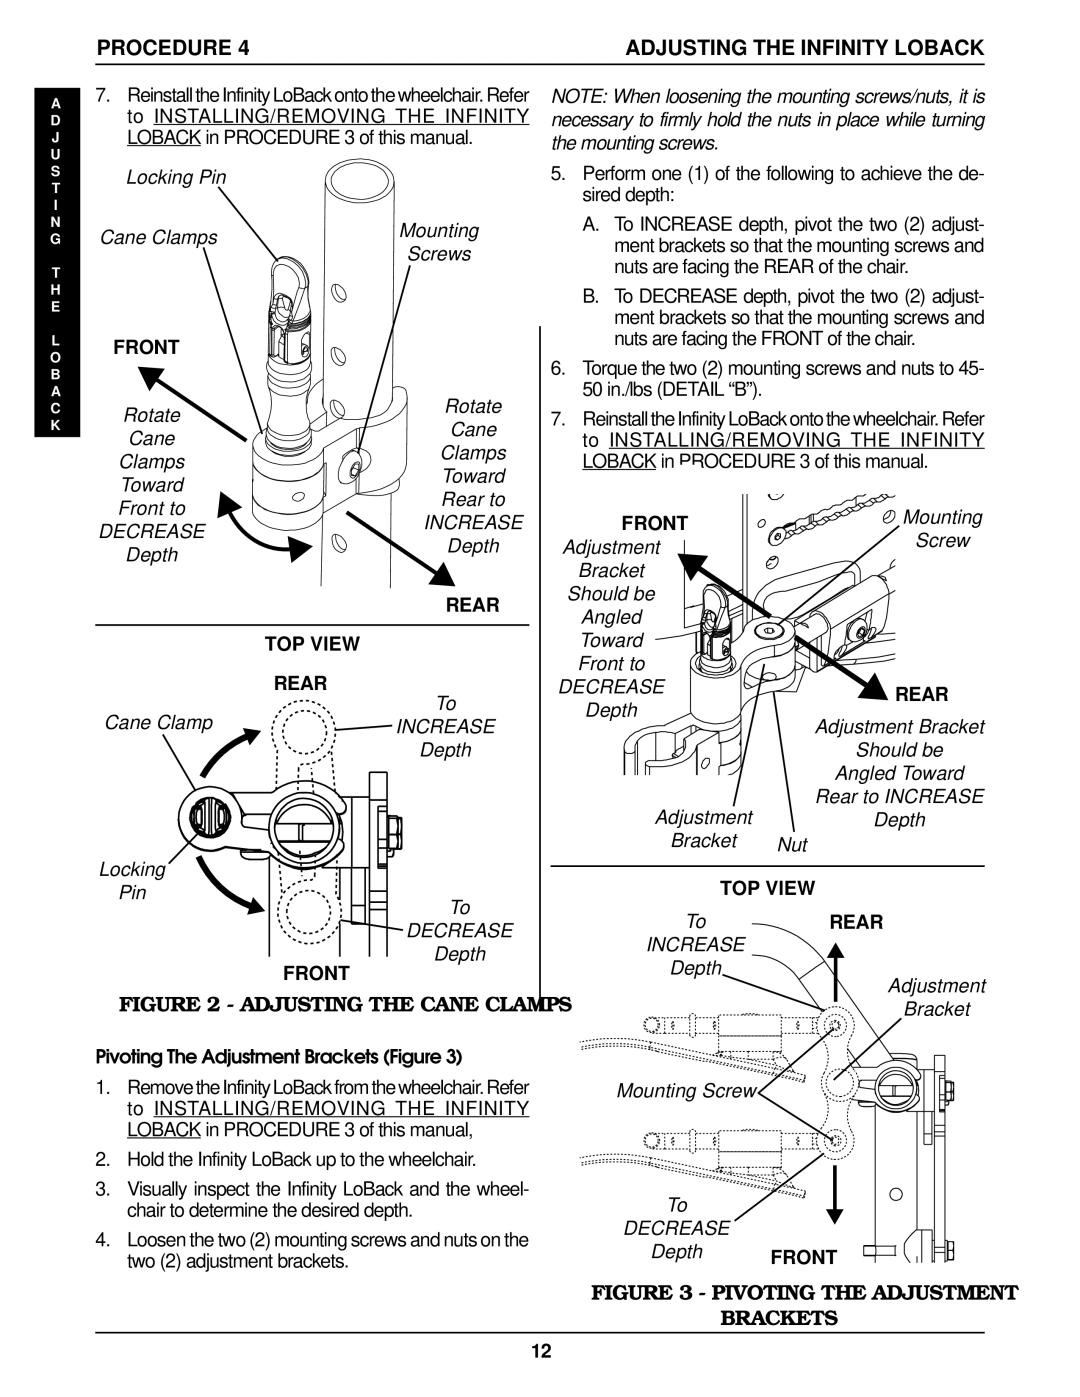
Locking Pin
Cane Clamps | Mounting | |
Screws | ||
|
FRONT |
| |
Rotate | Rotate | |
Cane | ||
Cane | ||
Clamps | ||
Clamps | ||
Toward | ||
Toward | ||
Rear to | ||
Front to | ||
INCREASE | ||
DECREASE | ||
Depth | ||
Depth | ||
| ||
| REAR |
TOP VIEW
REAR
To
Cane ClampINCREASE
Depth
Locking
Pin
To
DECREASE
Depth
FRONT
FIGURE 2 - ADJUSTING THE CANE CLAMPS
Pivoting The Adjustment Brackets (Figure 3)
1.Remove the Infinity LoBack from the wheelchair. Refer to INSTALLING/REMOVING THE INFINITY LOBACK in PROCEDURE 3 of this manual,
2.Hold the Infinity LoBack up to the wheelchair.
3.Visually inspect the Infinity LoBack and the wheel- chair to determine the desired depth.
4.Loosen the two (2) mounting screws and nuts on the two (2) adjustment brackets.
NOTE: When loosening the mounting screws/nuts, it is necessary to firmly hold the nuts in place while turning the mounting screws.
5.Perform one (1) of the following to achieve the de- sired depth:
A.To INCREASE depth, pivot the two (2) adjust- ment brackets so that the mounting screws and nuts are facing the REAR of the chair.
B.To DECREASE depth, pivot the two (2) adjust- ment brackets so that the mounting screws and nuts are facing the FRONT of the chair.
6.Torque the two (2) mounting screws and nuts to 45- 50 in./lbs (DETAIL “B”).
7.Reinstall the Infinity LoBack onto the wheelchair. Refer to INSTALLING/REMOVING THE INFINITY LOBACK in PROCEDURE 3 of this manual.
FRONT | Mounting | |
Screw | ||
Adjustment | ||
| ||
Bracket |
|
Should be |
| |
Angled |
| |
Toward |
| |
Front to |
| |
DECREASE | REAR | |
Depth | ||
Adjustment Bracket | ||
| ||
| Should be | |
| Angled Toward | |
Adjustment | Rear to INCREASE | |
Depth | ||
Bracket | Nut |
TOP VIEW
ToREAR
INCREASE
Depth
Adjustment
Bracket
Mounting Screw
To
DECREASE
Depth FRONT
FIGURE 3 - PIVOTING THE ADJUSTMENT
BRACKETS
12