PROCEDURE 4 | ADJUSTING THE INFINITY LOBACK |
A D J U S T I N G
T H E
L O B A C K
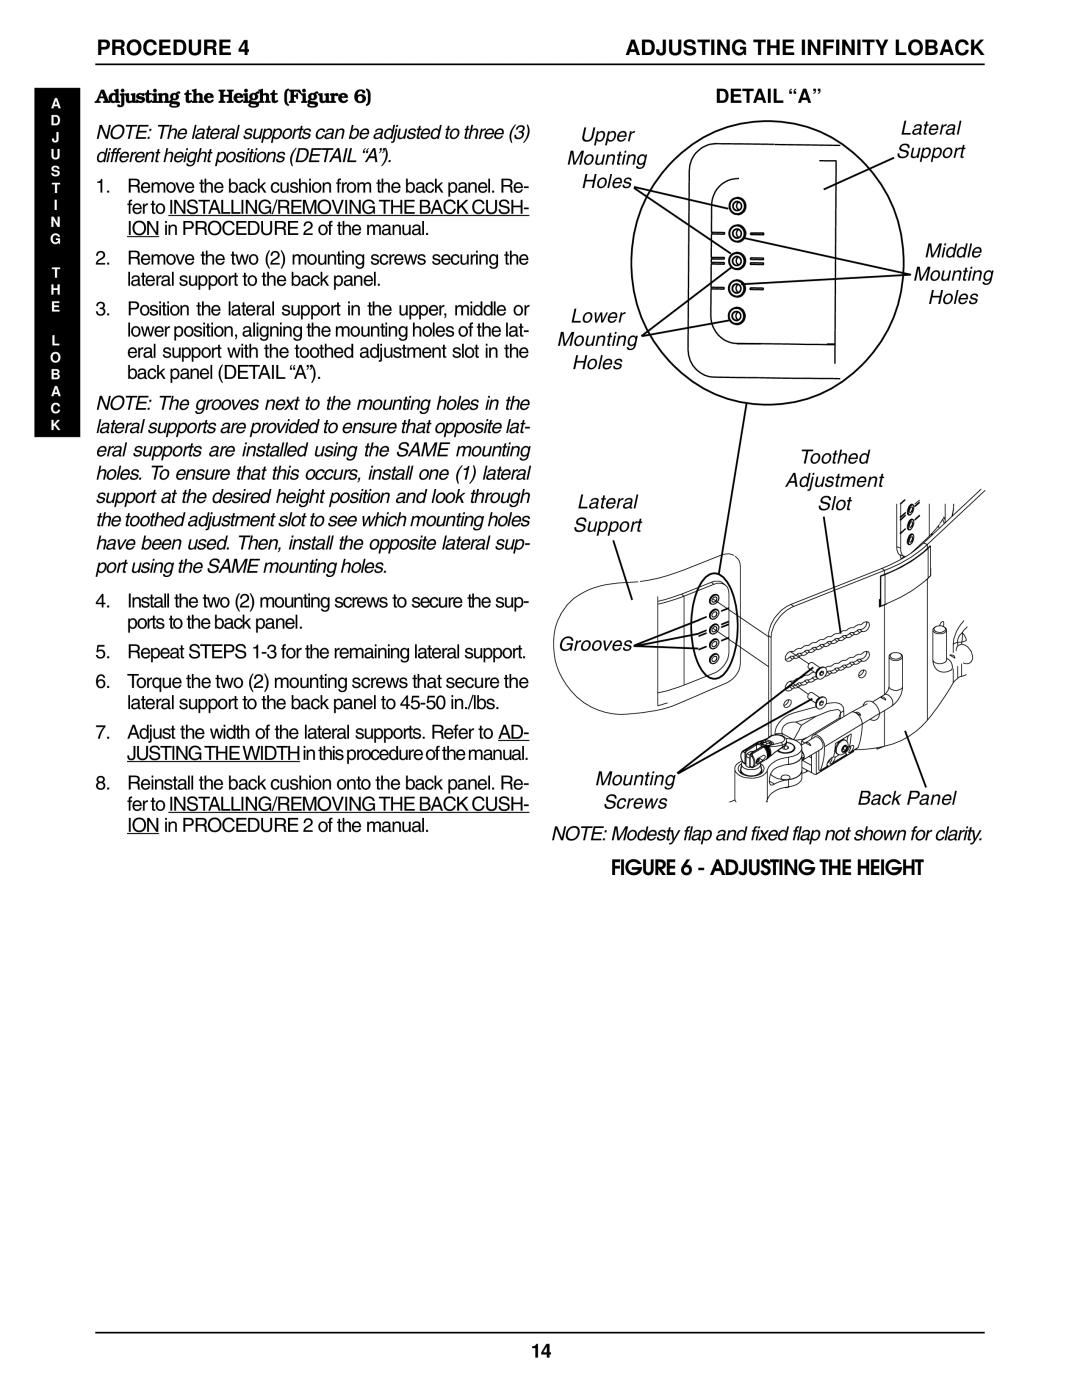
Adjusting the Height (Figure 6)
NOTE: The lateral supports can be adjusted to three (3) different height positions (DETAIL “A”).
1.Remove the back cushion from the back panel. Re- fer to INSTALLING/REMOVING THE BACK CUSH- ION in PROCEDURE 2 of the manual.
2.Remove the two (2) mounting screws securing the lateral support to the back panel.
3.Position the lateral support in the upper, middle or lower position, aligning the mounting holes of the lat- eral support with the toothed adjustment slot in the back panel (DETAIL “A”).
NOTE: The grooves next to the mounting holes in the lateral supports are provided to ensure that opposite lat- eral supports are installed using the SAME mounting holes. To ensure that this occurs, install one (1) lateral support at the desired height position and look through the toothed adjustment slot to see which mounting holes have been used. Then, install the opposite lateral sup- port using the SAME mounting holes.
4.Install the two (2) mounting screws to secure the sup- ports to the back panel.
5.Repeat STEPS
6.Torque the two (2) mounting screws that secure the lateral support to the back panel to
7.Adjust the width of the lateral supports. Refer to AD- JUSTINGTHEWIDTHinthisprocedureofthemanual.
8.Reinstall the back cushion onto the back panel. Re- fer to INSTALLING/REMOVING THE BACK CUSH- ION in PROCEDURE 2 of the manual.
DETAIL “A”
Upper | Lateral | |
Support | ||
Mounting | ||
| ||
Holes |
| |
| Middle | |
| Mounting | |
Lower | Holes | |
| ||
Mounting |
| |
Holes |
|
Toothed
Adjustment
LateralSlot
Support
Grooves![]()
![]()
Mounting | Back Panel |
Screws |
NOTE: Modesty flap and fixed flap not shown for clarity.
FIGURE 6 - ADJUSTING THE HEIGHT
14
