PERSONAL SEATAND CUSHION RIGIDIZER
Assembly, Installation and Operating Instructions
NOTE: Check all parts for shipping damage and test before use. In case of damage, DO NOT use. Contact your equipment supplier for further instruction.
SAFETY SUMMARY
The following recommendations are made for the safe installation of the Personal Seat and Cushion Rigidizer:
WARNINGS/CAUTIONS notices apply to hazards or unsafe practices which could result in per- sonal injury and/or property damage.
WARNING
DO NOT install this equipment without first reading andunderstandingthisinstructionsheet.Ifyouare unable to understand these instructions, contact a healthcare professional, dealer or technical personnel if applicable before attempting to install this equipment - otherwise, injury or dam- age may occur.
The best way to avoid problems related to pres- sure sores is to understand their causes and and your role in a skin management program.
Your therapist and physician should be con- sulted if you have questions regarding individual limitations and needs.
All cushions used for the prevention or treat- ment of decubitus ulcers (pressure sores) should be selected carefully. Working with your your therapist, and physician is the best way to assure that a cushion choice matches your in- dividual needs.
As the needs of the individual become more complex, the cushion evaluation becomes more inportant.
Skin condition should be checked very fre- quently after the provision of any new cushion.
INTRODUCTION
The Personal Seat cushion is designed to provide pel- vic stability, leg positioning and pressure management for the user. The cover is made from a water repellant fabric to protect the foam and the foam is coated with a water repellant coating to provide additional protection.
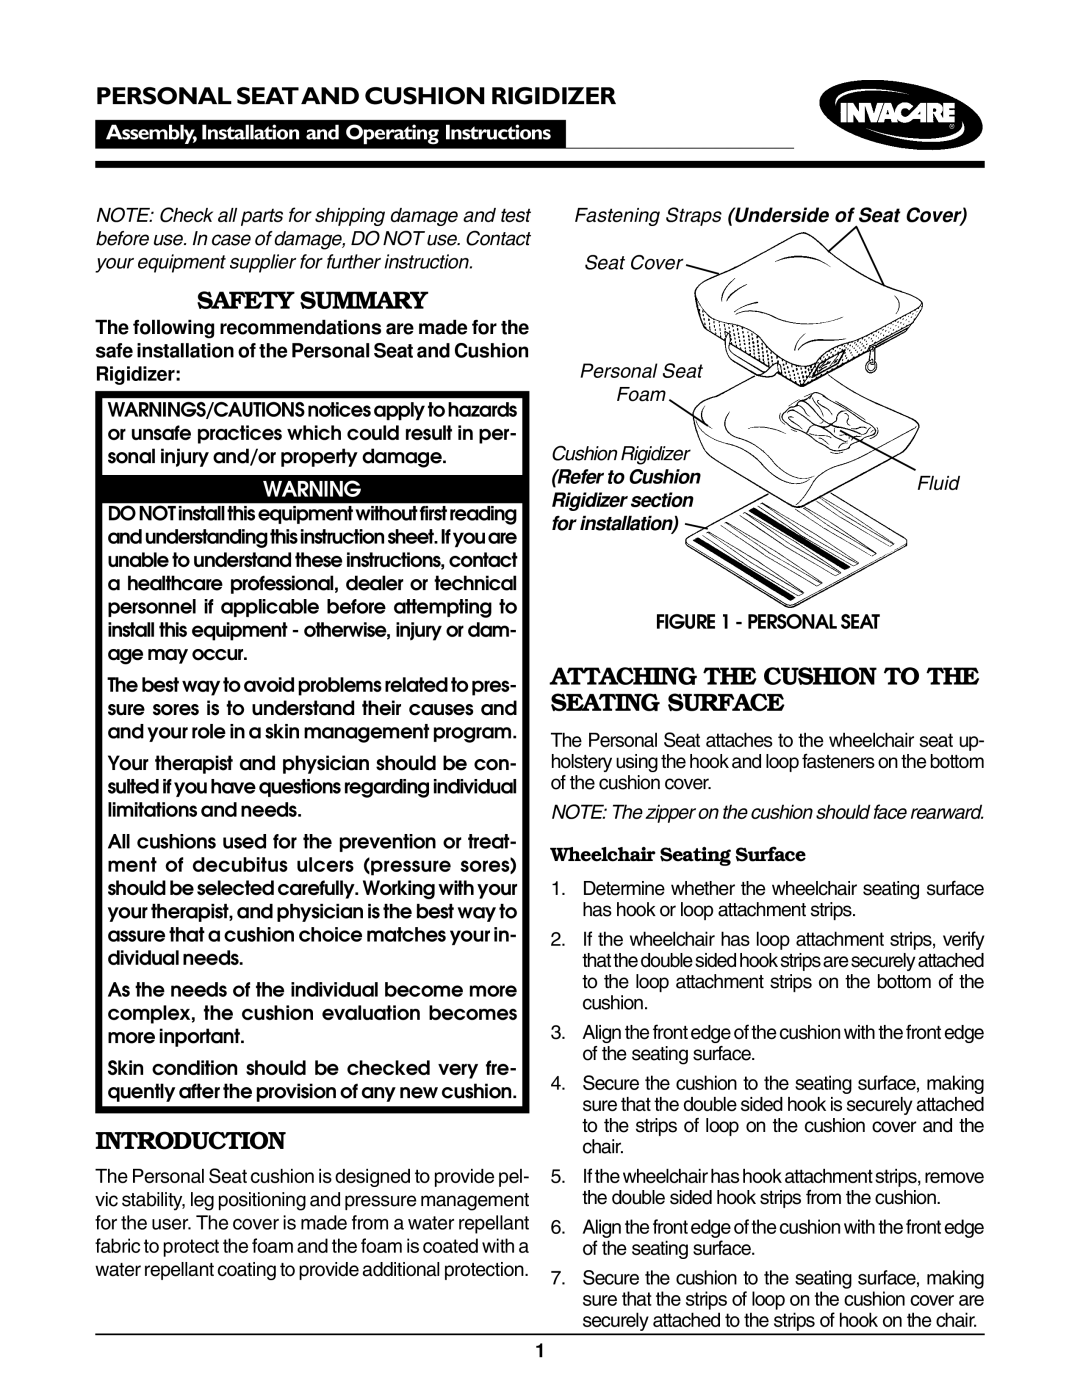
Fastening Straps (Underside of Seat Cover)
Seat Cover
Personal Seat
Foam
Cushion Rigidizer
(Refer to CushionFluid
Rigidizer section for installation) ![]()
FIGURE 1 - PERSONAL SEAT
ATTACHING THE CUSHION TO THE SEATING SURFACE
The Personal Seat attaches to the wheelchair seat up- holstery using the hook and loop fasteners on the bottom of the cushion cover.
NOTE: The zipper on the cushion should face rearward.
Wheelchair Seating Surface
1.Determine whether the wheelchair seating surface has hook or loop attachment strips.
2.If the wheelchair has loop attachment strips, verify thatthedoublesidedhookstripsaresecurelyattached to the loop attachment strips on the bottom of the cushion.
3.Align the front edge of the cushion with the front edge of the seating surface.
4.Secure the cushion to the seating surface, making sure that the double sided hook is securely attached to the strips of loop on the cushion cover and the chair.
5.If the wheelchair has hook attachment strips, remove the double sided hook strips from the cushion.
6.Align the front edge of the cushion with the front edge of the seating surface.
7.Secure the cushion to the seating surface, making sure that the strips of loop on the cushion cover are securely attached to the strips of hook on the chair.
1