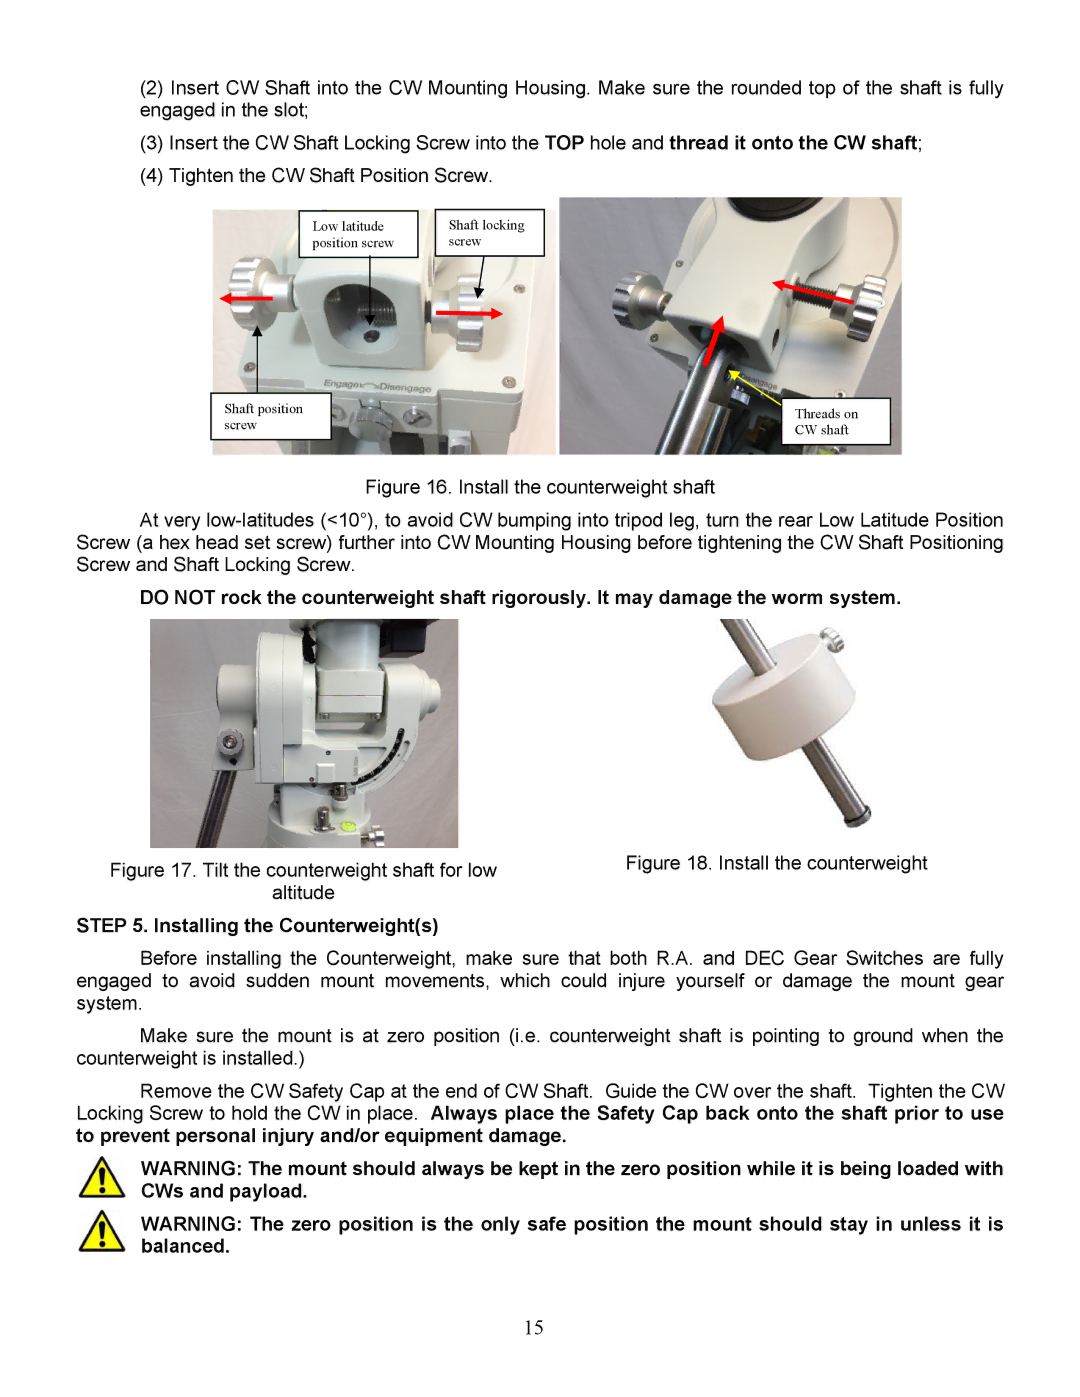
(2)Insert CW Shaft into the CW Mounting Housing. Make sure the rounded top of the shaft is fully engaged in the slot;
(3)Insert the CW Shaft Locking Screw into the TOP hole and thread it onto the CW shaft;
(4)Tighten the CW Shaft Position Screw.
Low latitude position screw
Shaft locking screw
Shaft position screw
Threads on CW shaft
Figure 16. Install the counterweight shaft
At very low-latitudes (<10°), to avoid CW bumping into tripod leg, turn the rear Low Latitude Position Screw (a hex head set screw) further into CW Mounting Housing before tightening the CW Shaft Positioning Screw and Shaft Locking Screw.
DO NOT rock the counterweight shaft rigorously. It may damage the worm system.
Figure 17. Tilt the counterweight shaft for low | Figure 18. Install the counterweight |
altitude |
|
STEP 5. Installing the Counterweight(s)
Before installing the Counterweight, make sure that both R.A. and DEC Gear Switches are fully engaged to avoid sudden mount movements, which could injure yourself or damage the mount gear system.
Make sure the mount is at zero position (i.e. counterweight shaft is pointing to ground when the counterweight is installed.)
Remove the CW Safety Cap at the end of CW Shaft. Guide the CW over the shaft. Tighten the CW Locking Screw to hold the CW in place. Always place the Safety Cap back onto the shaft prior to use to prevent personal injury and/or equipment damage.
WARNING: The mount should always be kept in the zero position while it is being loaded with CWs and payload.
WARNING: The zero position is the only safe position the mount should stay in unless it is balanced.
15