∙BACK Key: Move back to the previous screen, or end/cancel current operation, such as slewing.
∙ENTER Key: Confirm an input, go to the next menu, select a choice, or slew the telescope to a selected object.
∙Arrow (▲▼◄►) Keys: The arrow keys are used to control the movement of DEC and R.A. axes. Press and hold
∙Number Keys: Input numerical values. Also used to adjust speeds (1: 1X; 2: 2X; 3: 8X; 4: 16X; 5:
64X; 6: 128X; 7: 256X; 8: 512X; 9: MAX)
∙Light Key(☼): Turns on/off the red LED reading light on the back of the controller.
∙? Key: Identify and display bright stars or objects where the telescope points to.
∙STOP/0 Key: Stop the mount during GOTO. Also toggling between start and stop tracking.
∙HBX (Handbox) port: connect the HC to the CEM60 mount using a
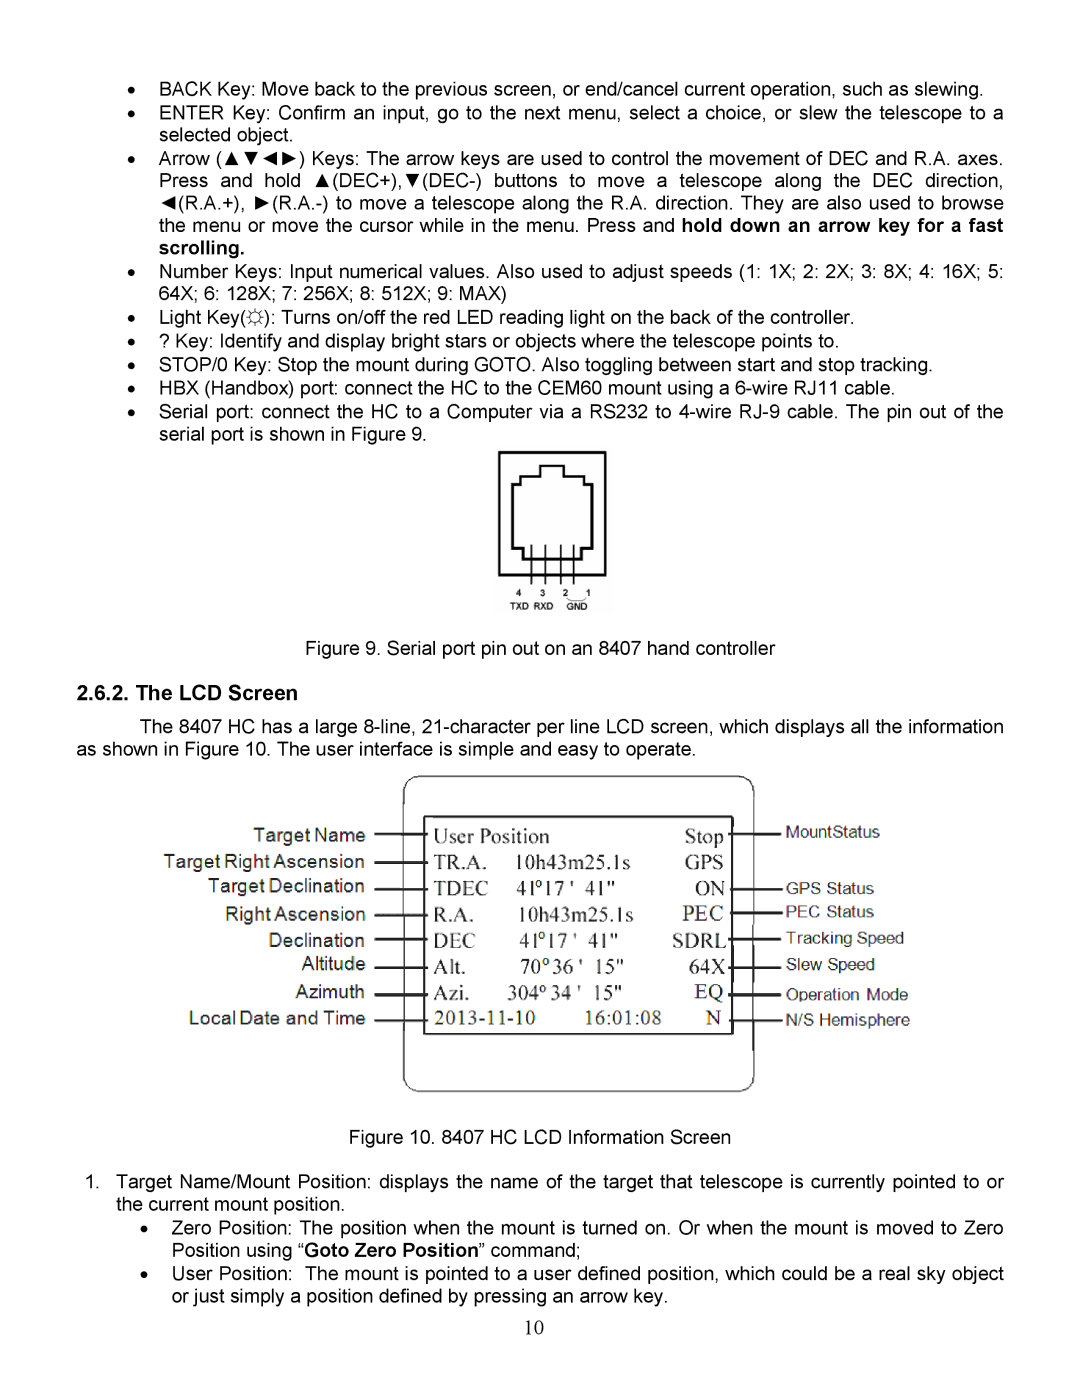
∙Serial port: connect the HC to a Computer via a RS232 to
Figure 9. Serial port pin out on an 8407 hand controller
2.6.2. The LCD Screen
The 8407 HC has a large
Figure 10. 8407 HC LCD Information Screen
1.Target Name/Mount Position: displays the name of the target that telescope is currently pointed to or the current mount position.
∙Zero Position: The position when the mount is turned on. Or when the mount is moved to Zero Position using “Goto Zero Position” command;
∙User Position: The mount is pointed to a user defined position, which could be a real sky object or just simply a position defined by pressing an arrow key.
10
