|
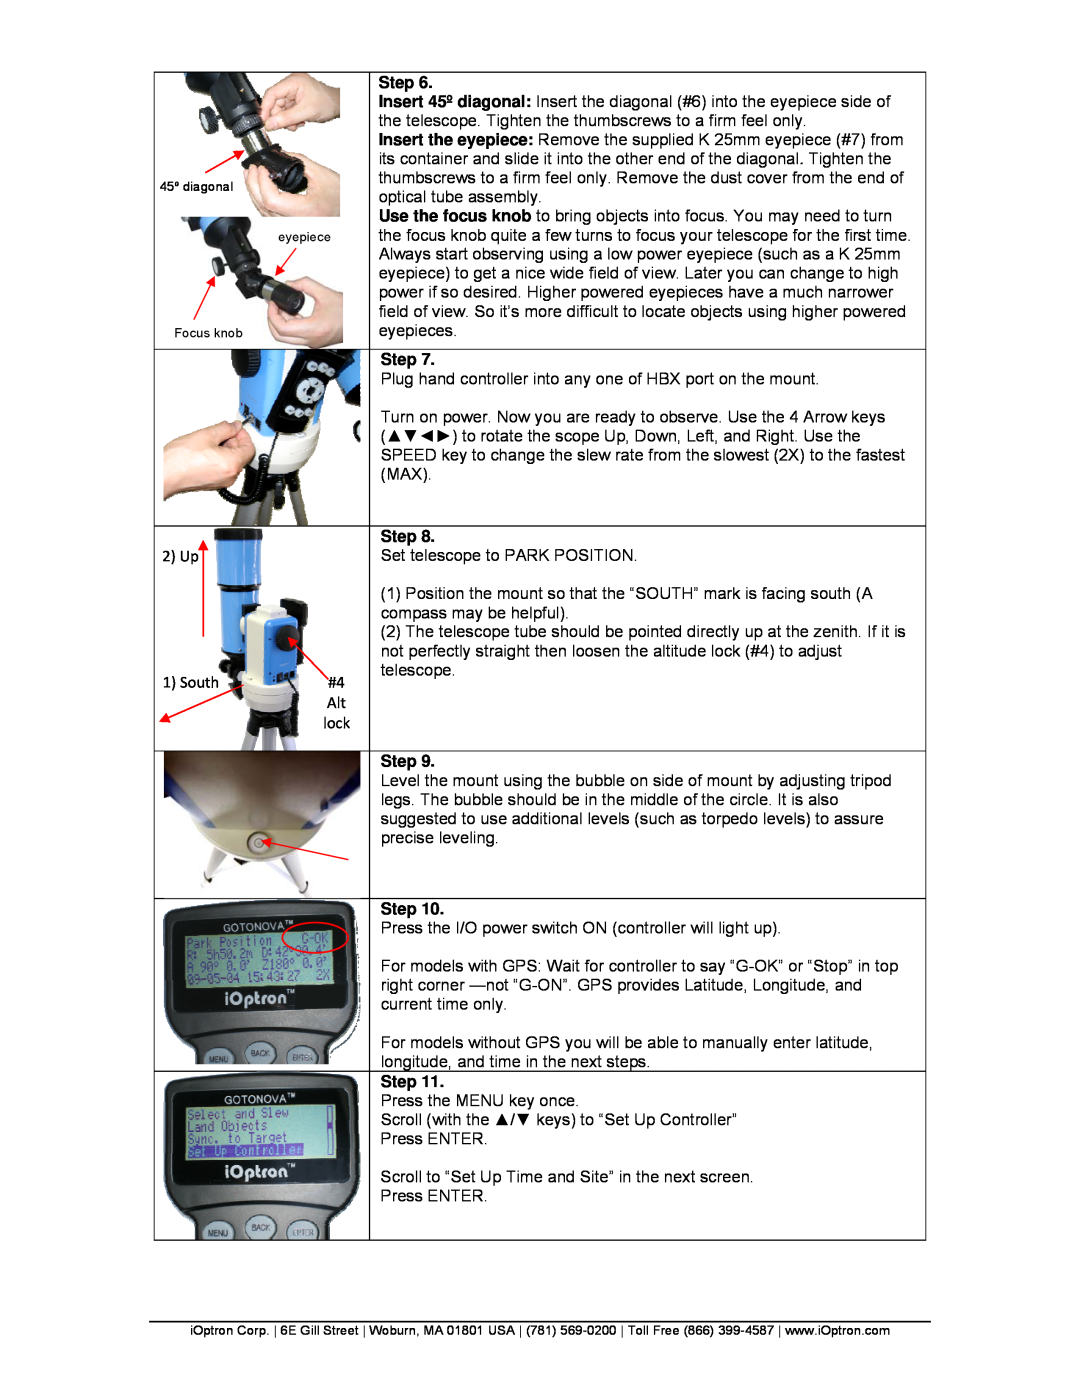
| Step 6. |
|
| Insert 45º diagonal: Insert the diagonal (#6) into the eyepiece side of |
|
| the telescope. Tighten the thumbscrews to a firm feel only. |
|
| Insert the eyepiece: Remove the supplied K 25mm eyepiece (#7) from |
|
| its container and slide it into the other end of the diagonal. Tighten the |
45º diagonal |
| thumbscrews to a firm feel only. Remove the dust cover from the end of |
| optical tube assembly. | |
|
| |
|
| Use the focus knob to bring objects into focus. You may need to turn |
| eyepiece | the focus knob quite a few turns to focus your telescope for the first time. |
|
| Always start observing using a low power eyepiece (such as a K 25mm |
|
| eyepiece) to get a nice wide field of view. Later you can change to high |
|
| power if so desired. Higher powered eyepieces have a much narrower |
|
| field of view. So it’s more difficult to locate objects using higher powered |
Focus knob |
| eyepieces. |
|
|
|
|
| Step 7. |
|
| Plug hand controller into any one of HBX port on the mount. |
|
| Turn on power. Now you are ready to observe. Use the 4 Arrow keys |
|
| (▲▼◄►) to rotate the scope Up, Down, Left, and Right. Use the |
|
| SPEED key to change the slew rate from the slowest (2X) to the fastest |
|
| (MAX). |
|
|
|
|
| Step 8. |
2) Up |
| Set telescope to PARK POSITION. |
|
| (1) Position the mount so that the “SOUTH” mark is facing south (A |
|
| compass may be helpful). |
|
| (2) The telescope tube should be pointed directly up at the zenith. If it is |
|
| not perfectly straight then loosen the altitude lock (#4) to adjust |
1) South | #4 | telescope. |
| ||
| Alt |
|
| lock |
|
|
|
|
|
| Step 9. |
|
| Level the mount using the bubble on side of mount by adjusting tripod |
|
| legs. The bubble should be in the middle of the circle. It is also |
|
| suggested to use additional levels (such as torpedo levels) to assure |
|
| precise leveling. |
|
|
|
|
| Step 10. |
|
| Press the I/O power switch ON (controller will light up). |
|
| For models with GPS: Wait for controller to say |
|
| right corner |
|
| current time only. |
|
| For models without GPS you will be able to manually enter latitude, |
|
| longitude, and time in the next steps. |
|
| Step 11. |
|
| Press the MENU key once. |
|
| Scroll (with the ▲/▼ keys) to “Set Up Controller” |
|
| Press ENTER. |
|
| Scroll to “Set Up Time and Site” in the next screen. |
|
| Press ENTER. |
|
|
|
iOptron Corp. 6E Gill Street Woburn, MA 01801 USA (781)