Assembly
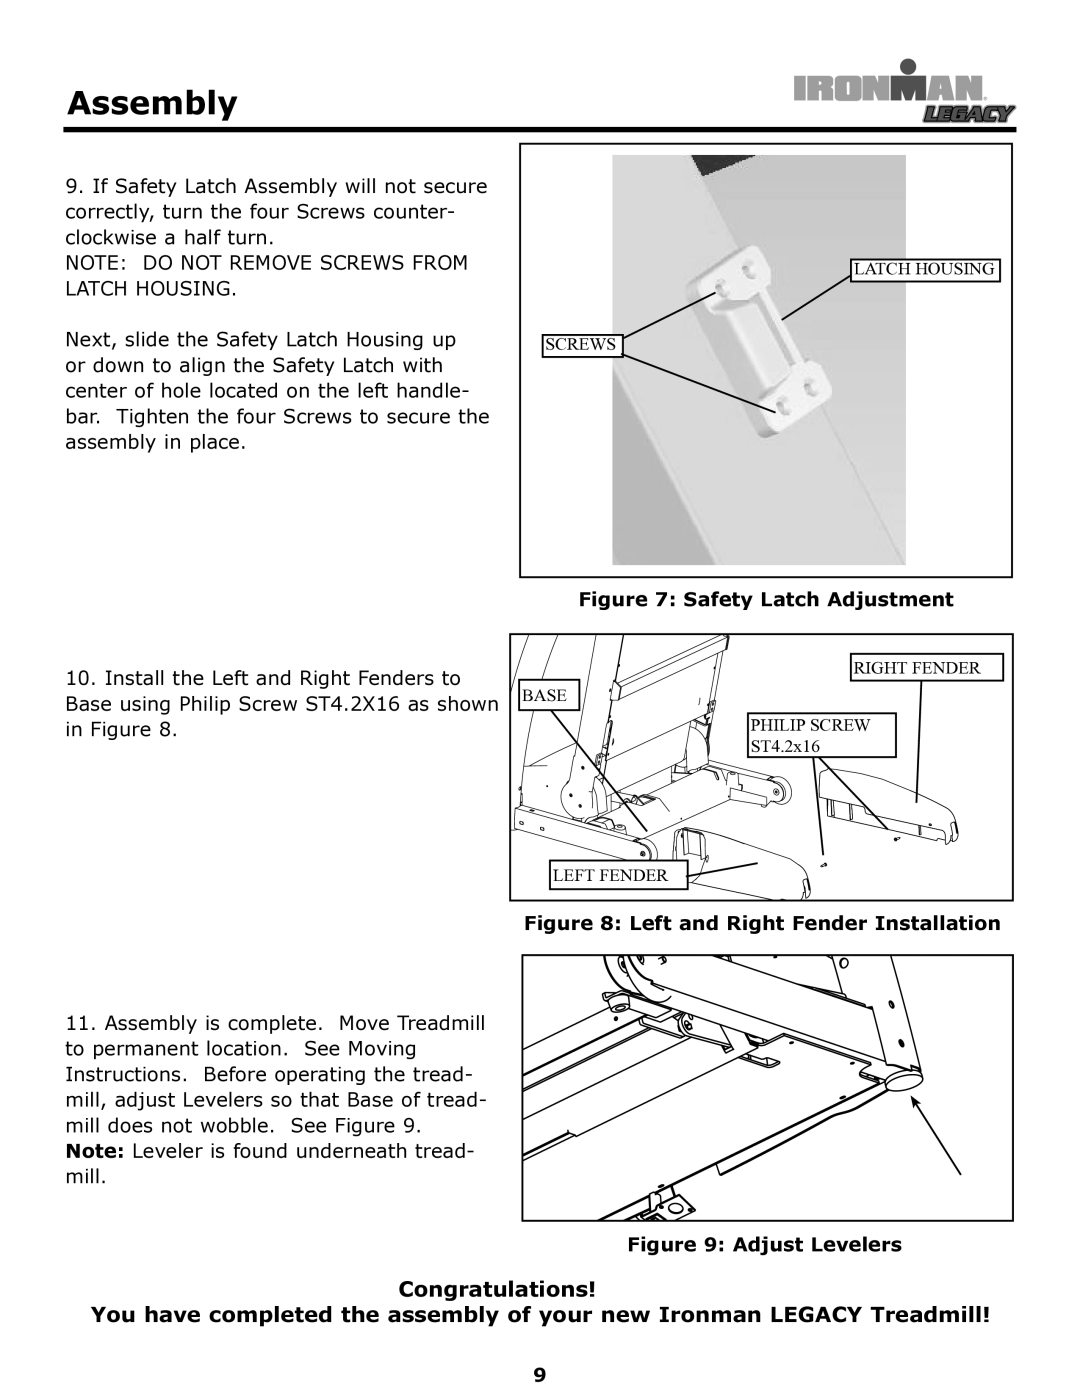
9.If Safety Latch Assembly will not secure correctly, turn the four Screws counter- clockwise a half turn.
NOTE: DO NOT REMOVE SCREWS FROM LATCH HOUSING.
Next, slide the Safety Latch Housing up or down to align the Safety Latch with center of hole located on the left handle- bar. Tighten the four Screws to secure the assembly in place.
LATCH HOUSING |
SCREWS |
Figure 7: Safety Latch Adjustment
10.Install the Left and Right Fenders to
Base using Philip Screw ST4.2X16 as shown in Figure 8.
RIGHT FENDER |
BASE |
PHILIP SCREW |
ST4.2x16 |
LEFT FENDER |
Figure 8: Left and Right Fender Installation
11.Assembly is complete. Move Treadmill to permanent location. See Moving Instructions. Before operating the tread-
mill, adjust Levelers so that Base of tread- mill does not wobble. See Figure 9. Note: Leveler is found underneath tread- mill.
Figure 9: Adjust Levelers
Congratulations!
You have completed the assembly of your new Ironman LEGACY Treadmill!