English
|
|
| Luxury Whirlpool Bath | ||
|
|
|
| ||
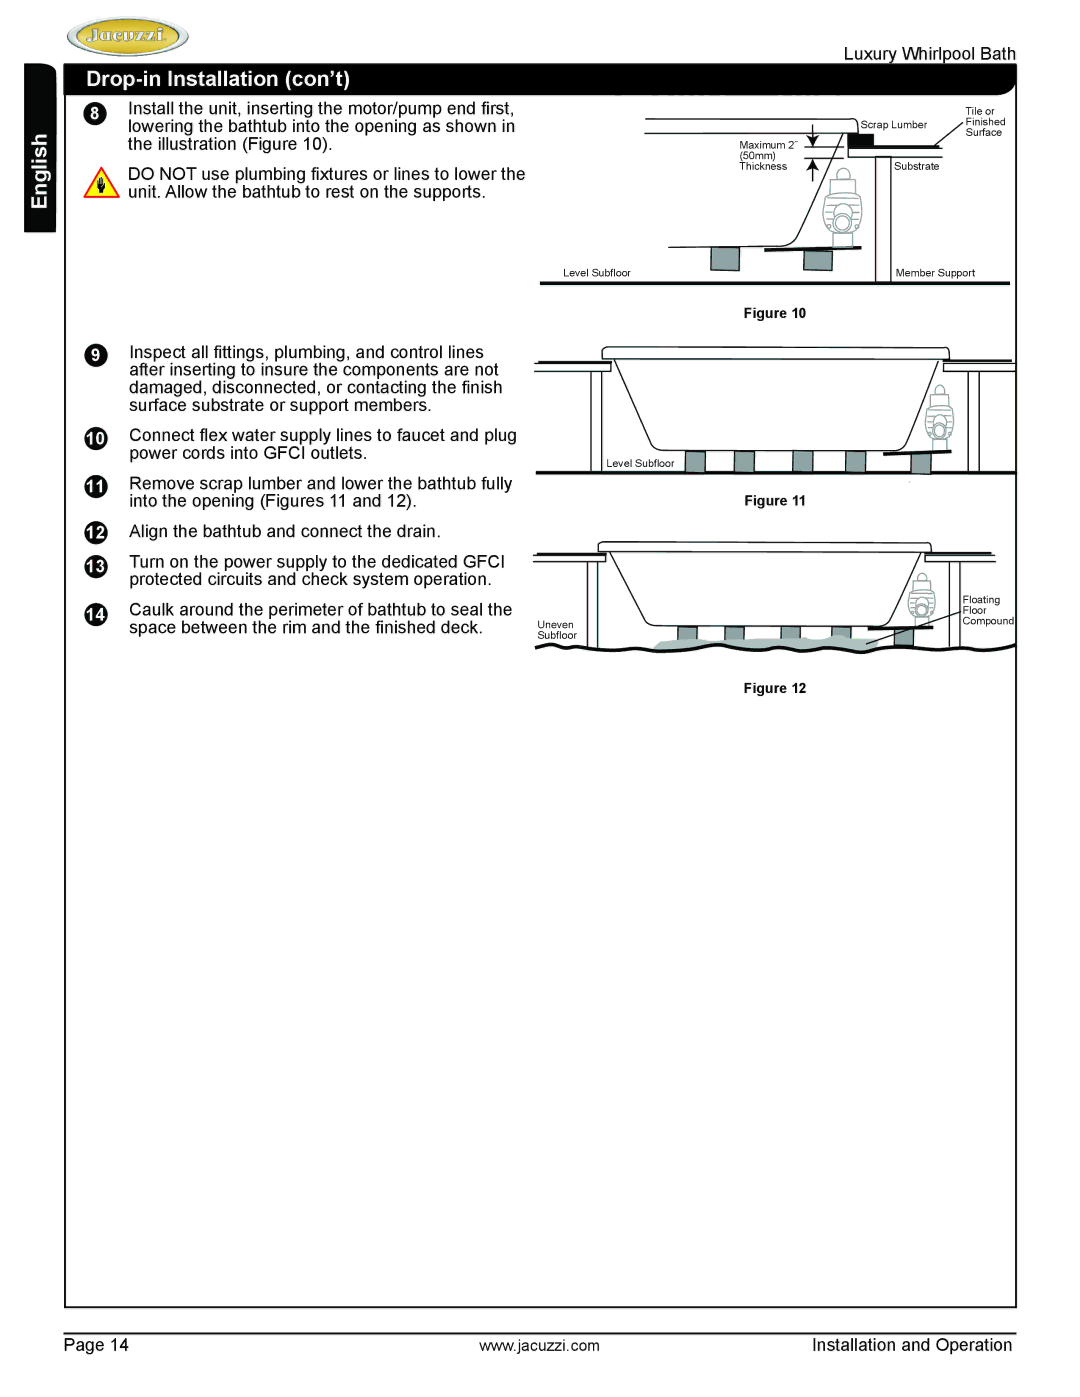
8 | Install the unit, inserting the motor/pump end first, |
|
|
| Tile or |
| lowering the bathtub into the opening as shown in |
|
|
| Surface |
|
|
|
| Scrap Lumber | Finished |
| the illustration (Figure 10). |
| Maximum 2˝ |
|
|
|
|
| (50mm) | Substrate |
|
| DO NOT use plumbing fixtures or lines to lower the |
| Thickness |
| |
|
|
|
|
| |
| unit. Allow the bathtub to rest on the supports. |
|
|
|
|
|
| Level Subfloor |
| Member Support | |
|
|
| Figure 10 |
|
|
9 | Inspect all fittings, plumbing, and control lines |
|
|
|
|
| after inserting to insure the components are not |
|
|
|
|
| damaged, disconnected, or contacting the finish |
|
|
|
|
| surface substrate or support members. |
|
|
|
|
10 | Connect flex water supply lines to faucet and plug |
|
|
|
|
| power cords into GFCI outlets. | Level Subfloor |
|
|
|
|
|
|
|
| |
11 | Remove scrap lumber and lower the bathtub fully |
|
|
|
|
| into the opening (Figures 11 and 12). |
| Figure 11 |
|
|
12 | Align the bathtub and connect the drain. |
|
|
|
|
13 | Turn on the power supply to the dedicated GFCI |
|
|
|
|
| protected circuits and check system operation. |
|
|
|
|
14 | Caulk around the perimeter of bathtub to seal the |
|
|
| Floating |
|
|
| Compound | ||
| space between the rim and the finished deck. | Subfloor |
|
| Floor |
|
| Uneven |
|
|
|
|
|
| Figure 12 |
|
|
Page 14 | www.jacuzzi.com | Installation and Operation |
