Luxury Whirlpool Bath
Drop-in Installation
Before you begin your installation, please read the following:
•Observe all local and building codes.
•Determine which tools will be used during the installation.
•Additional bathtub drain parts and plumbing are commercially available at plumbing and hardware stores.
•Drain/Overflow
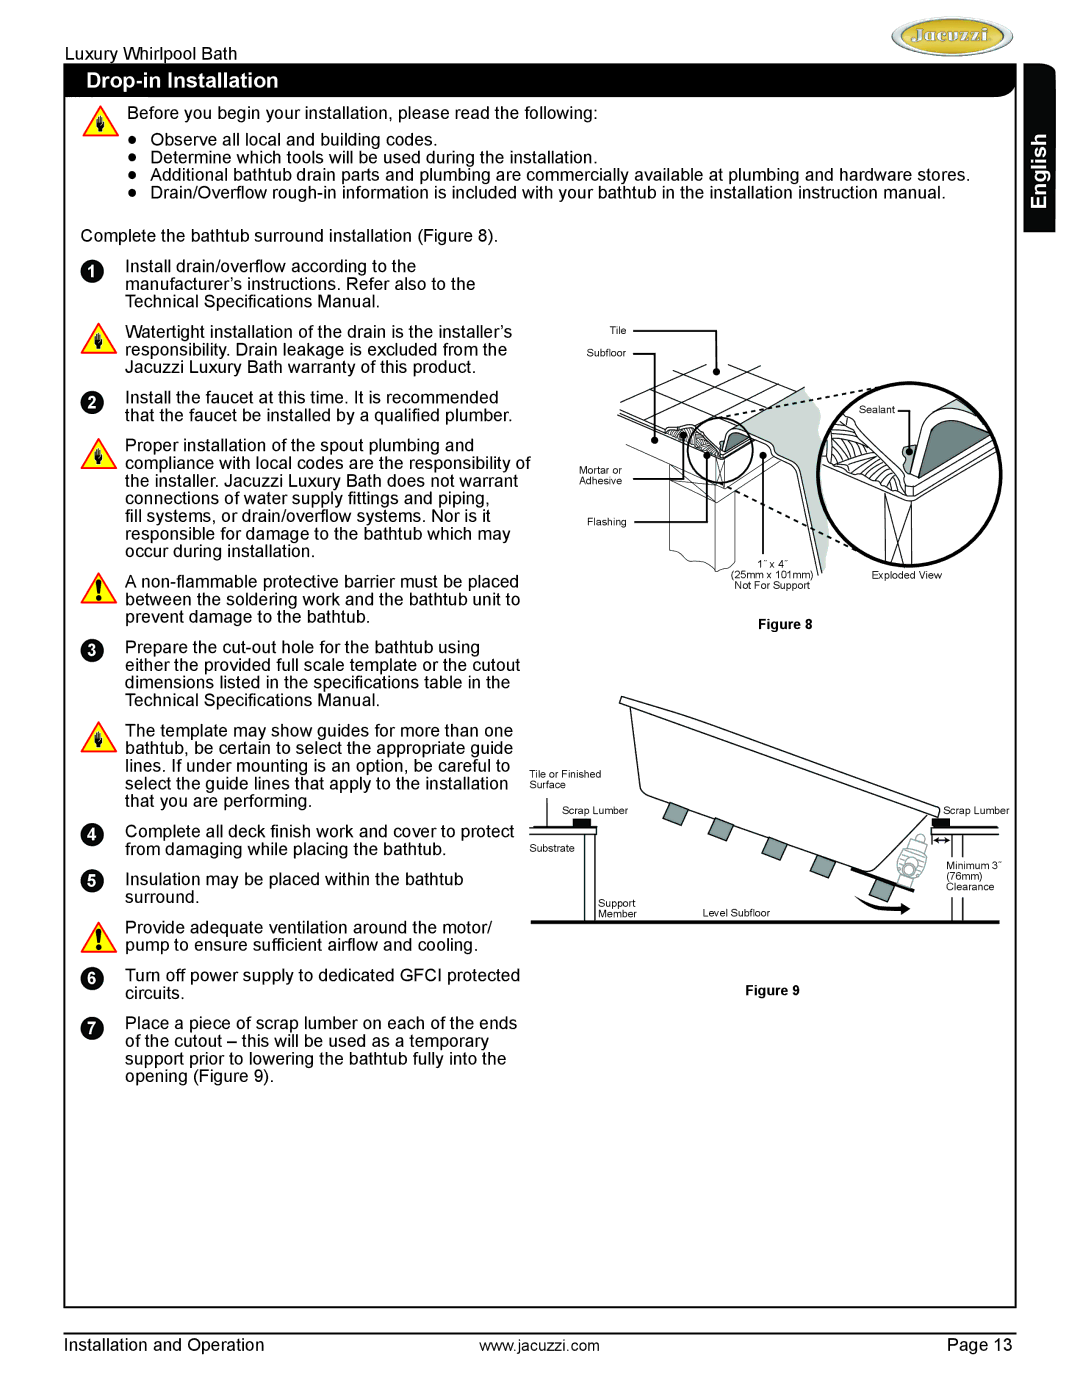
Complete the bathtub surround installation (Figure 8).
1Install drain/overflow according to the manufacturer’s instructions. Refer also to the
Technical Specifications Manual.
| Watertight installation of the drain is the installer’s |
| Tile |
|
|
| responsibility. Drain leakage is excluded from the |
| Subfloor |
|
|
| Jacuzzi Luxury Bath warranty of this product. |
|
|
|
|
2 | Install the faucet at this time. It is recommended |
|
|
| Sealant |
| that the faucet be installed by a qualified plumber. |
|
|
|
|
| Proper installation of the spout plumbing and |
|
|
|
|
| compliance with local codes are the responsibility of | Mortar or |
|
| |
| the installer. Jacuzzi Luxury Bath does not warrant |
| Adhesive |
|
|
| connections of water supply fittings and piping, |
|
|
|
|
| fill systems, or drain/overflow systems. Nor is it |
| Flashing |
|
|
| responsible for damage to the bathtub which may |
|
|
|
|
| occur during installation. |
|
| 1˝ x 4˝ |
|
| A |
|
| (25mm x 101mm) | Exploded View |
|
|
| Not For Support |
| |
| between the soldering work and the bathtub unit to |
|
|
|
|
| prevent damage to the bathtub. |
|
| Figure 8 |
|
|
|
|
|
| |
3 | Prepare the |
|
|
|
|
| either the provided full scale template or the cutout |
|
|
|
|
| dimensions listed in the specifications table in the |
|
|
|
|
| Technical Specifications Manual. |
|
|
|
|
| The template may show guides for more than one |
|
|
|
|
| bathtub, be certain to select the appropriate guide |
|
|
|
|
| lines. If under mounting is an option, be careful to | Tile or Finished |
|
| |
| select the guide lines that apply to the installation | Surface |
|
|
|
| that you are performing. | Scrap Lumber |
| Scrap Lumber | |
|
|
| |||
4 | Complete all deck finish work and cover to protect |
|
|
|
|
| from damaging while placing the bathtub. | Substrate |
|
| Minimum 3˝ |
| Insulation may be placed within the bathtub |
|
|
| |
5 |
|
|
| (76mm) | |
|
|
| Clearance | ||
| surround. |
| Support | Level Subfloor |
|
| Provide adequate ventilation around the motor/ |
| Member |
| |
|
|
|
|
| |
| pump to ensure sufficient airflow and cooling. |
|
|
|
|
6 | Turn off power supply to dedicated GFCI protected |
|
| Figure 9 |
|
| circuits. |
|
|
| |
7Place a piece of scrap lumber on each of the ends of the cutout – this will be used as a temporary support prior to lowering the bathtub fully into the opening (Figure 9).
English
Installation and Operation | www.jacuzzi.com | Page 13 |