System Configuration
pensate for this difference through the use of the delay settings to adjust the timing for the specific speaker placement and acoustic conditions in your listening room or home theater.
To re-synchronize the front, center and surround channels at first measure and note the distance from the listening/viewing position to the front, center, surround and surround back (if any) speakers in meters.
Due to the differences in the way each surround mode operates, the delay settings must be estab- lished individually for each surround mode.
However, once the delay settings are configured for the version of the surround mode with the most channels, they need not be entered again for a version of that mode with fewer channels. For example, once the delay settings are estab- lished for Dolby Pro Logic IIx – Movie, they will be carried over to Dolby Pro Logic II – Movie mode. However, you will need to enter the delay settings separately for each variant mode, such as Dolby Pro Logic IIx – Music, Dolby Pro Logic IIx – Game, Dolby Pro Logic, Dolby 3 Stereo and Dolby Digital EX.
Delay times are adjustable for all surround modes. Although all channels will appear on screen with the default or previously entered dis- tances, the menu system will only allow you to adjust the settings for those channels which are actually used by the current sur-round mode. For example, when you are listening to music CDs using the CD input in DSP Surround Off mode, you may adjust the delay settings for the front left, front right and subwoofer channels only. The cursor will simply skip the other channels as you navigate through the menu. Therefore, the first time you adjust the delay settings, it is recom- mended that you select a 5.1-, 6.1- or 7.1-chan- nel surround mode, depending on the number of speakers in your system. For the purposes of set- ting the delay distances, the Logic 7 modes allow access to the settings for all channels without requiring that you play a source.
When your system includes a surround back speaker, delay distances should be entered twice for this speaker, once for the surround back left channel, and again for the surround back right channel. This enables the mixing circuit that com- bines the signals for these channels when a 7.1- channel surround mode is in use to output the information correctly.
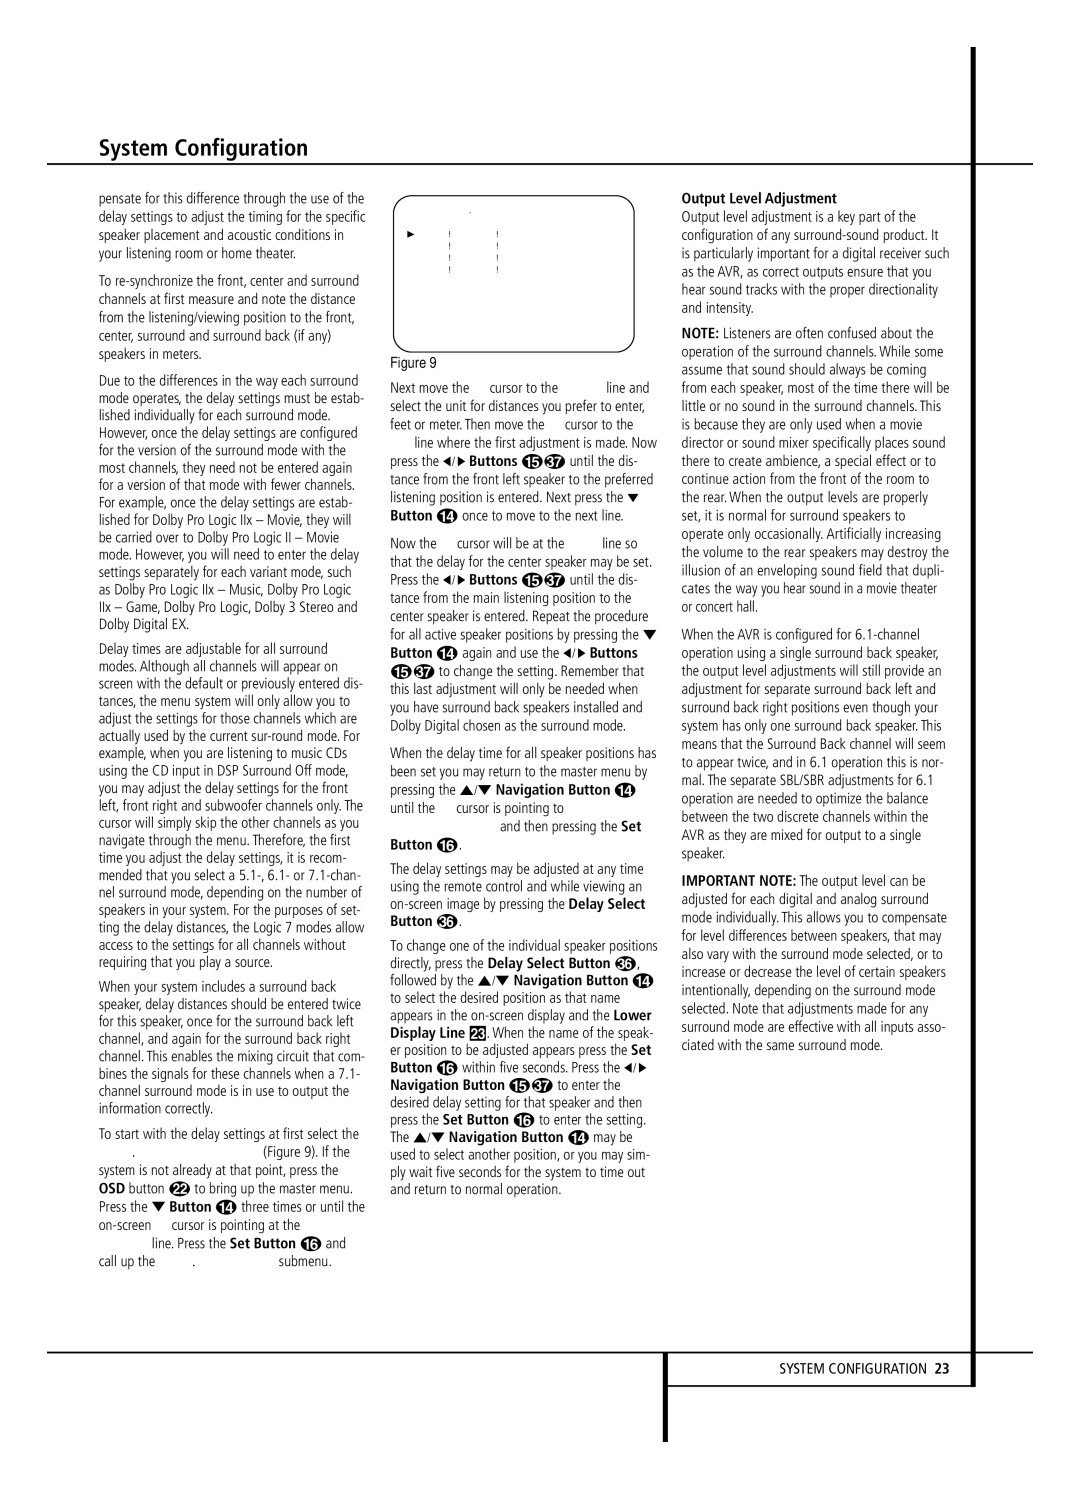
To start with the delay settings at first select the DELAY ADJUST MENU (Figure 9). If the system is not already at that point, press the OSD button Lto bring up the master menu. Press the ¤ Button Dthree times or until the on-screen ➞ cursor is pointing at the MANUAL SETUP line. Press the Set Button Fand call up the DELAY ADJUST submenu.
* | DELAY | ADJUST * |
F L : | 1 0 F T | S B R : 1 0 F T |
C E N : | 1 0 F T | S B L : 1 0 F T |
F R : | 1 0 F T | S L : 1 0 F T |
S R : | 1 0 F T | S U B : 1 0 F T |
D E L A Y R E S E T : O F F |
U N I T : | F E E T | |
B A C K T O M A N U A L S E T U P
Figure 9
Next move the ➞ cursor to the UNIT line and select the unit for distances you prefer to enter, feet or meter. Then move the ➞ cursor to the FL line where the first adjustment is made. Now press the ‹/ › Buttons E until the dis- tance from the front left speaker to the preferred listening position is entered. Next press the ¤ Button Donce to move to the next line.
Now the ➞ cursor will be at the CEN line so that the delay for the center speaker may be set. Press the ‹/ › Buttons E until the dis- tance from the main listening position to the center speaker is entered. Repeat the procedure for all active speaker positions by pressing the ¤ Button Dagain and use the ‹/ › Buttons
Eto change the setting. Remember that this last adjustment will only be needed when you have surround back speakers installed and Dolby Digital chosen as the surround mode.
When the delay time for all speaker positions has been set you may return to the master menu by pressing the ⁄/¤ Navigation Button D until the ➞ cursor is pointing to BACK TO MASTER MENU and then pressing the Set
Button F.
The delay settings may be adjusted at any time using the remote control and while viewing an on-screen image by pressing the Delay Select Button .
To change one of the individual speaker positions directly, press the Delay Select Button , followed by the ⁄/¤ Navigation Button D to select the desired position as that name appears in the on-screen display and the Lower Display Line Ò. When the name of the speak- er position to be adjusted appears press the Set Button Fwithin five seconds. Press the ‹/ ›
Navigation Button E to enter the
desired delay setting for that speaker and then press the Set Button Fto enter the setting. The ⁄/¤ Navigation Button Dmay be used to select another position, or you may sim- ply wait five seconds for the system to time out and return to normal operation.
Output Level Adjustment
Output level adjustment is a key part of the configuration of any surround-sound product. It is particularly important for a digital receiver such as the AVR, as correct outputs ensure that you hear sound tracks with the proper directionality and intensity.
NOTE: Listeners are often confused about the operation of the surround channels. While some assume that sound should always be coming from each speaker, most of the time there will be little or no sound in the surround channels. This is because they are only used when a movie director or sound mixer specifically places sound there to create ambience, a special effect or to continue action from the front of the room to the rear. When the output levels are properly set, it is normal for surround speakers to operate only occasionally. Artificially increasing the volume to the rear speakers may destroy the illusion of an enveloping sound field that dupli- cates the way you hear sound in a movie theater or concert hall.
When the AVR is configured for 6.1-channel operation using a single surround back speaker, the output level adjustments will still provide an adjustment for separate surround back left and surround back right positions even though your system has only one surround back speaker. This means that the Surround Back channel will seem to appear twice, and in 6.1 operation this is nor- mal. The separate SBL/SBR adjustments for 6.1 operation are needed to optimize the balance between the two discrete channels within the AVR as they are mixed for output to a single speaker.
IMPORTANT NOTE: The output level can be adjusted for each digital and analog surround mode individually. This allows you to compensate for level differences between speakers, that may also vary with the surround mode selected, or to increase or decrease the level of certain speakers intentionally, depending on the surround mode selected. Note that adjustments made for any surround mode are effective with all inputs asso- ciated with the same surround mode.